Camunda integration
Camunda is a comprehensive workflow automation and decision-making platform that provides process management solutions for organizations of all sizes. It offers tools for creating, managing, and deploying workflows and decision models in production environments.
In this article, we will use an example from the Camunda repository, Using React Forms with Tasklist, and modify it so that the forms are displayed using FormEngine.
Requirements
To follow along, you will need the following:
Ensure that both Camunda 7 Community Edition and Camunda Modeler are installed on your system if they are not already.
Starting with the React Example
The Camunda repository on GitHub provides a simple and clear instruction for using React in Tasklist. Let's walk through it together.
-
Add
loadReact.jsto Camunda Tasklist:Download loadReact.js and place it in the
app/tasklist/scripts/reactdirectory of the Camunda Tasklist webapp. For example, if you are using Tomcat, the path will be/webapps/camunda/app/tasklist/scripts/react.This script will load React and ReactDOM from a CDN and add them to the global scope. If you prefer to use different versions of React, adjust the import paths in the script accordingly.
-
Add the loader as a custom script:
Modify the
app/tasklist/scripts/config.jsfile of the Camunda Tasklist webapp to include the loader script. For Tomcat, this file is located at/webapps/camunda/app/tasklist/scripts/config.js. Update the file as shown in the example.config.jscustomScripts: [
'scripts/react/loadReact.js'
]
Launch Camunda if it is not already running. Next, we need to upload the process definition and forms from GitHub, then upload them to Camunda using Camunda Modeler and start the process. Let's do it step by step:
- Download the following files:
-
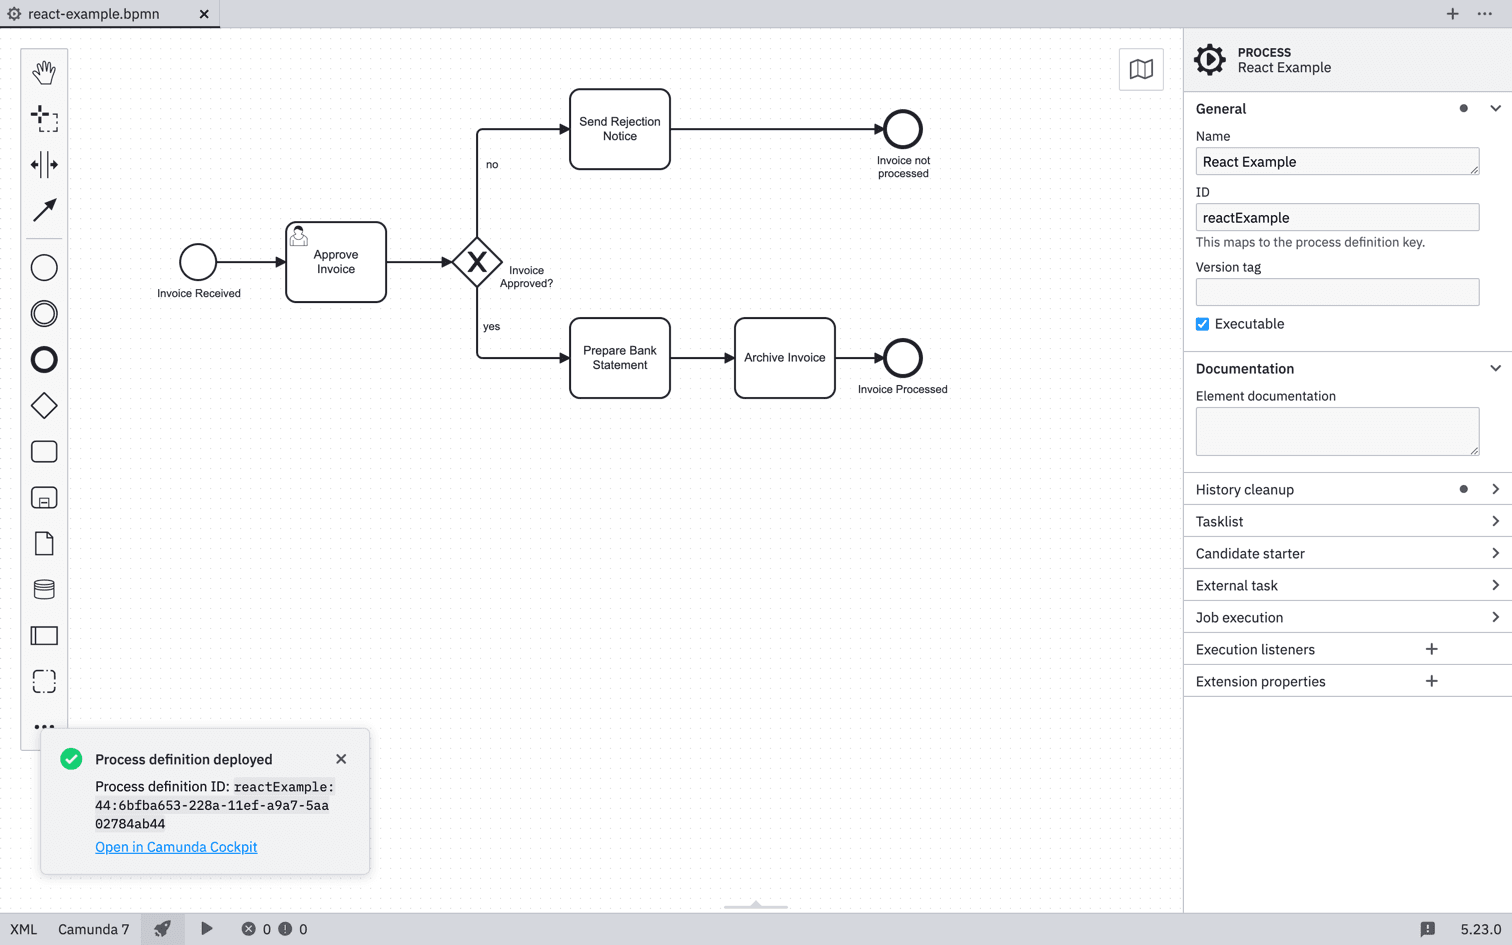
Open Camunda Modeler and load the
react-example.bpmnfile: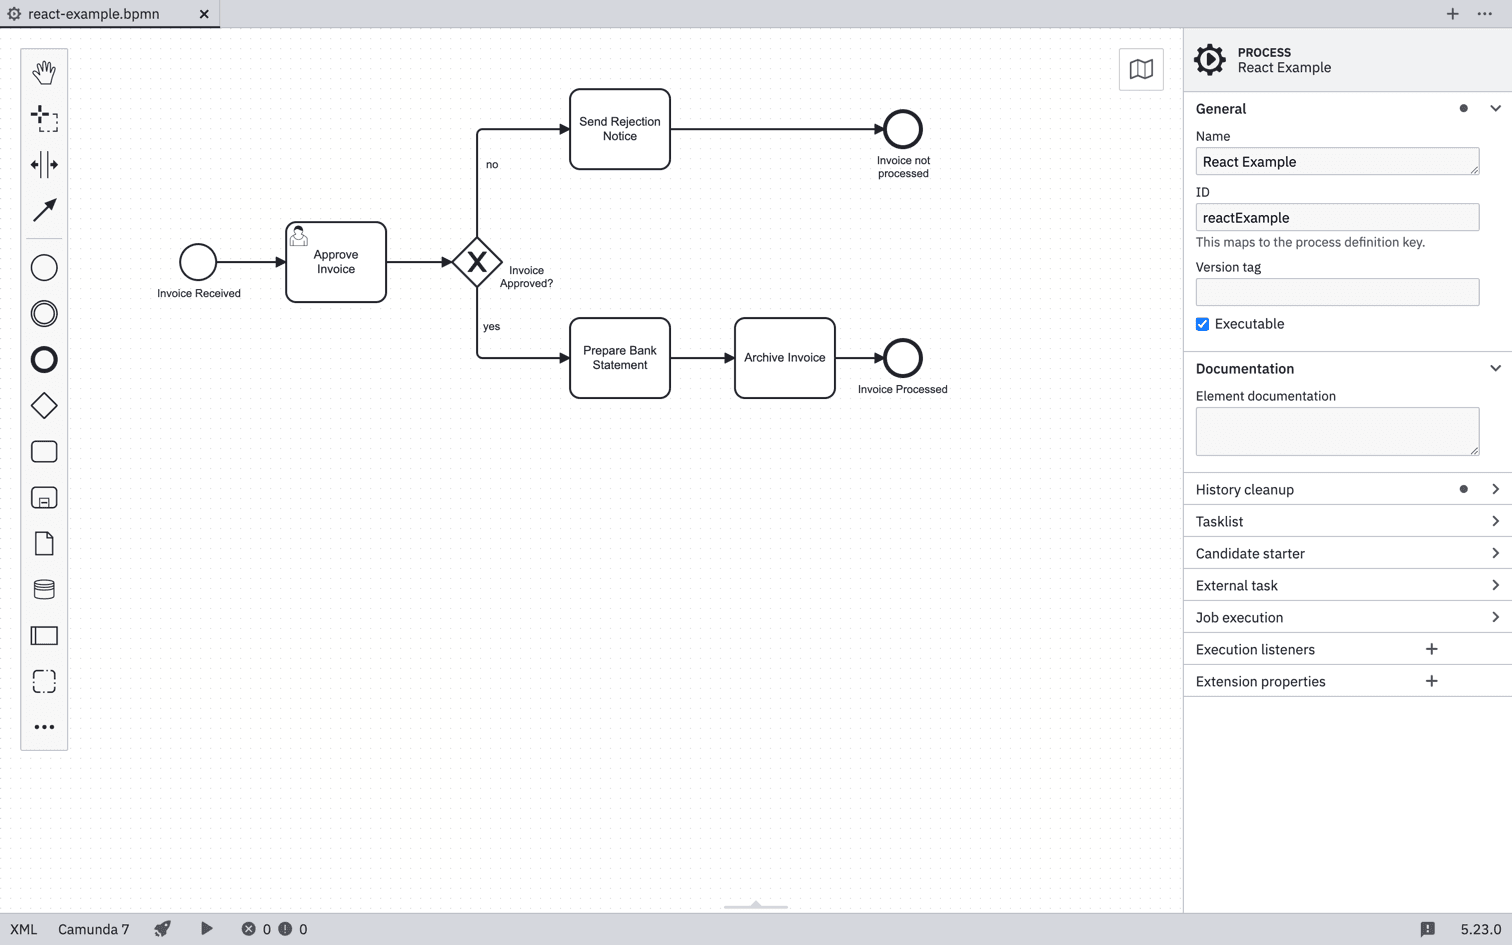
-
Update the form keys:
-
Click the "Invoice Received" element and change the Form key from
embedded:app:start-form.htmltoembedded:deployment:start-form.html: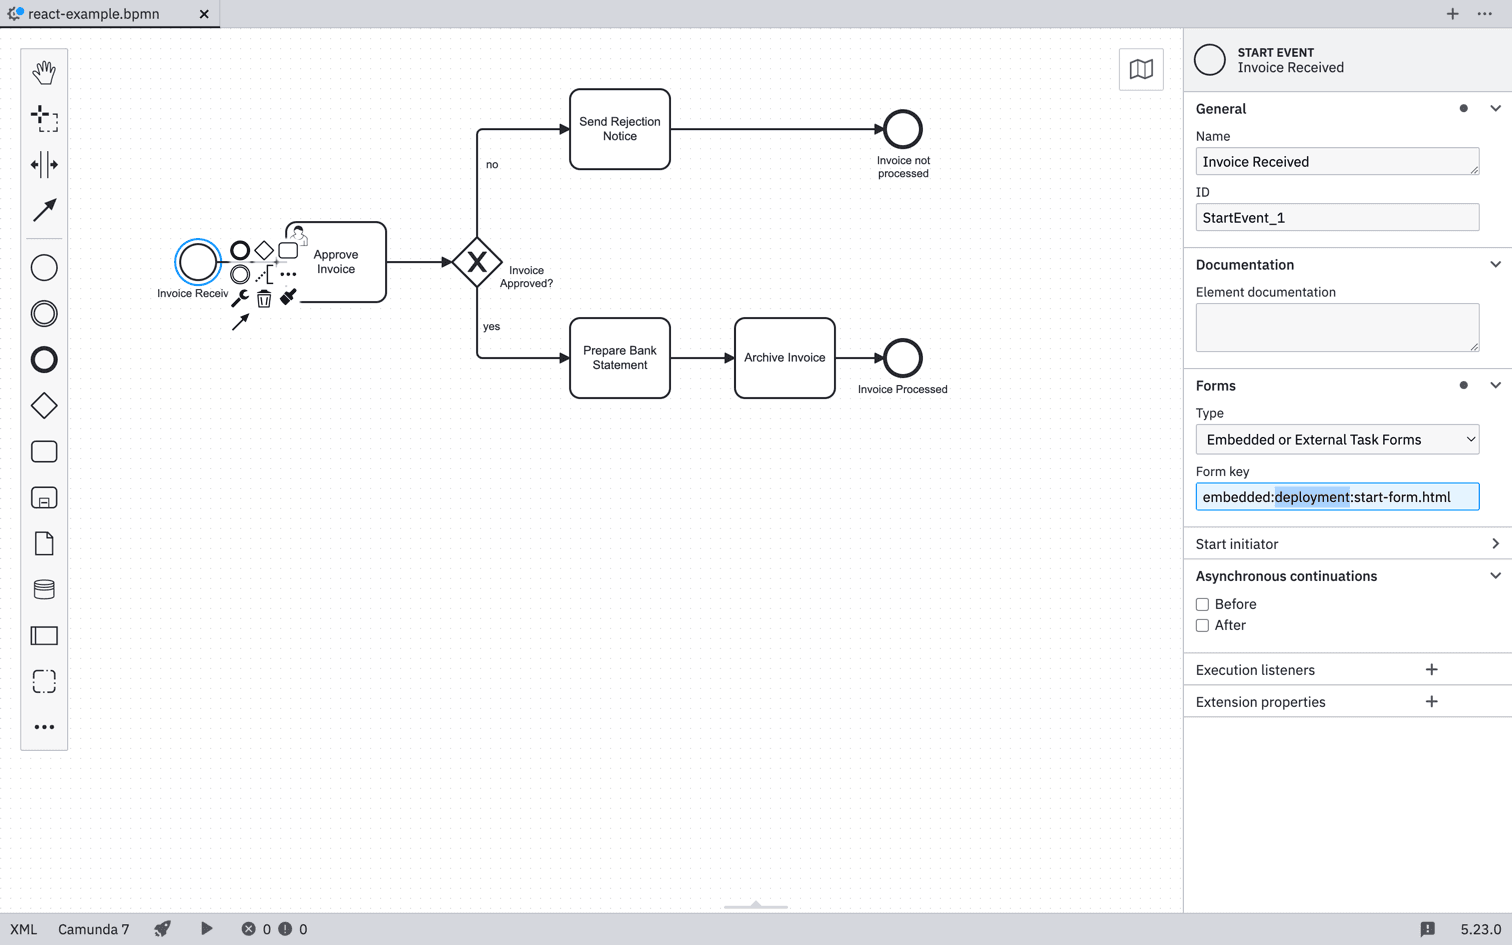
-
Click the "Approve Invoice" element and change the Form key from
embedded:app:task-form.htmltoembedded:deployment:task-form.html: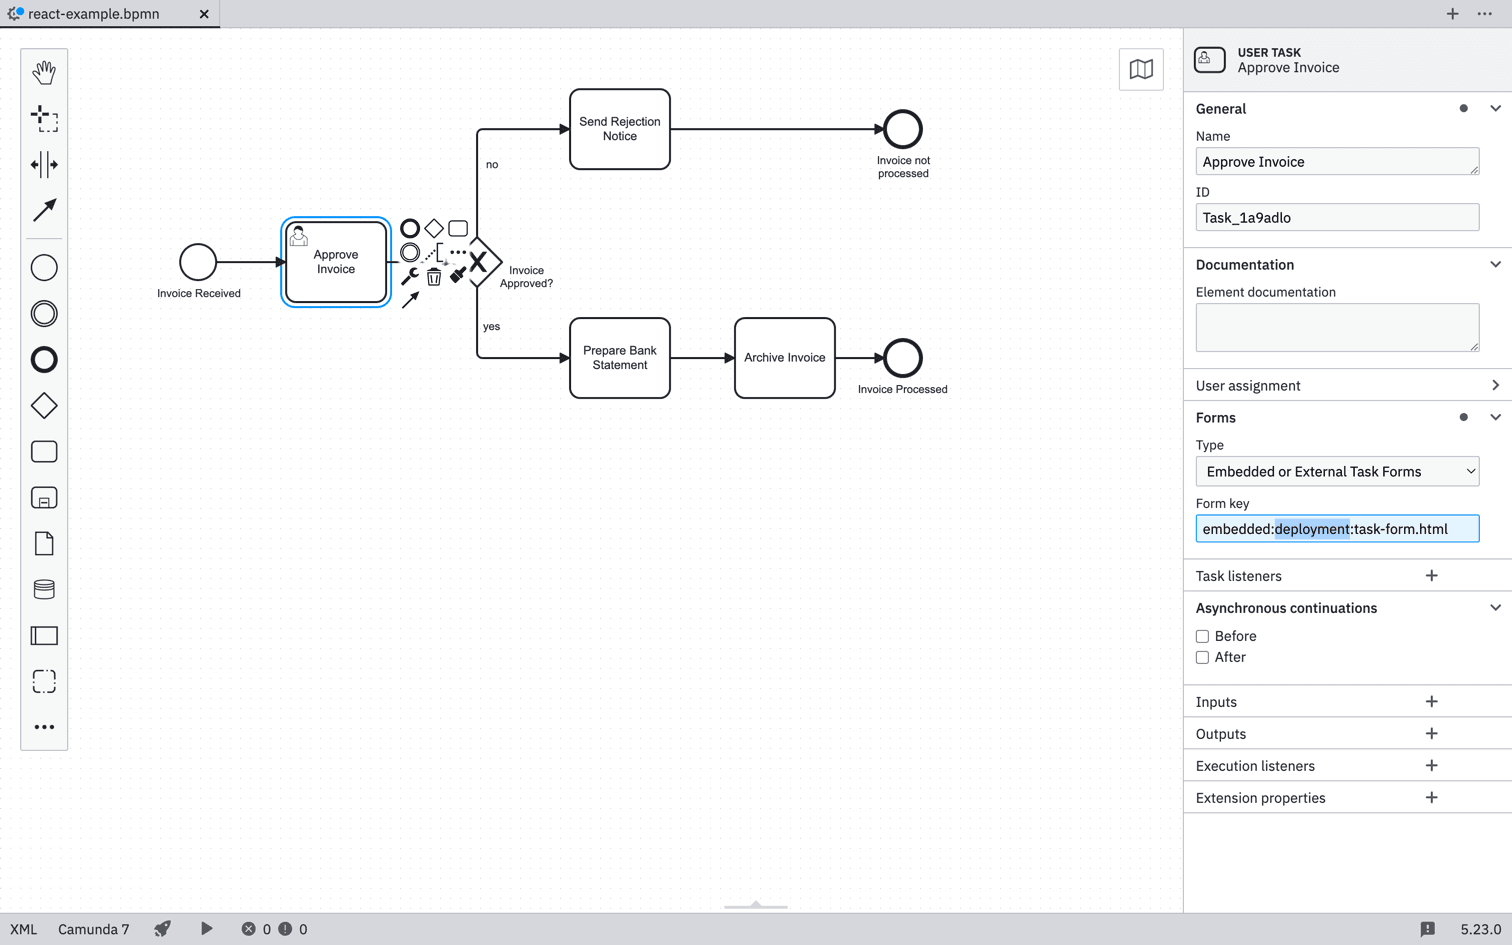
- Deploy the process:
-
Click the Rocket button at the bottom of the screen, then click the plus button next to "Include additional files" and add the previously downloaded
start-form.htmlandtask-form.htmlfiles: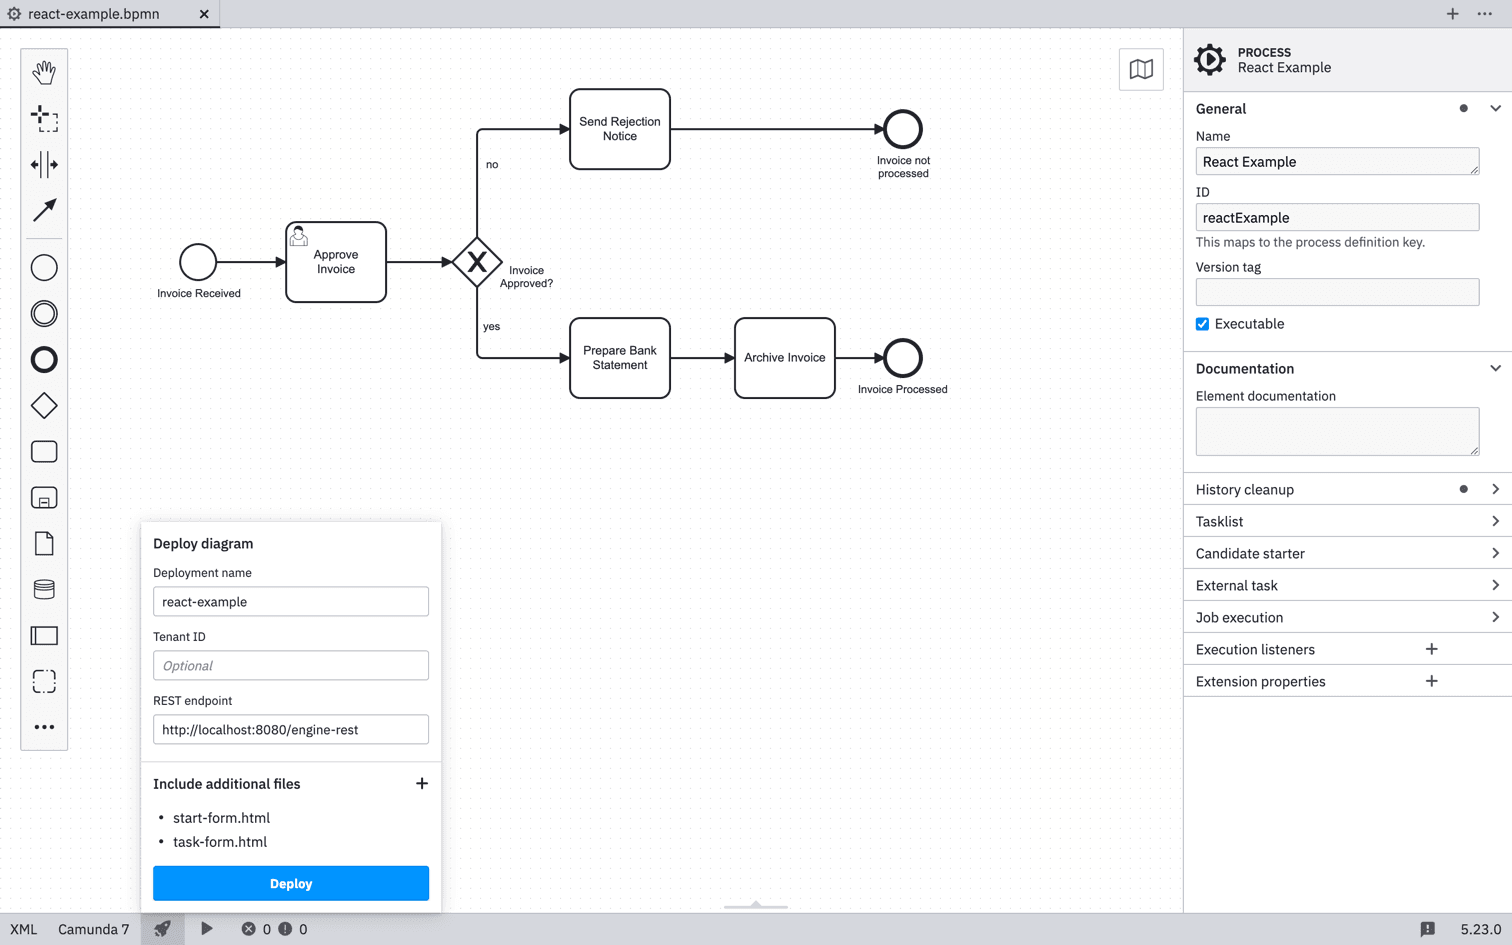
-
Click the "Deploy" button. You should see a message indicating that the Process Definition has been successfully deployed:
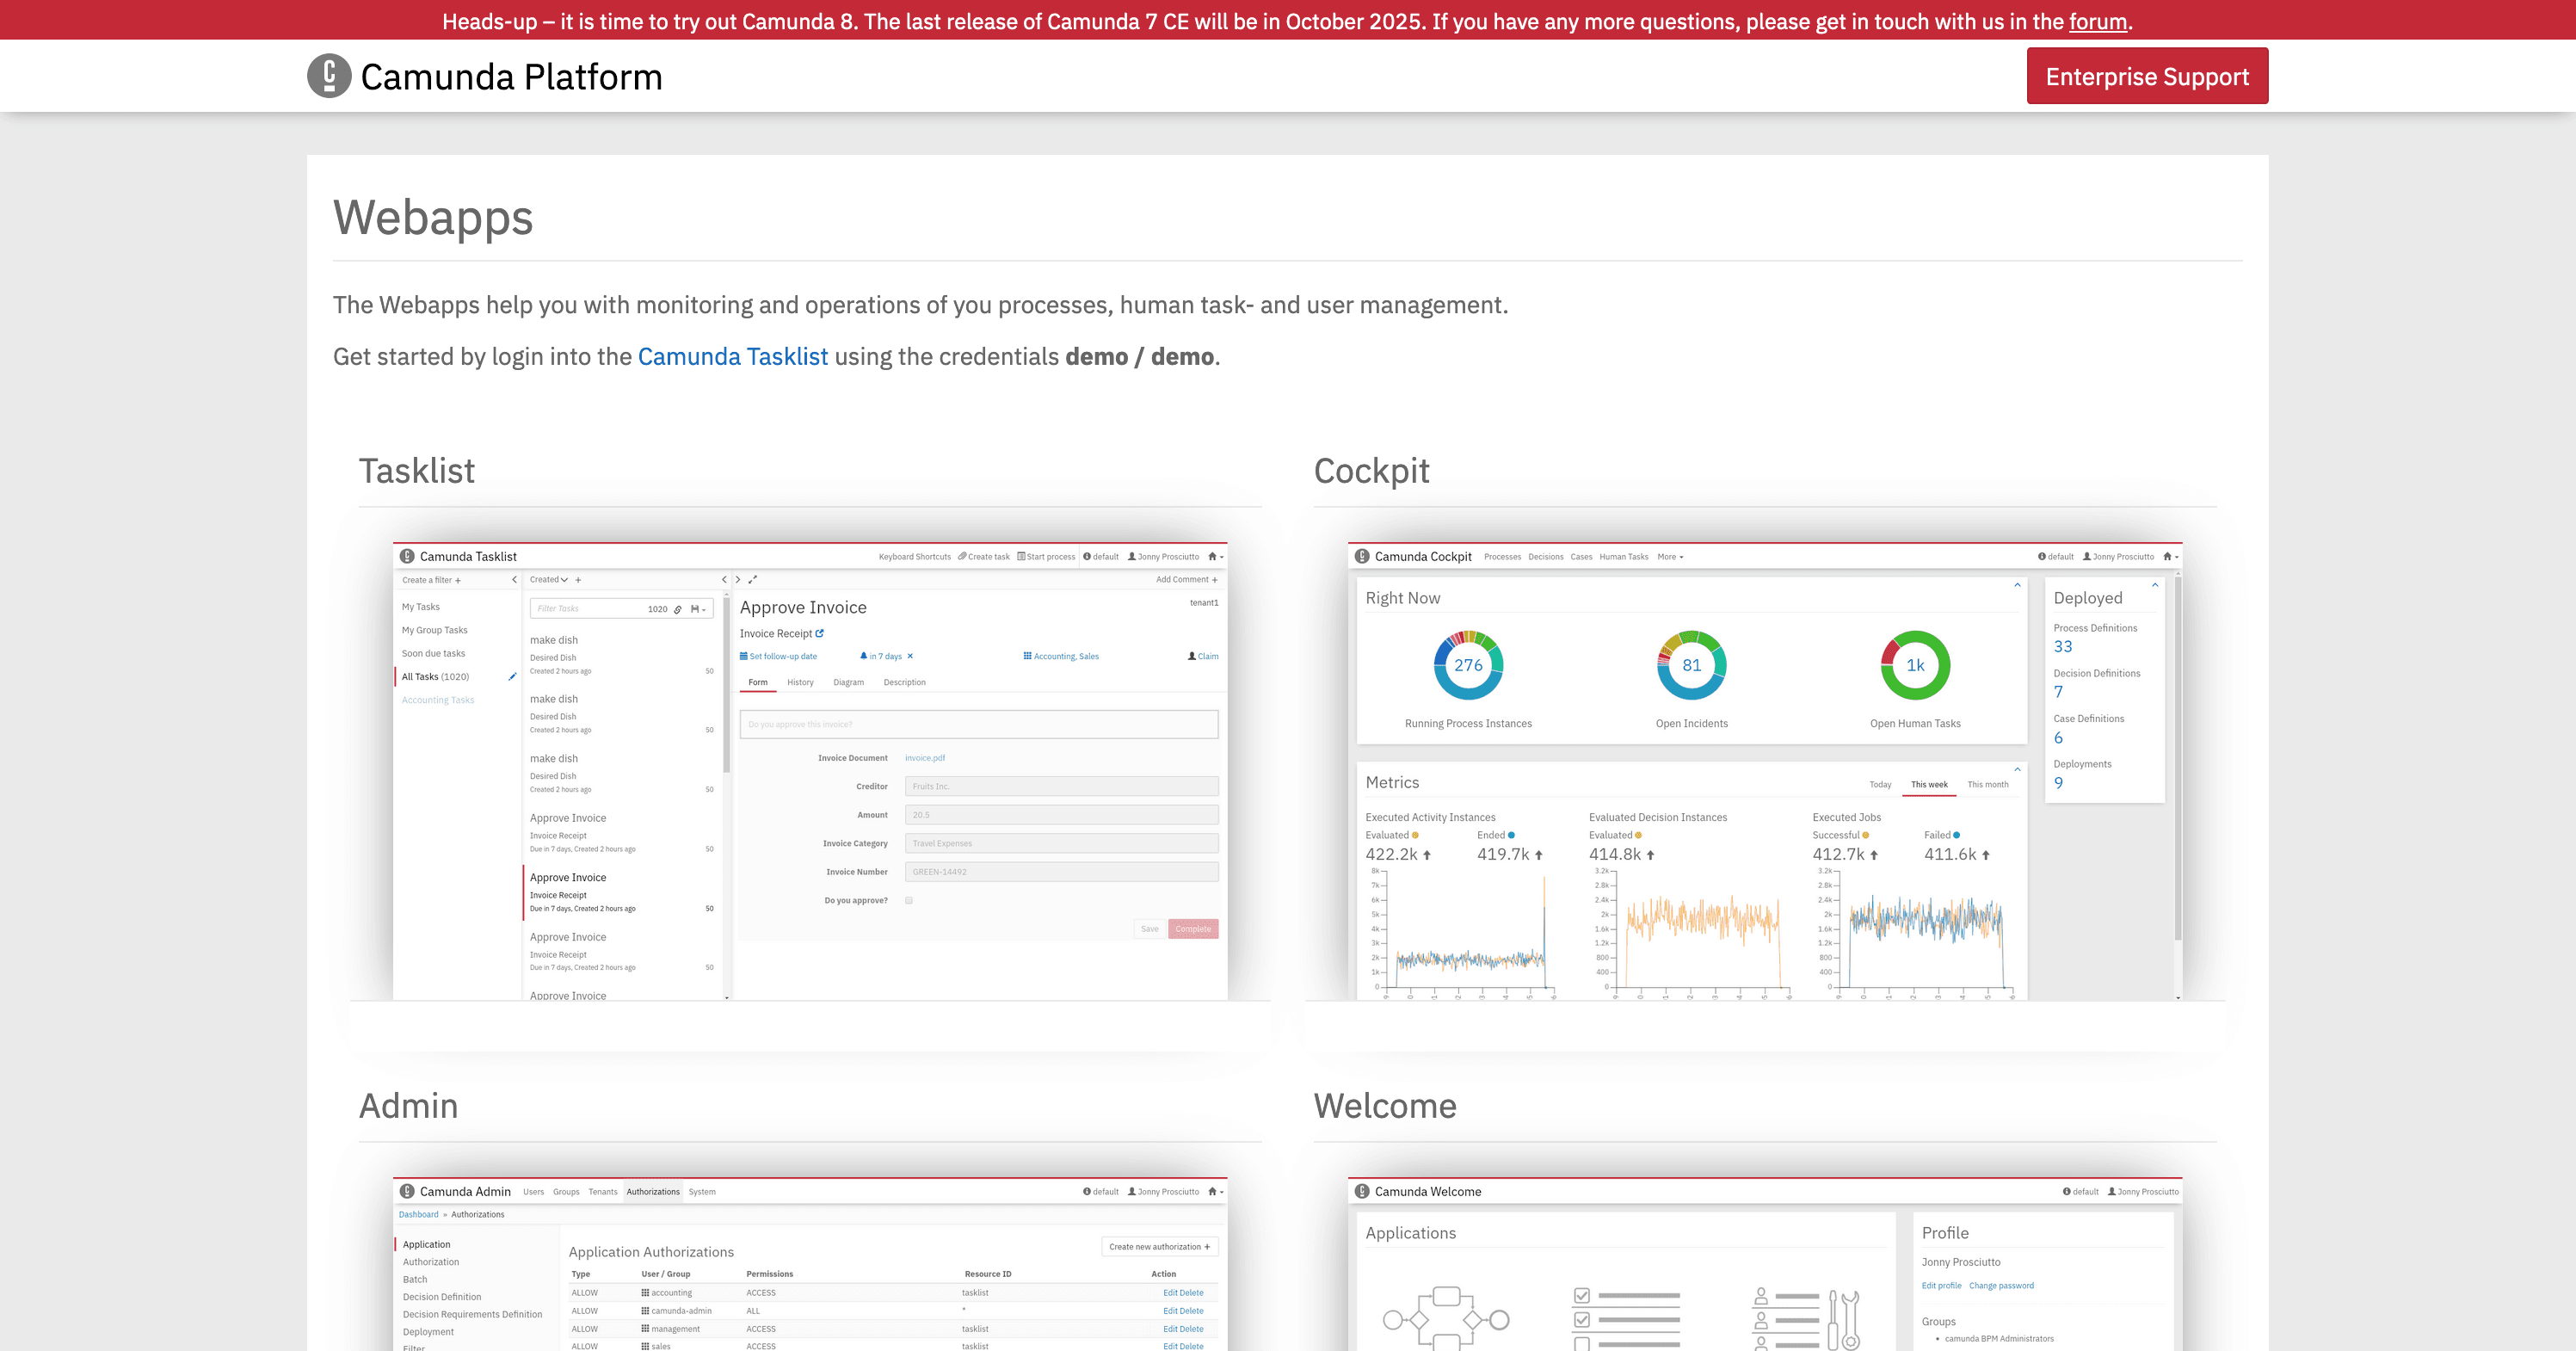
To ensure everything works correctly, follow these steps to test the setup in the Camunda web interface. If Camunda is running locally, the address will be something like http://localhost:8080/camunda-welcome/index.html:
-
Open the Camunda web interface:
-
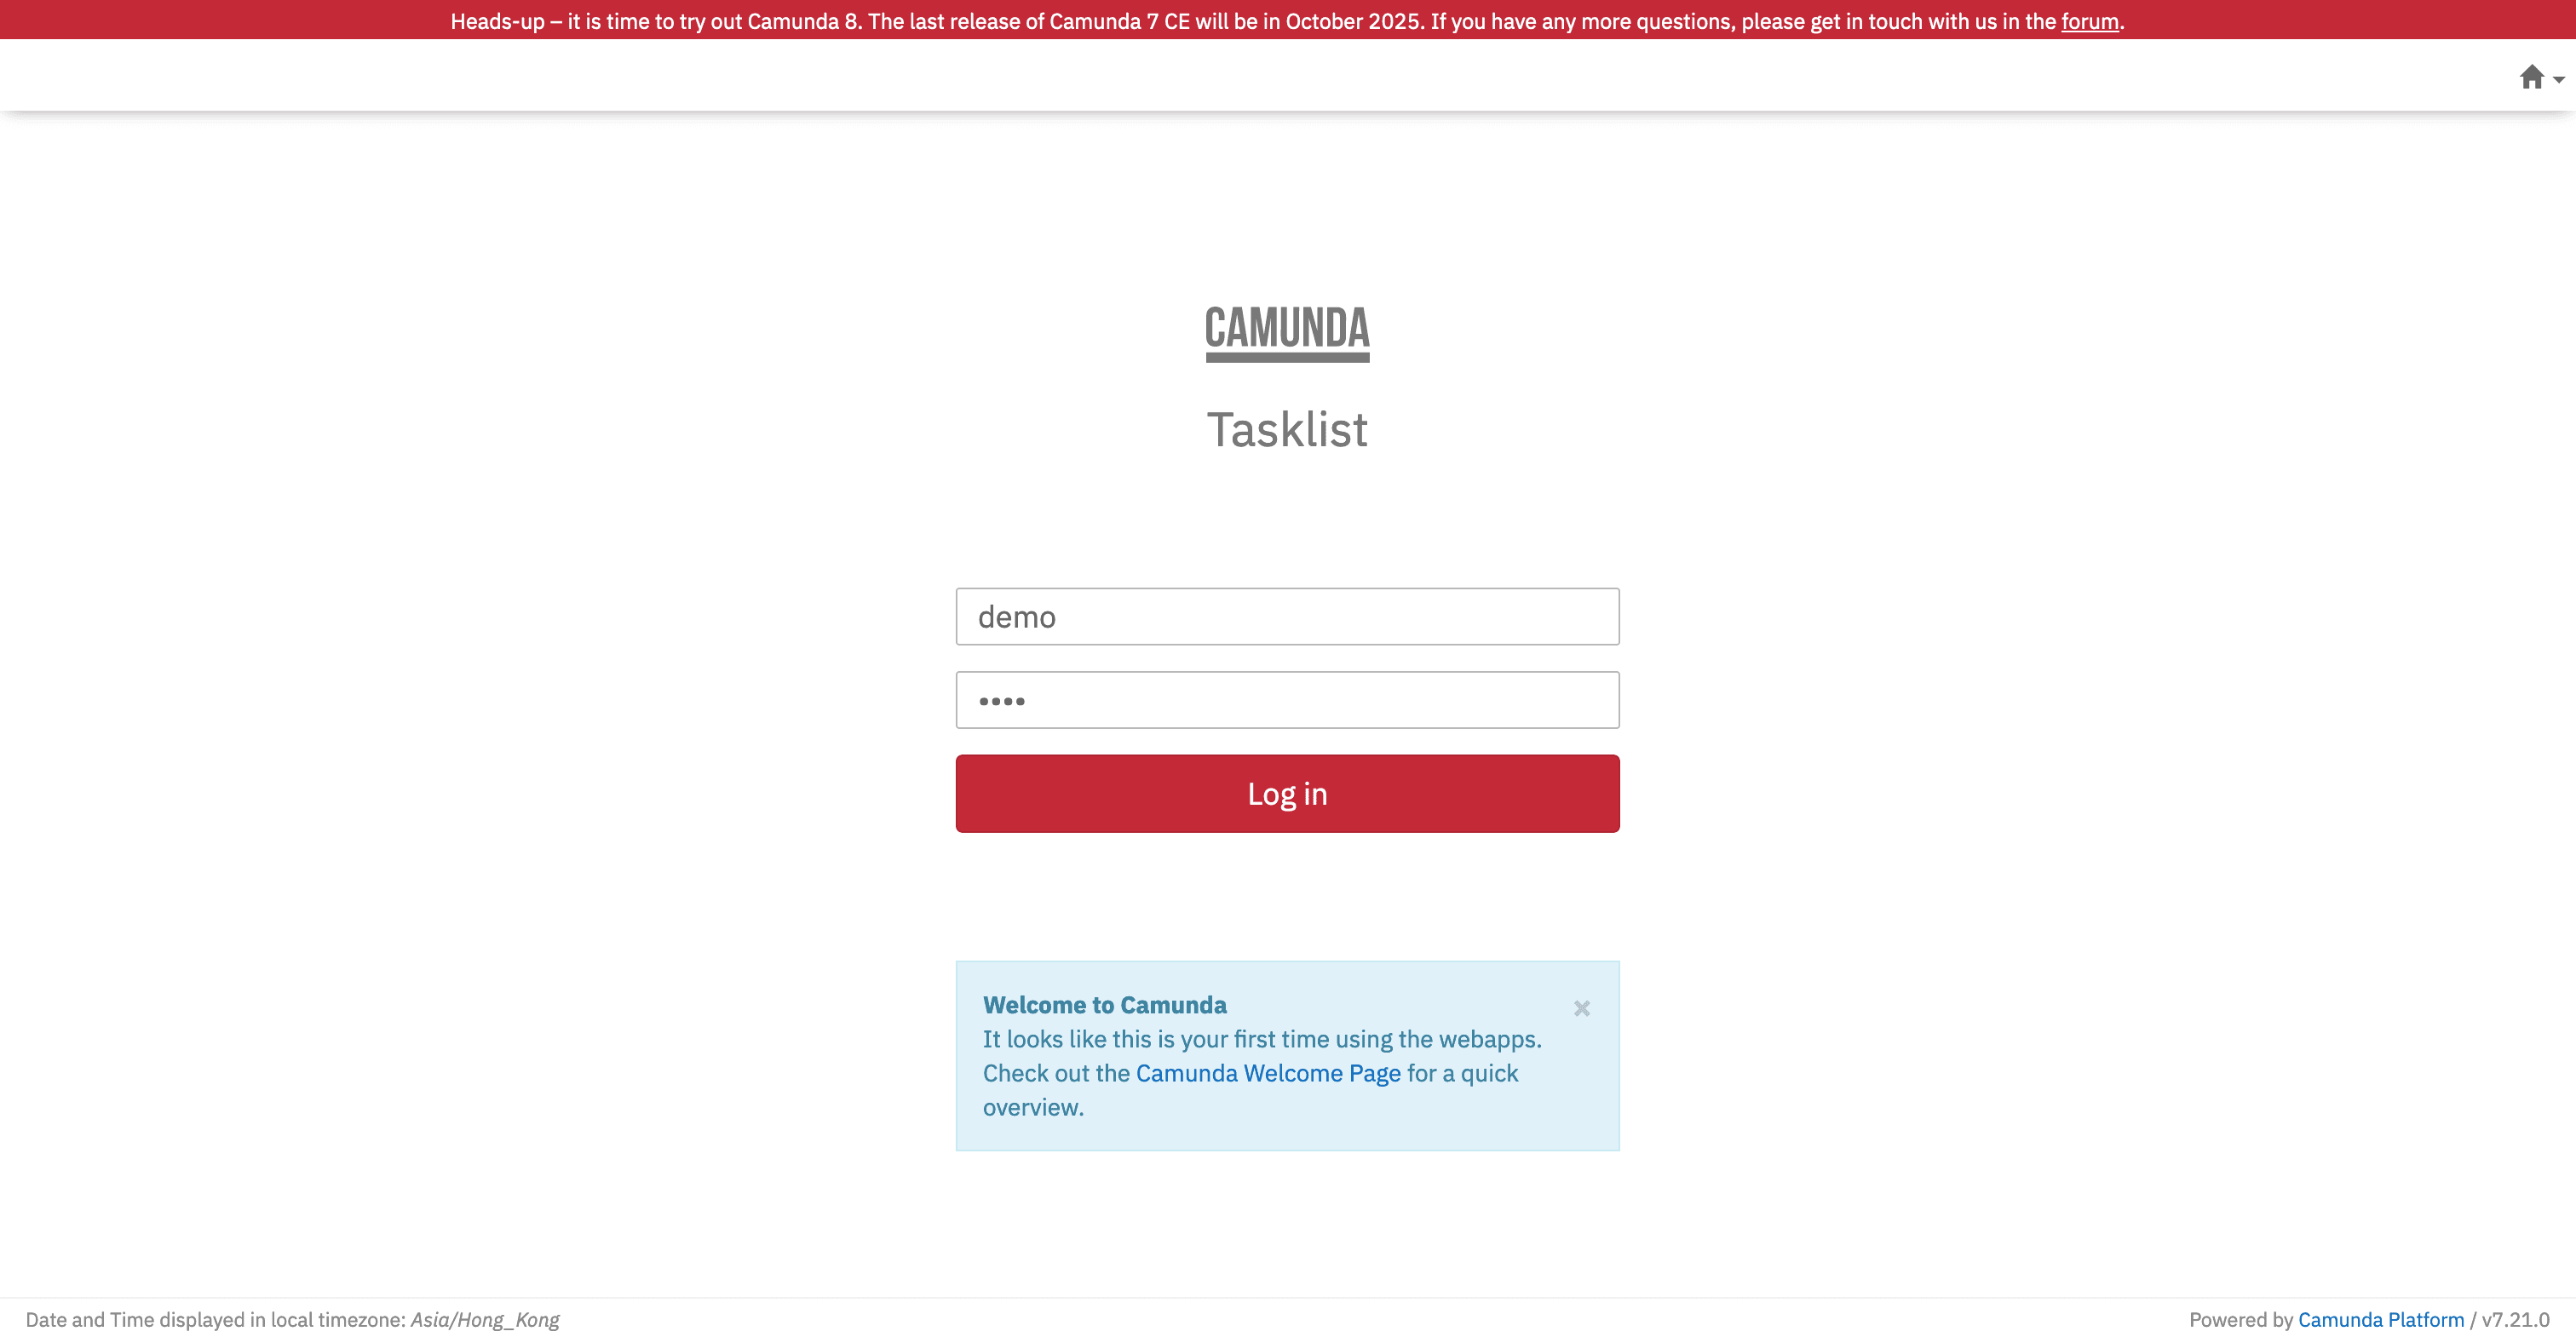
Access the Tasklist:
- Click on the Tasklist image.
- Log in using the credentials demo/demo:
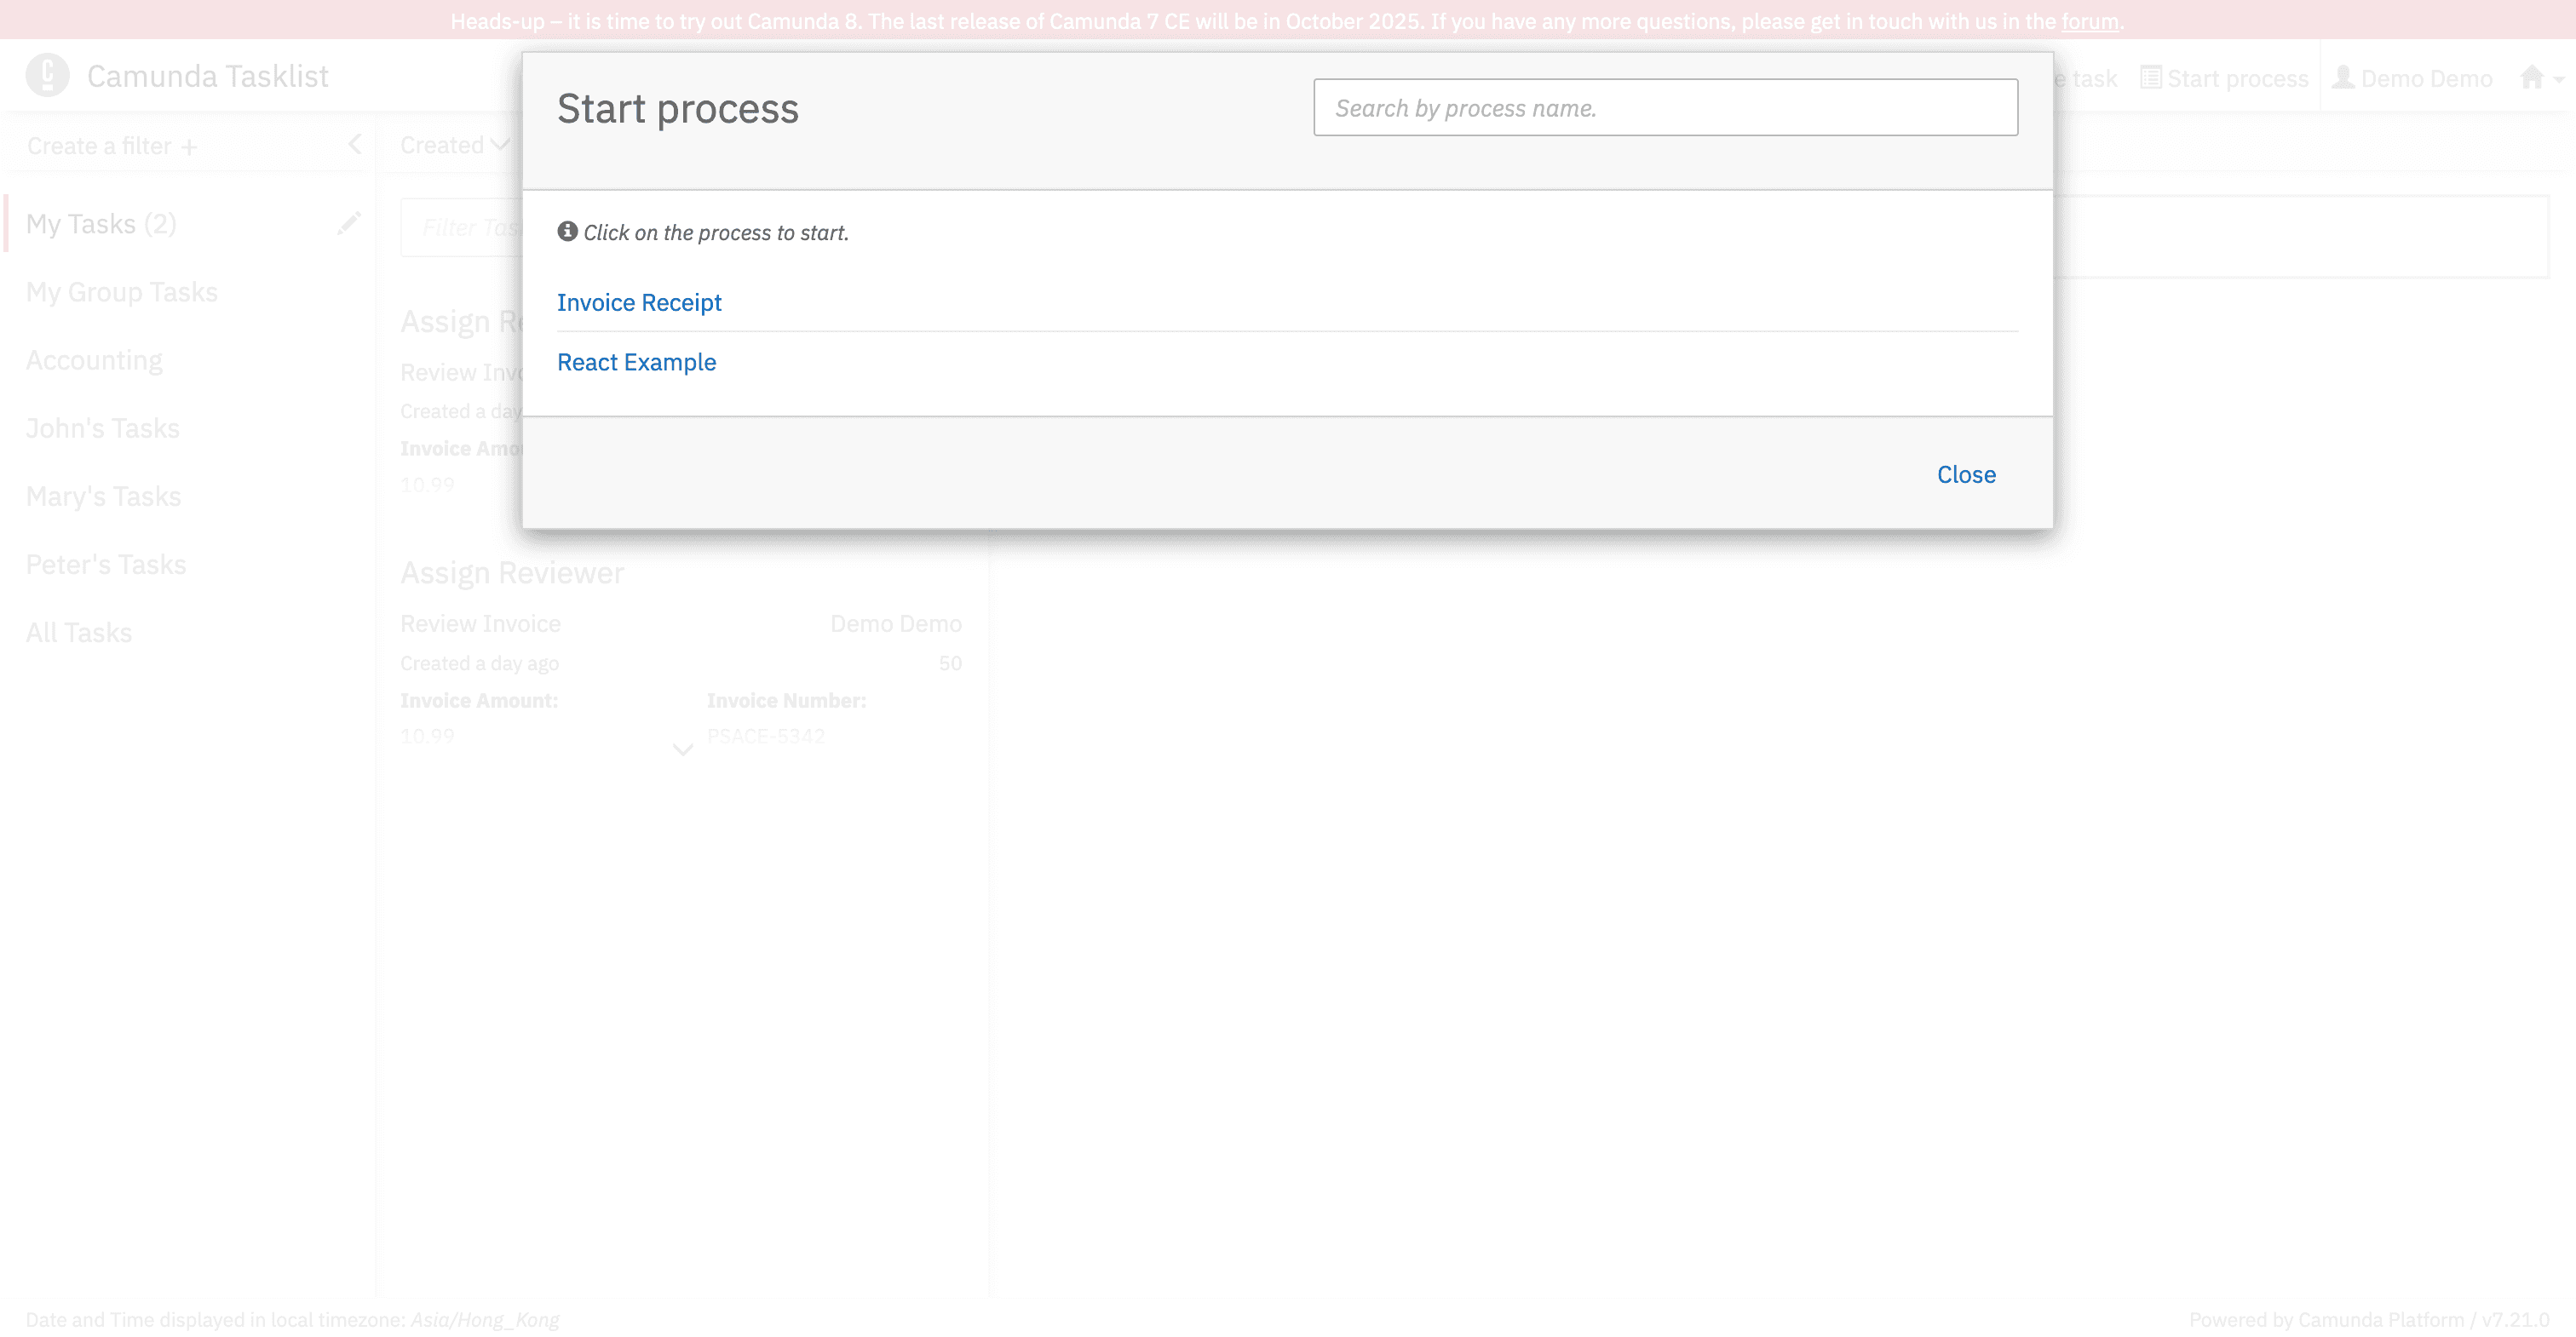
- Start the process:
- Click on the "Start Process" button on the top panel:

- Select "React example" in the "Start process" window:
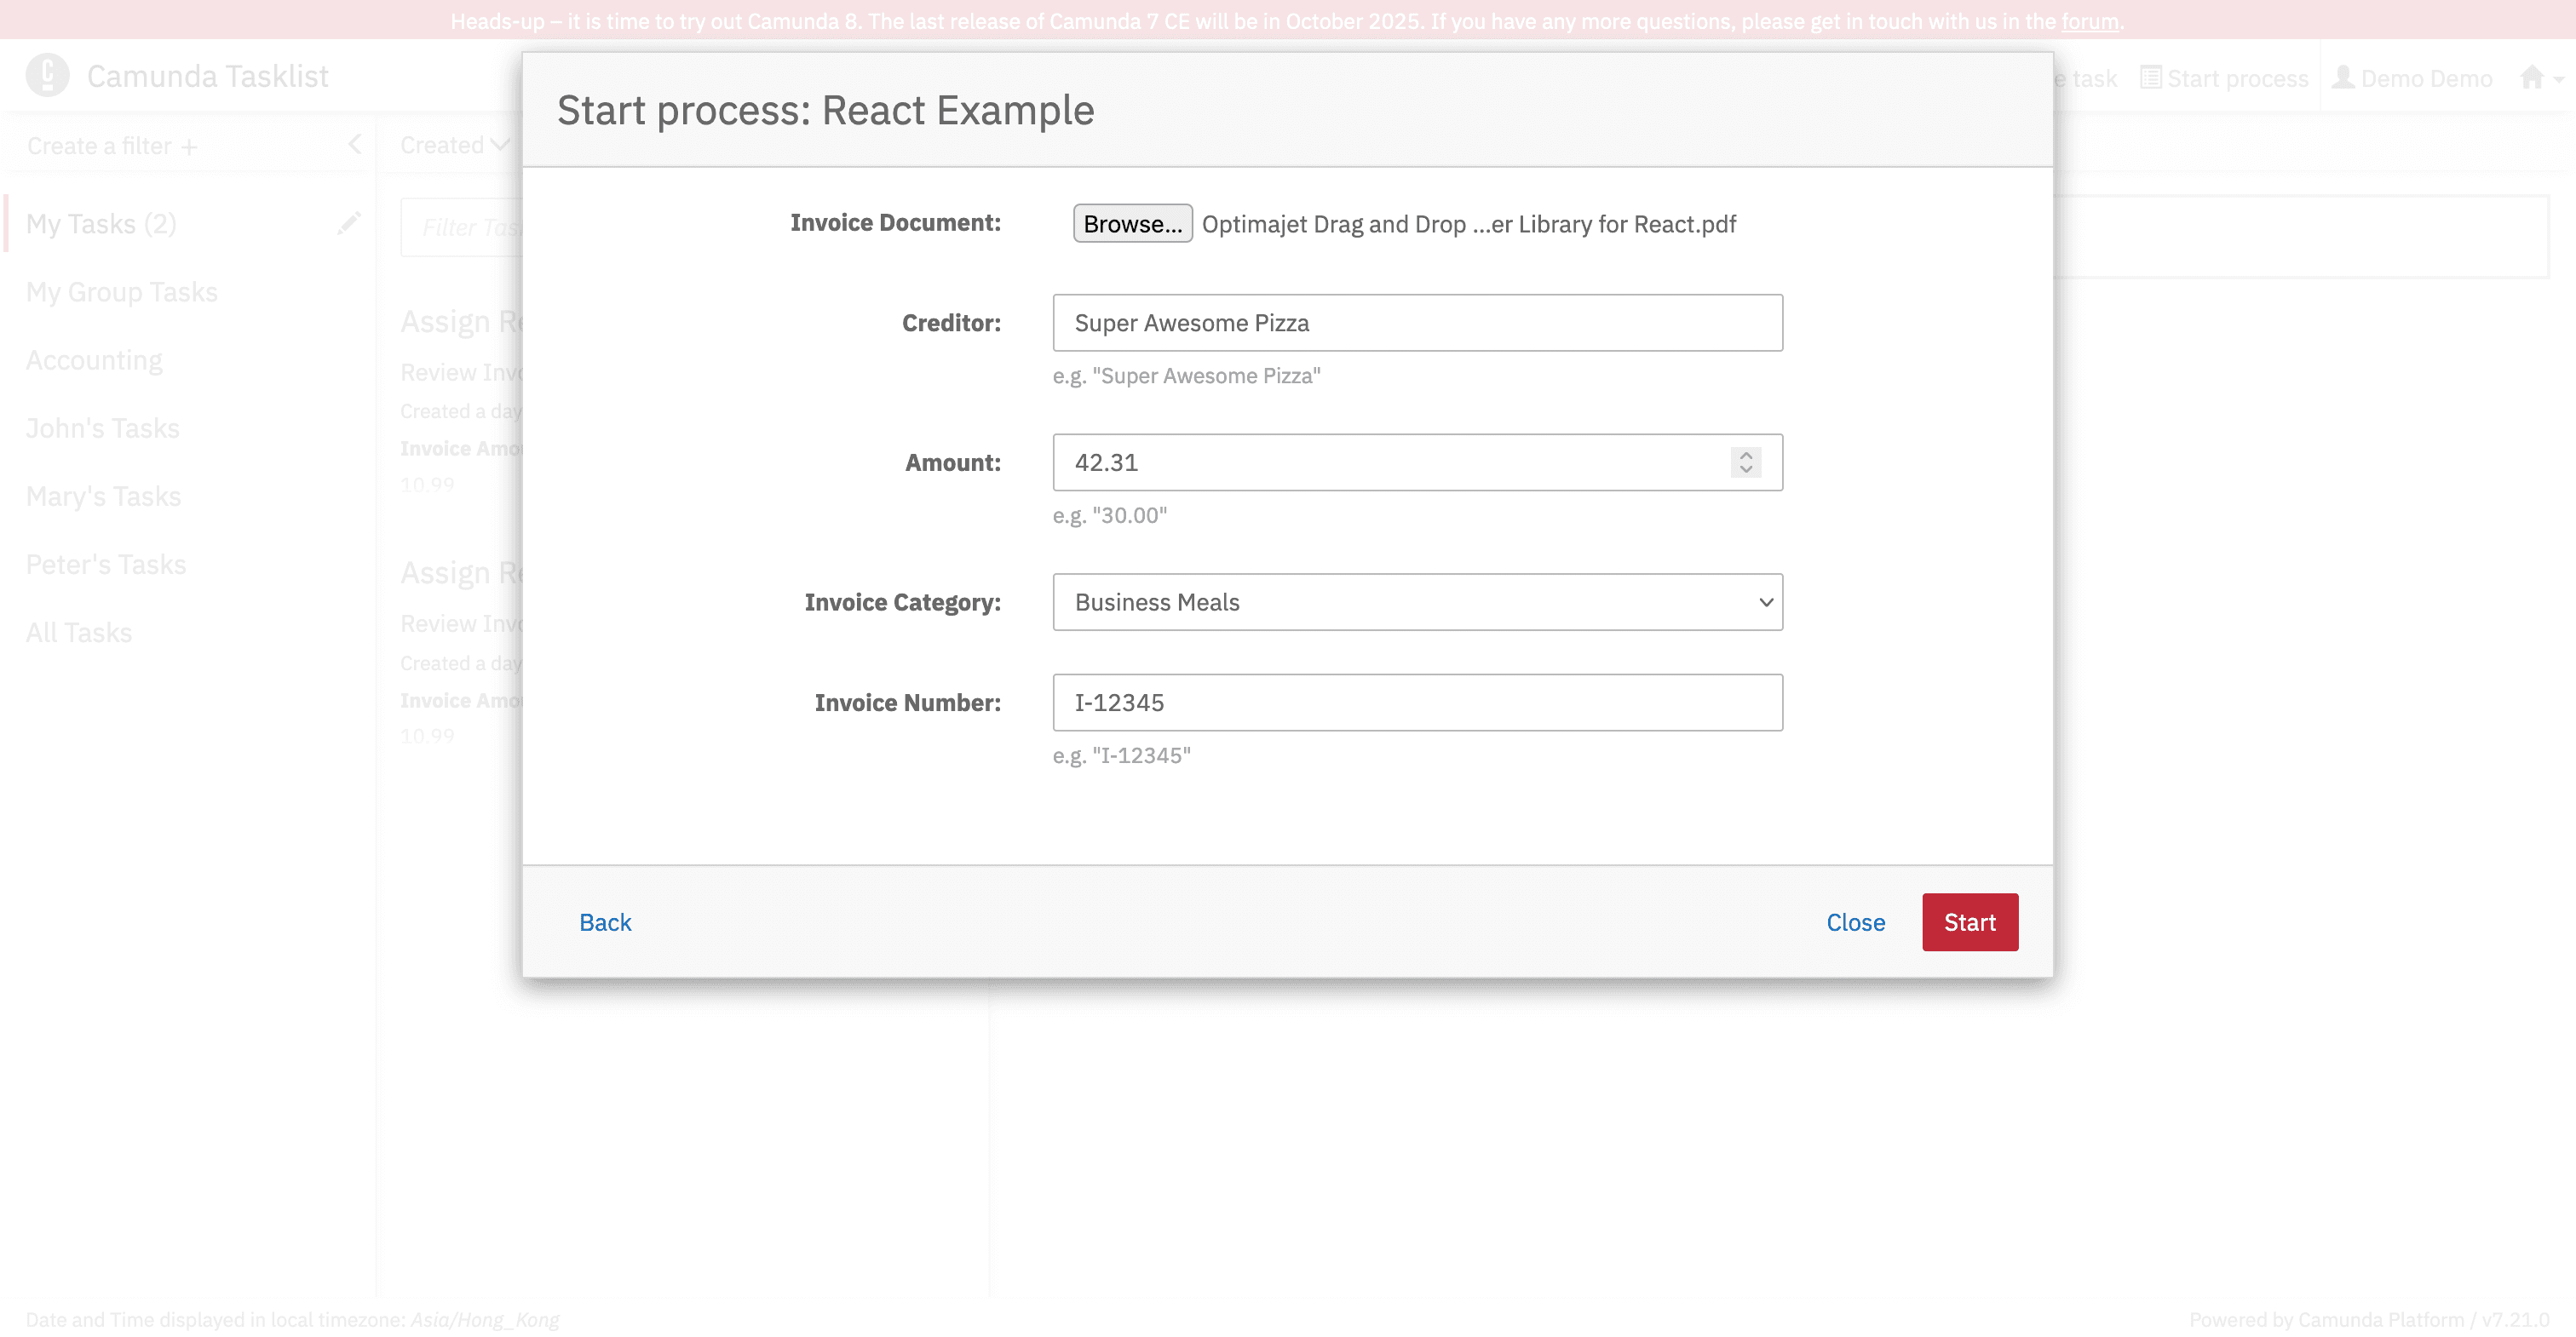
- Fill in the start form:
- The form for starting the process, uploaded from
start-form.html, should now be displayed. - Fill in the form with the necessary data and click the "Start" button:
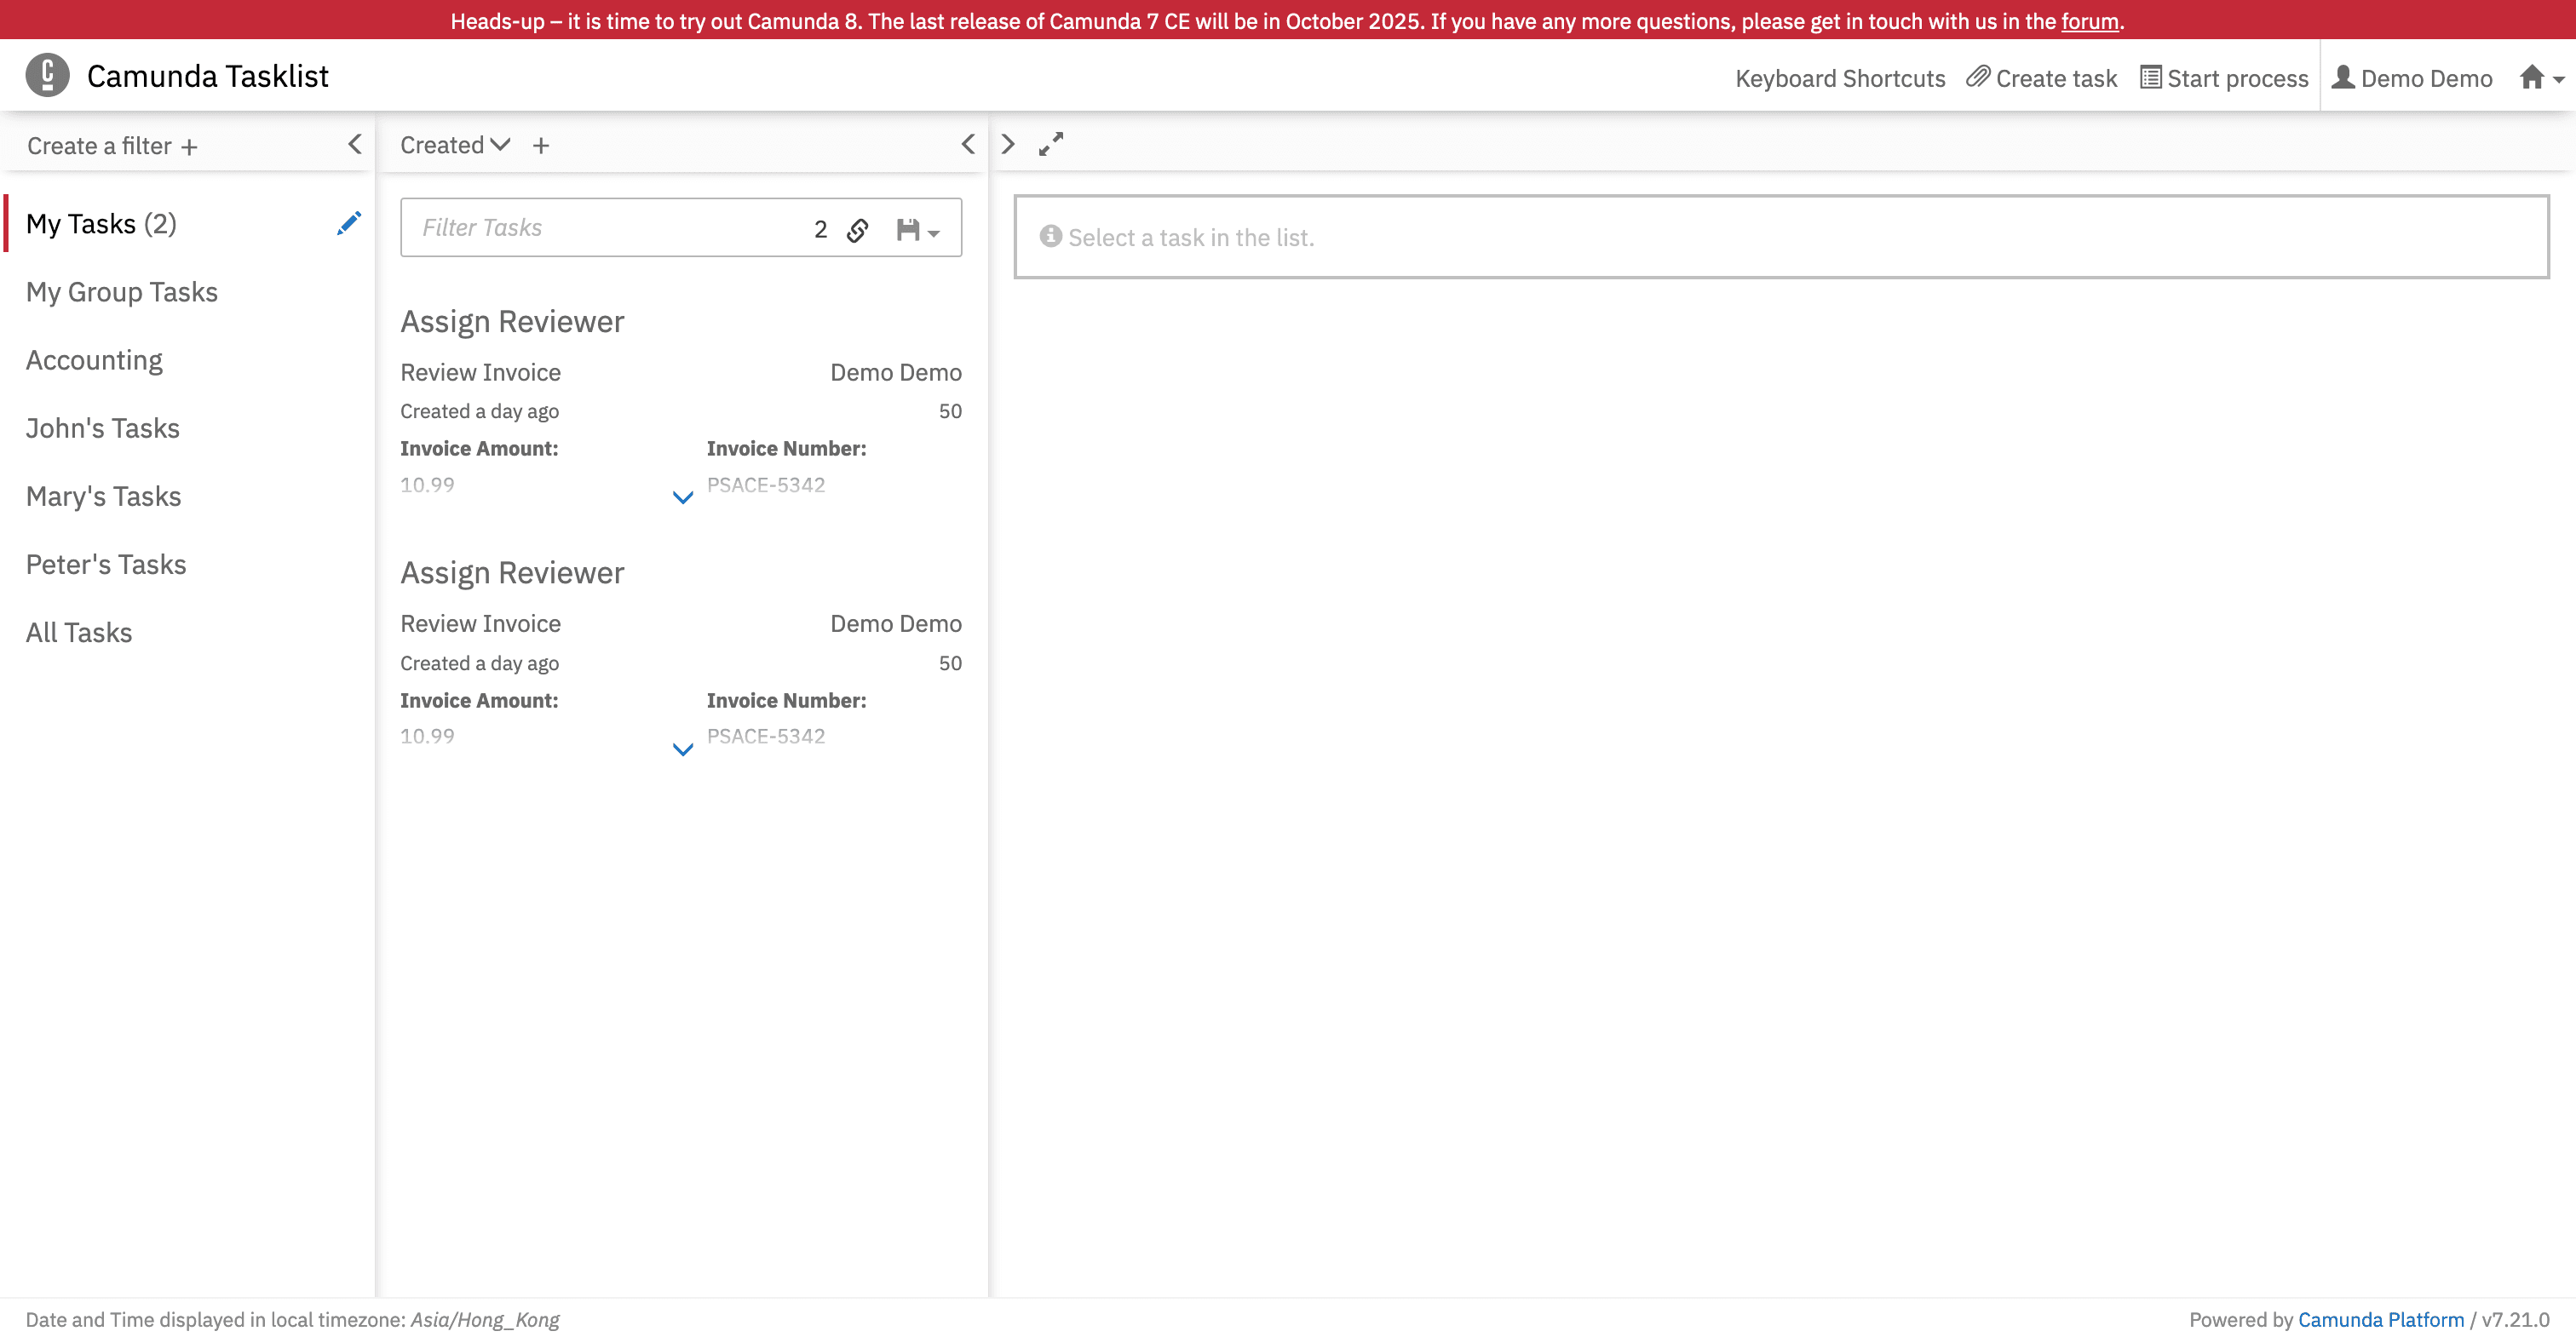
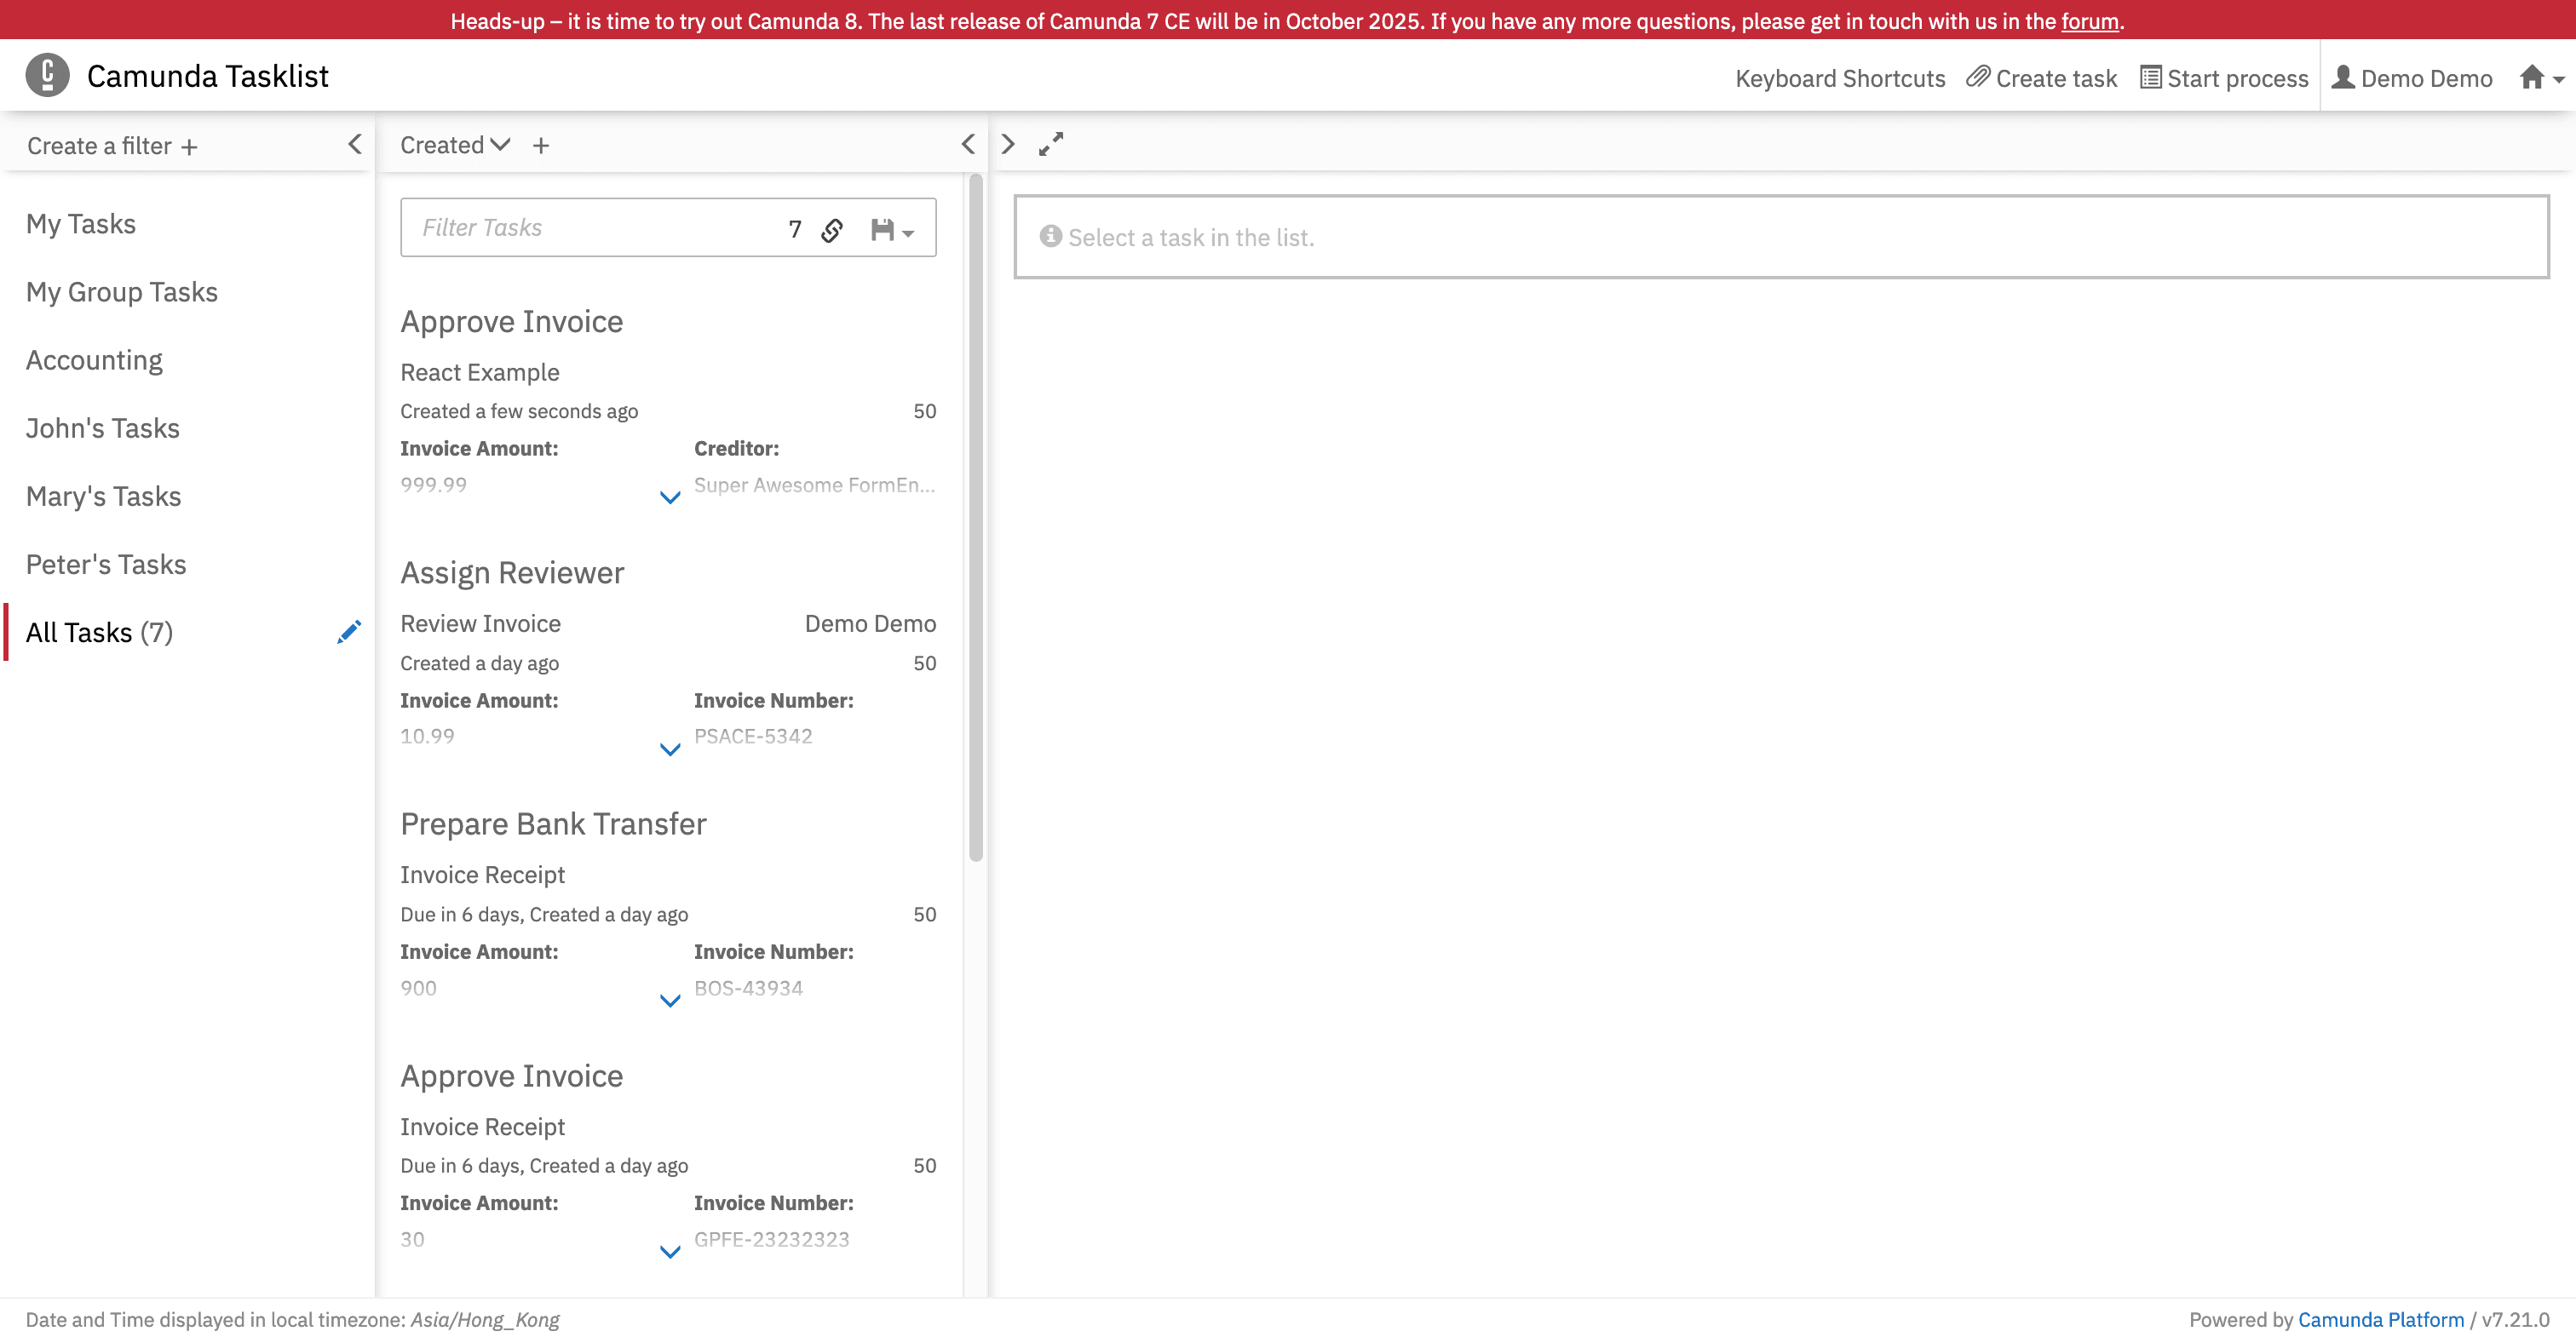
- View the task list:
- The process has started. Now click on "All Tasks" on the left panel.
- You should see your task in the task list:

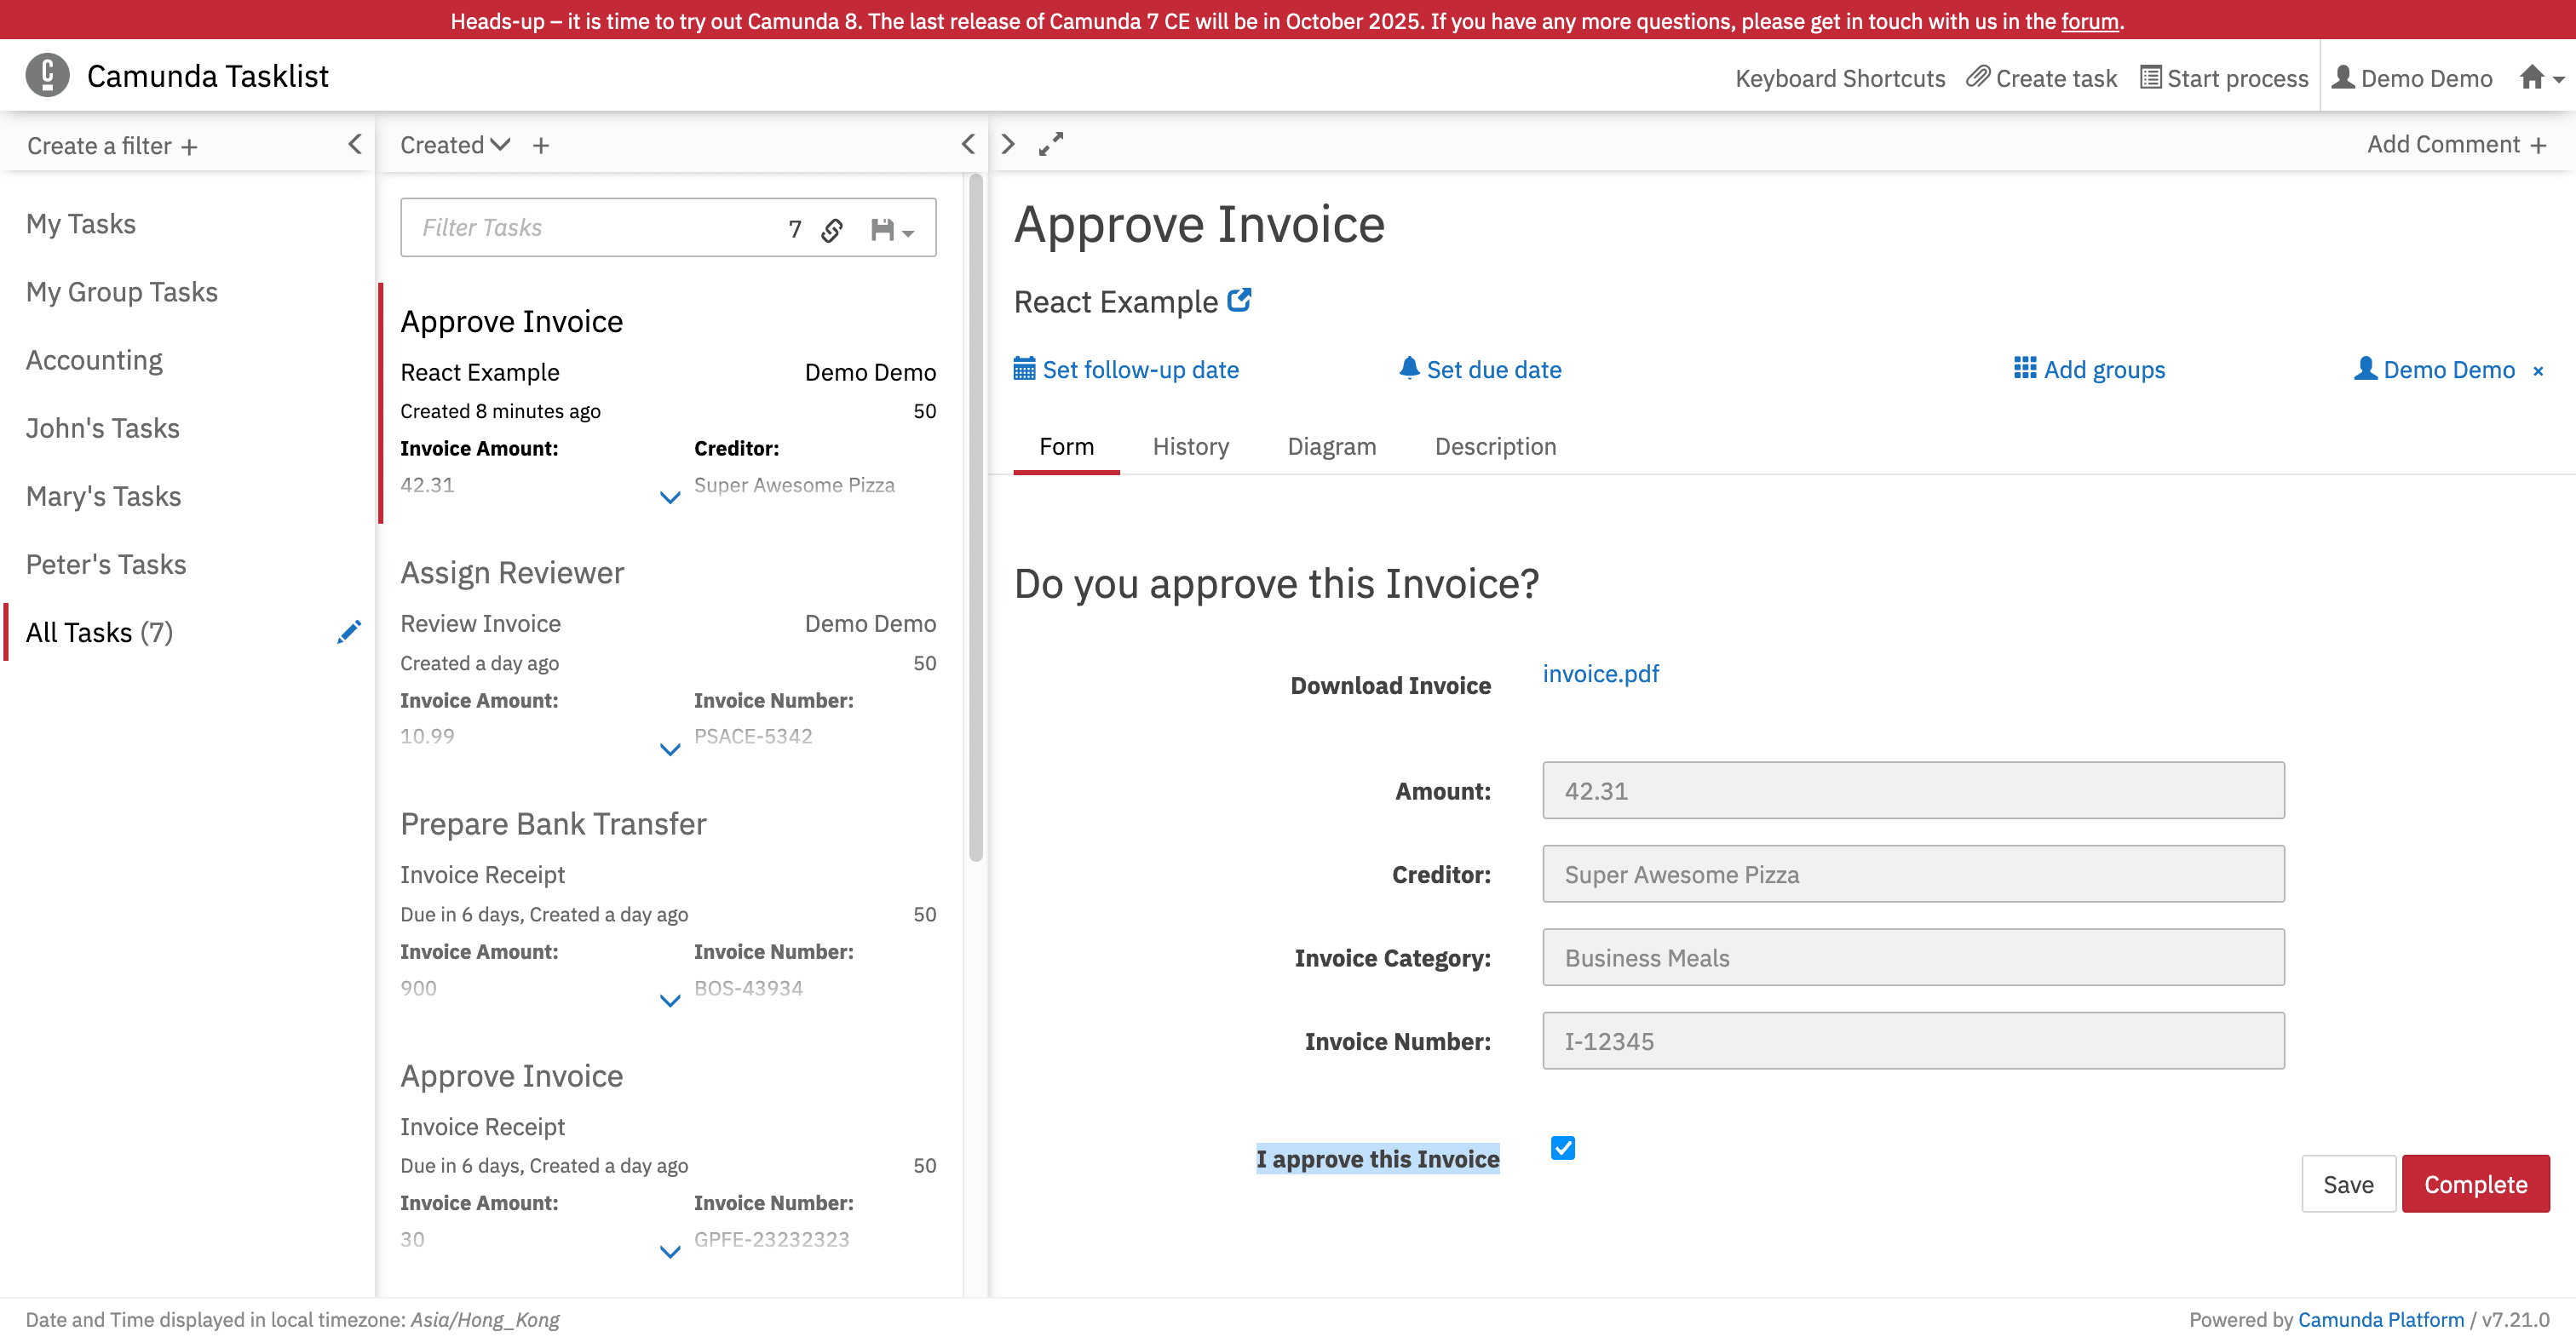
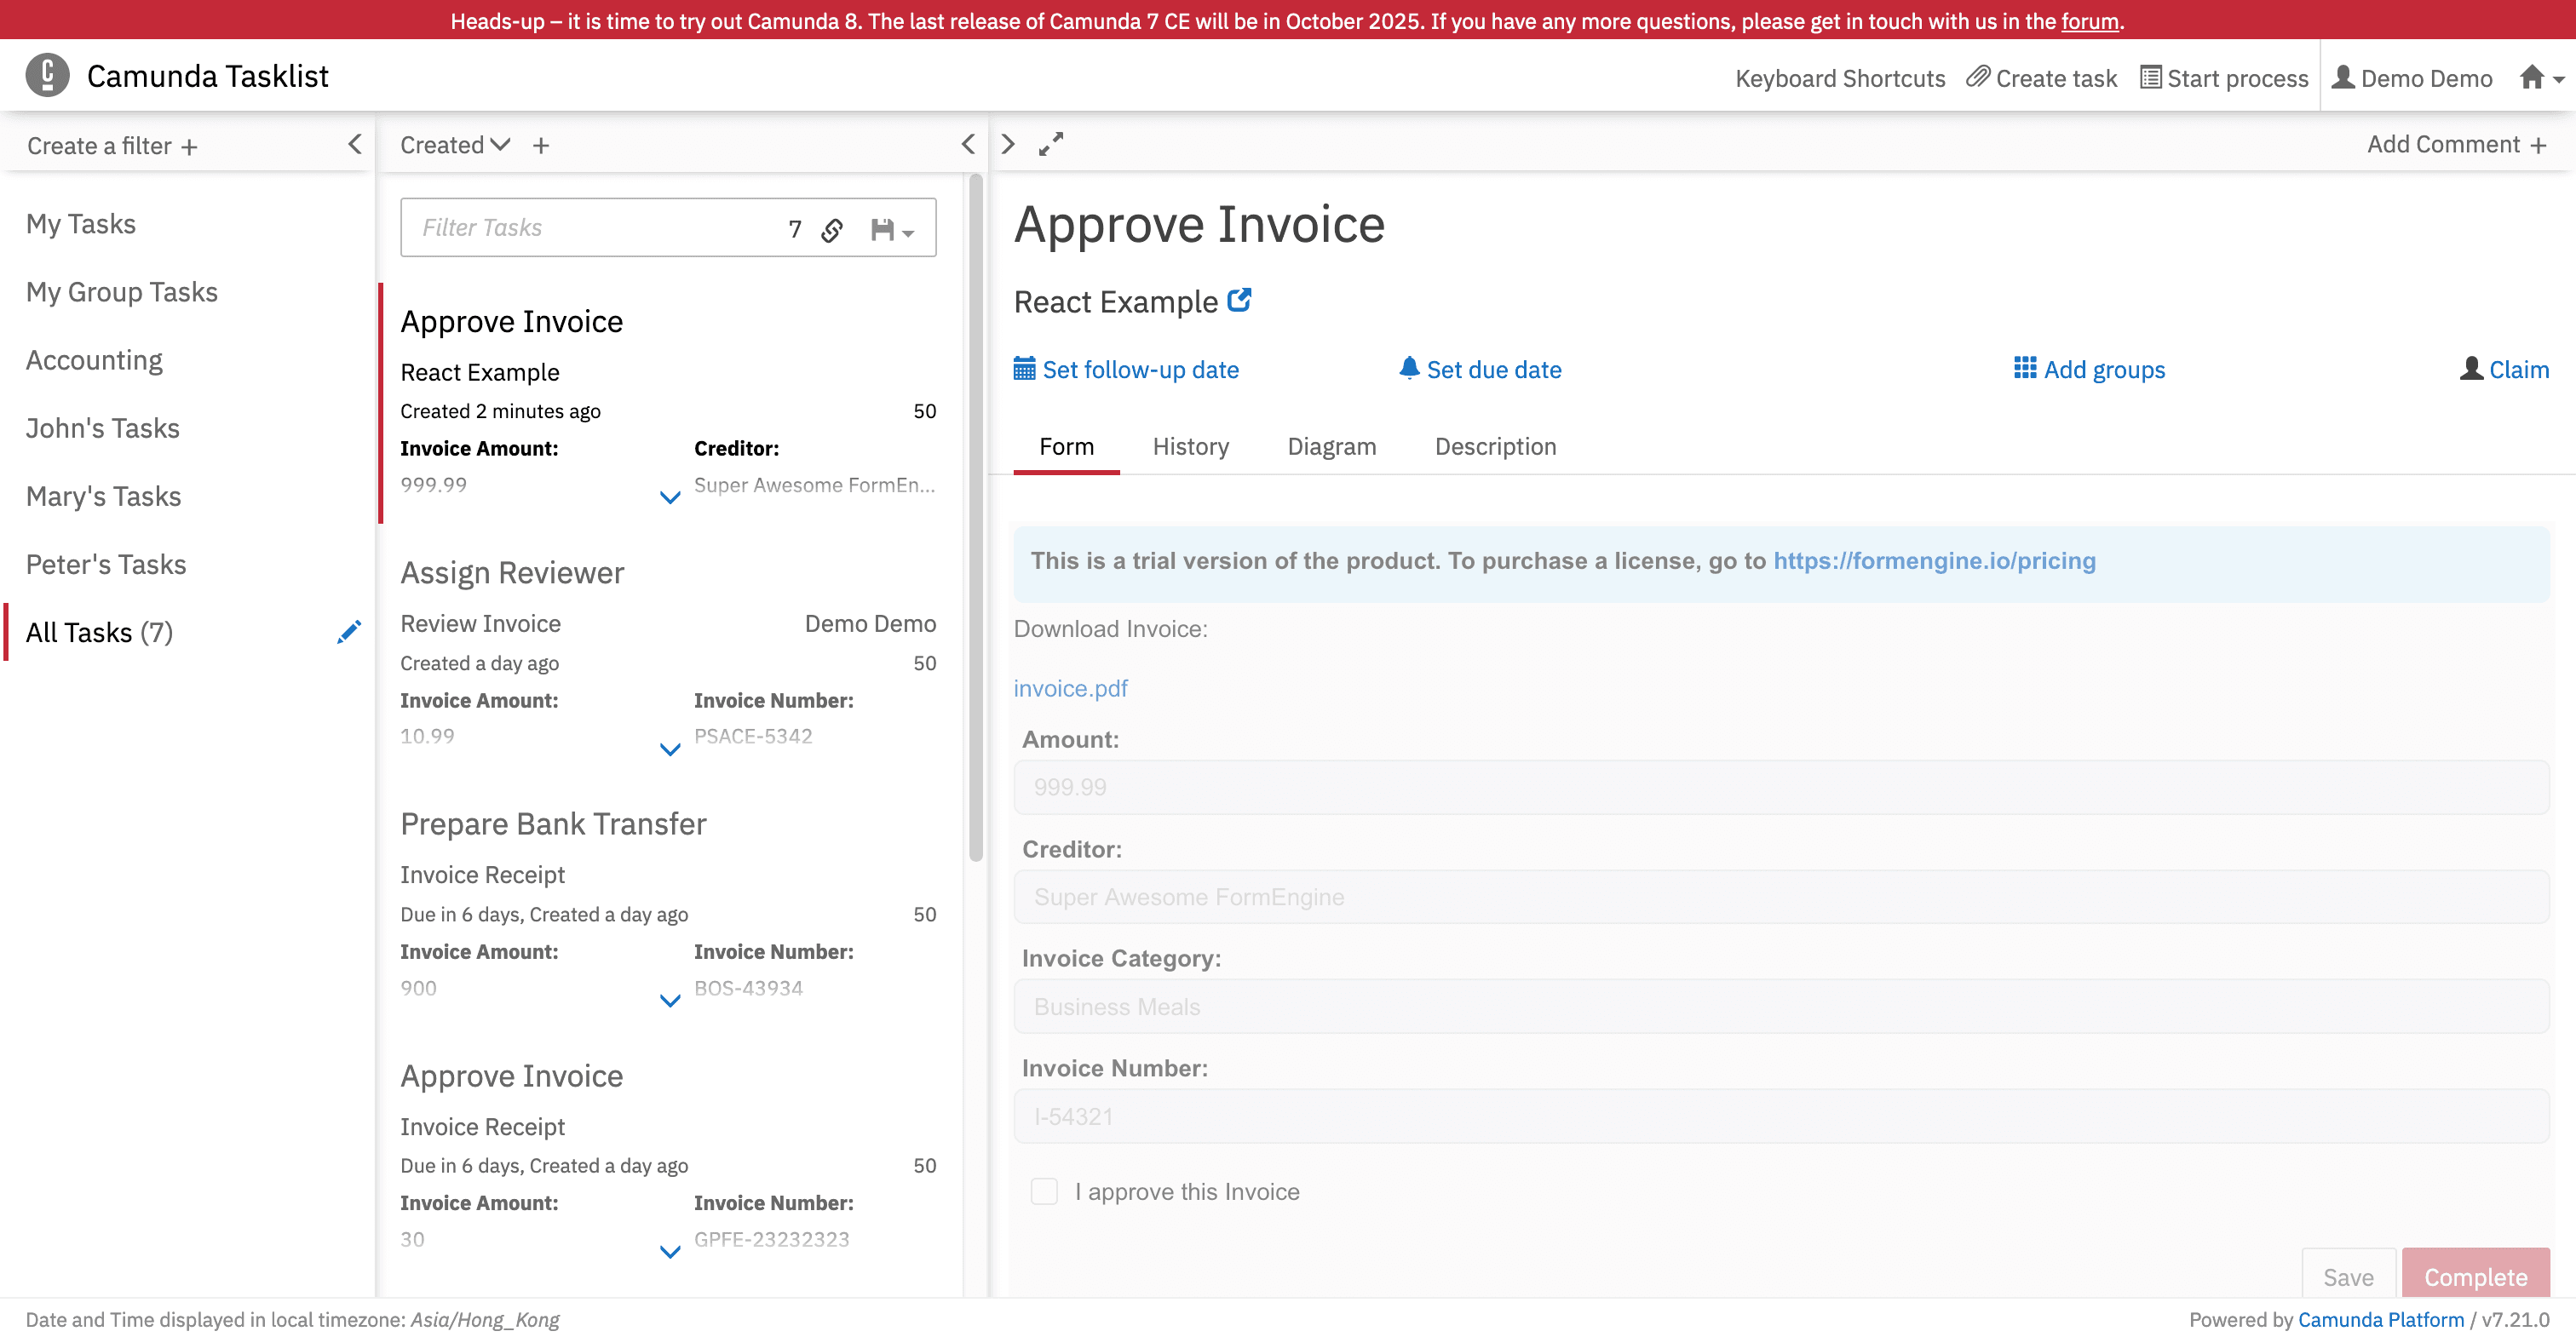
- Claim the task:
- Click on the task:
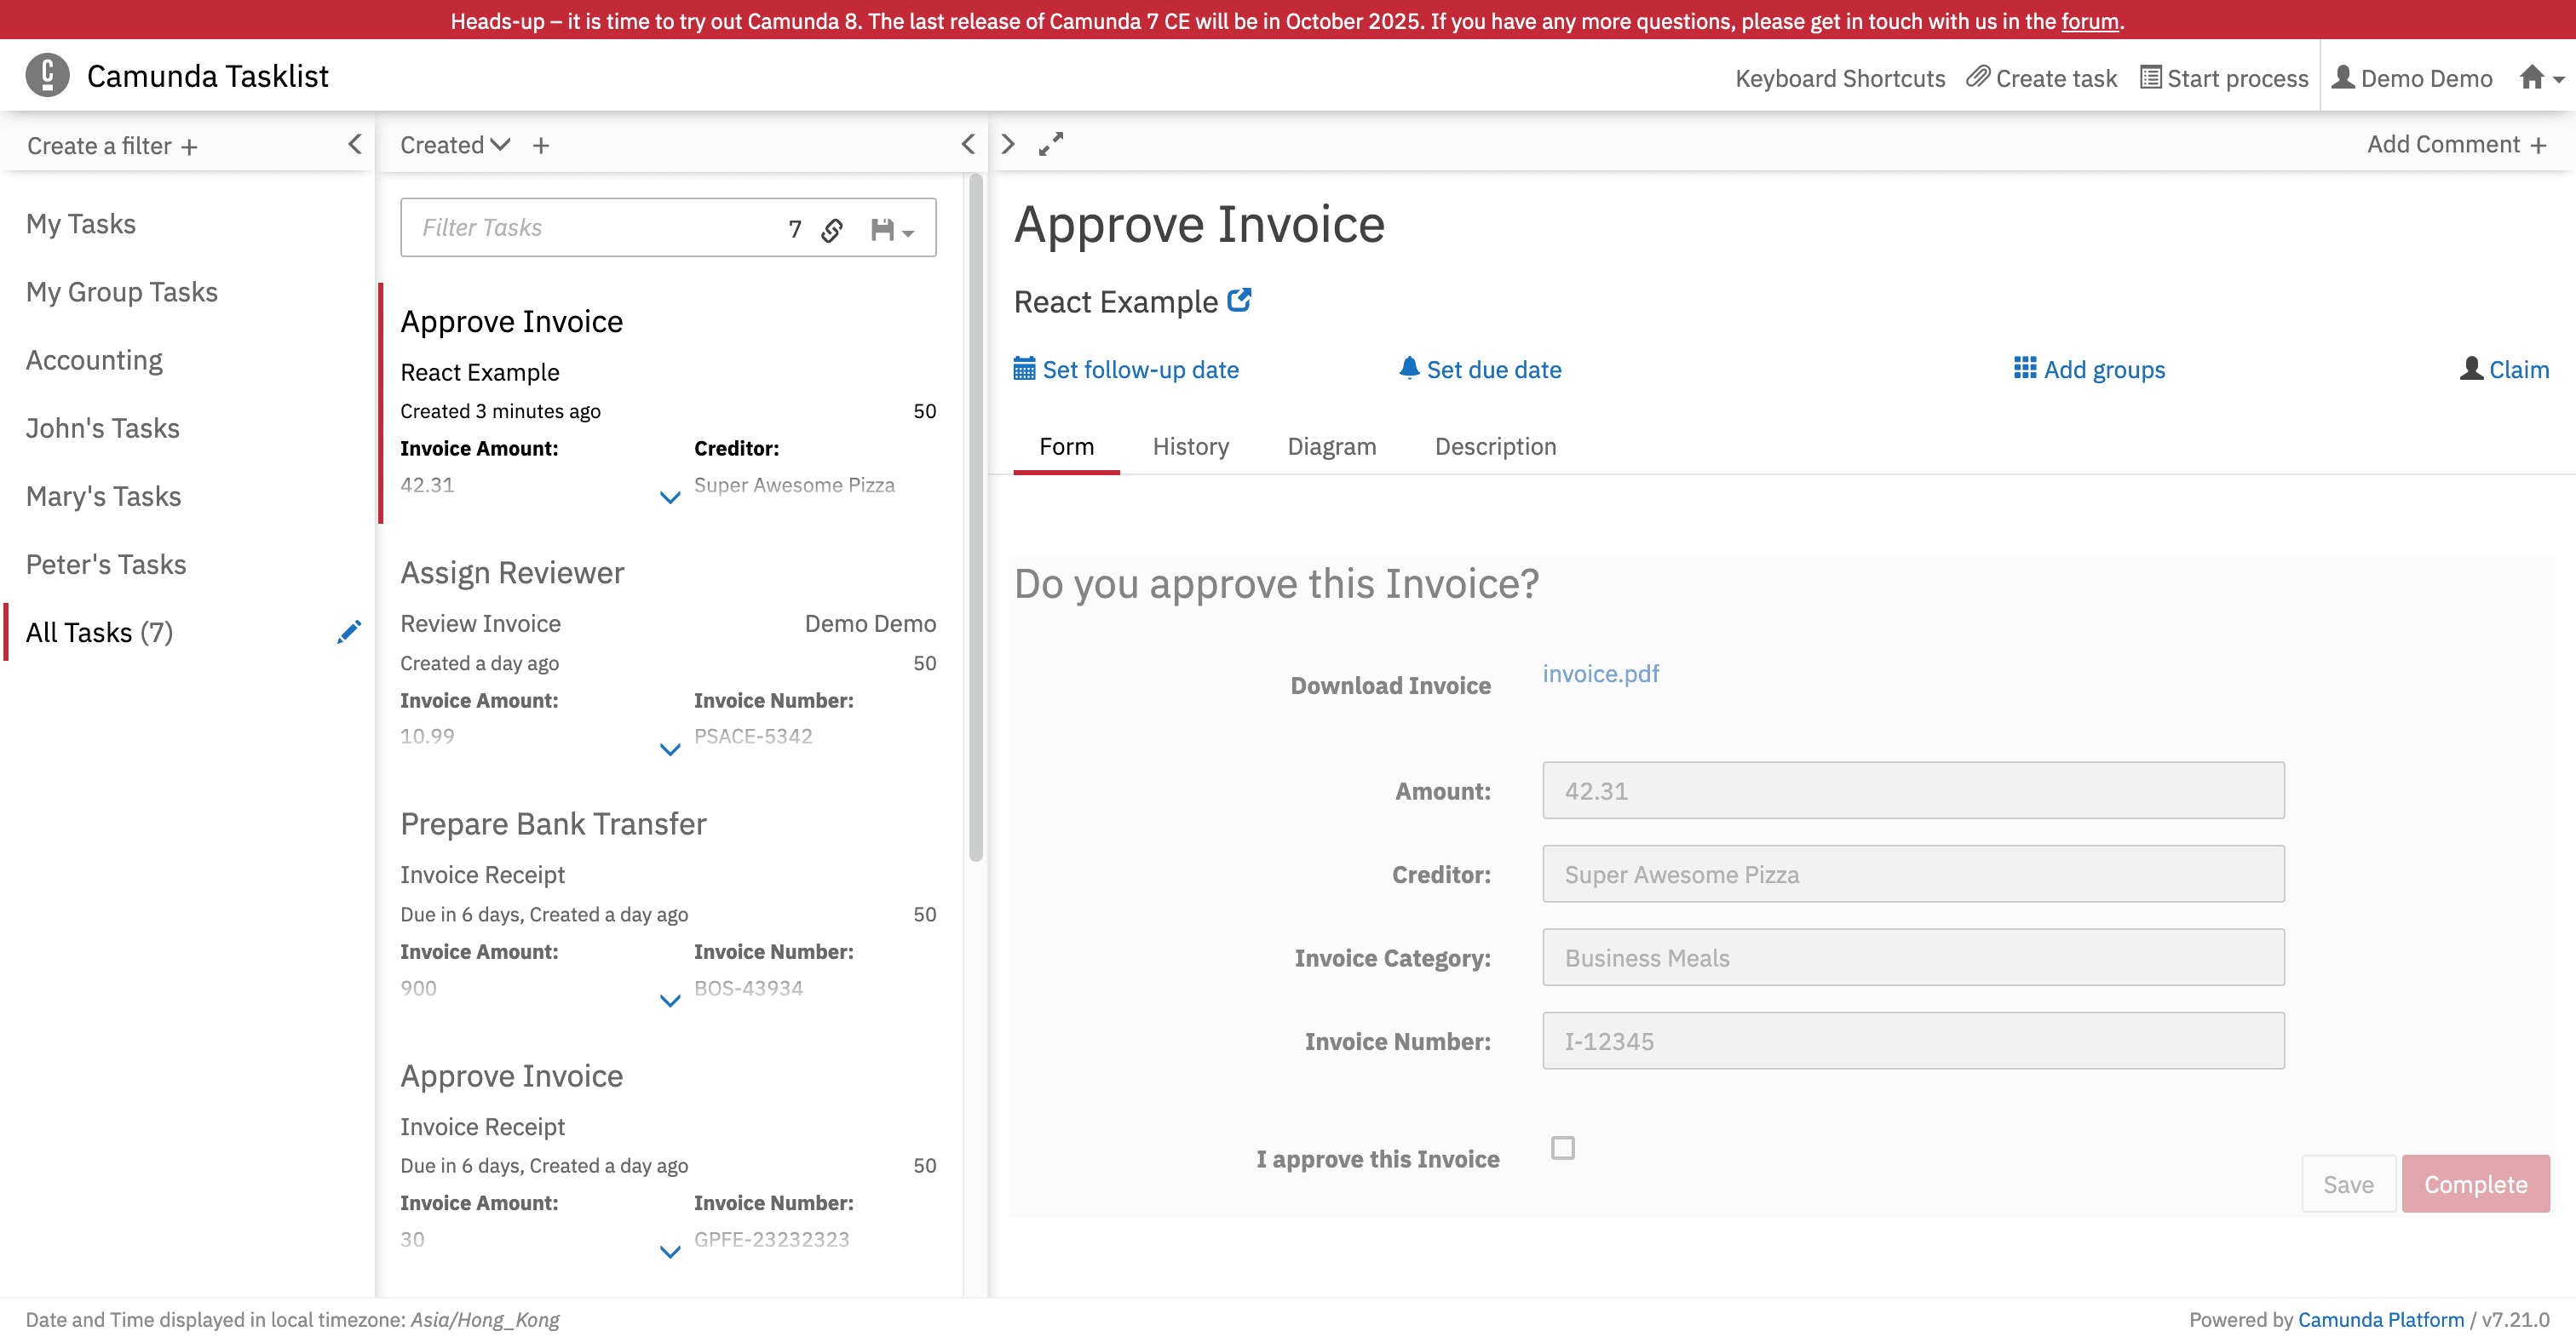
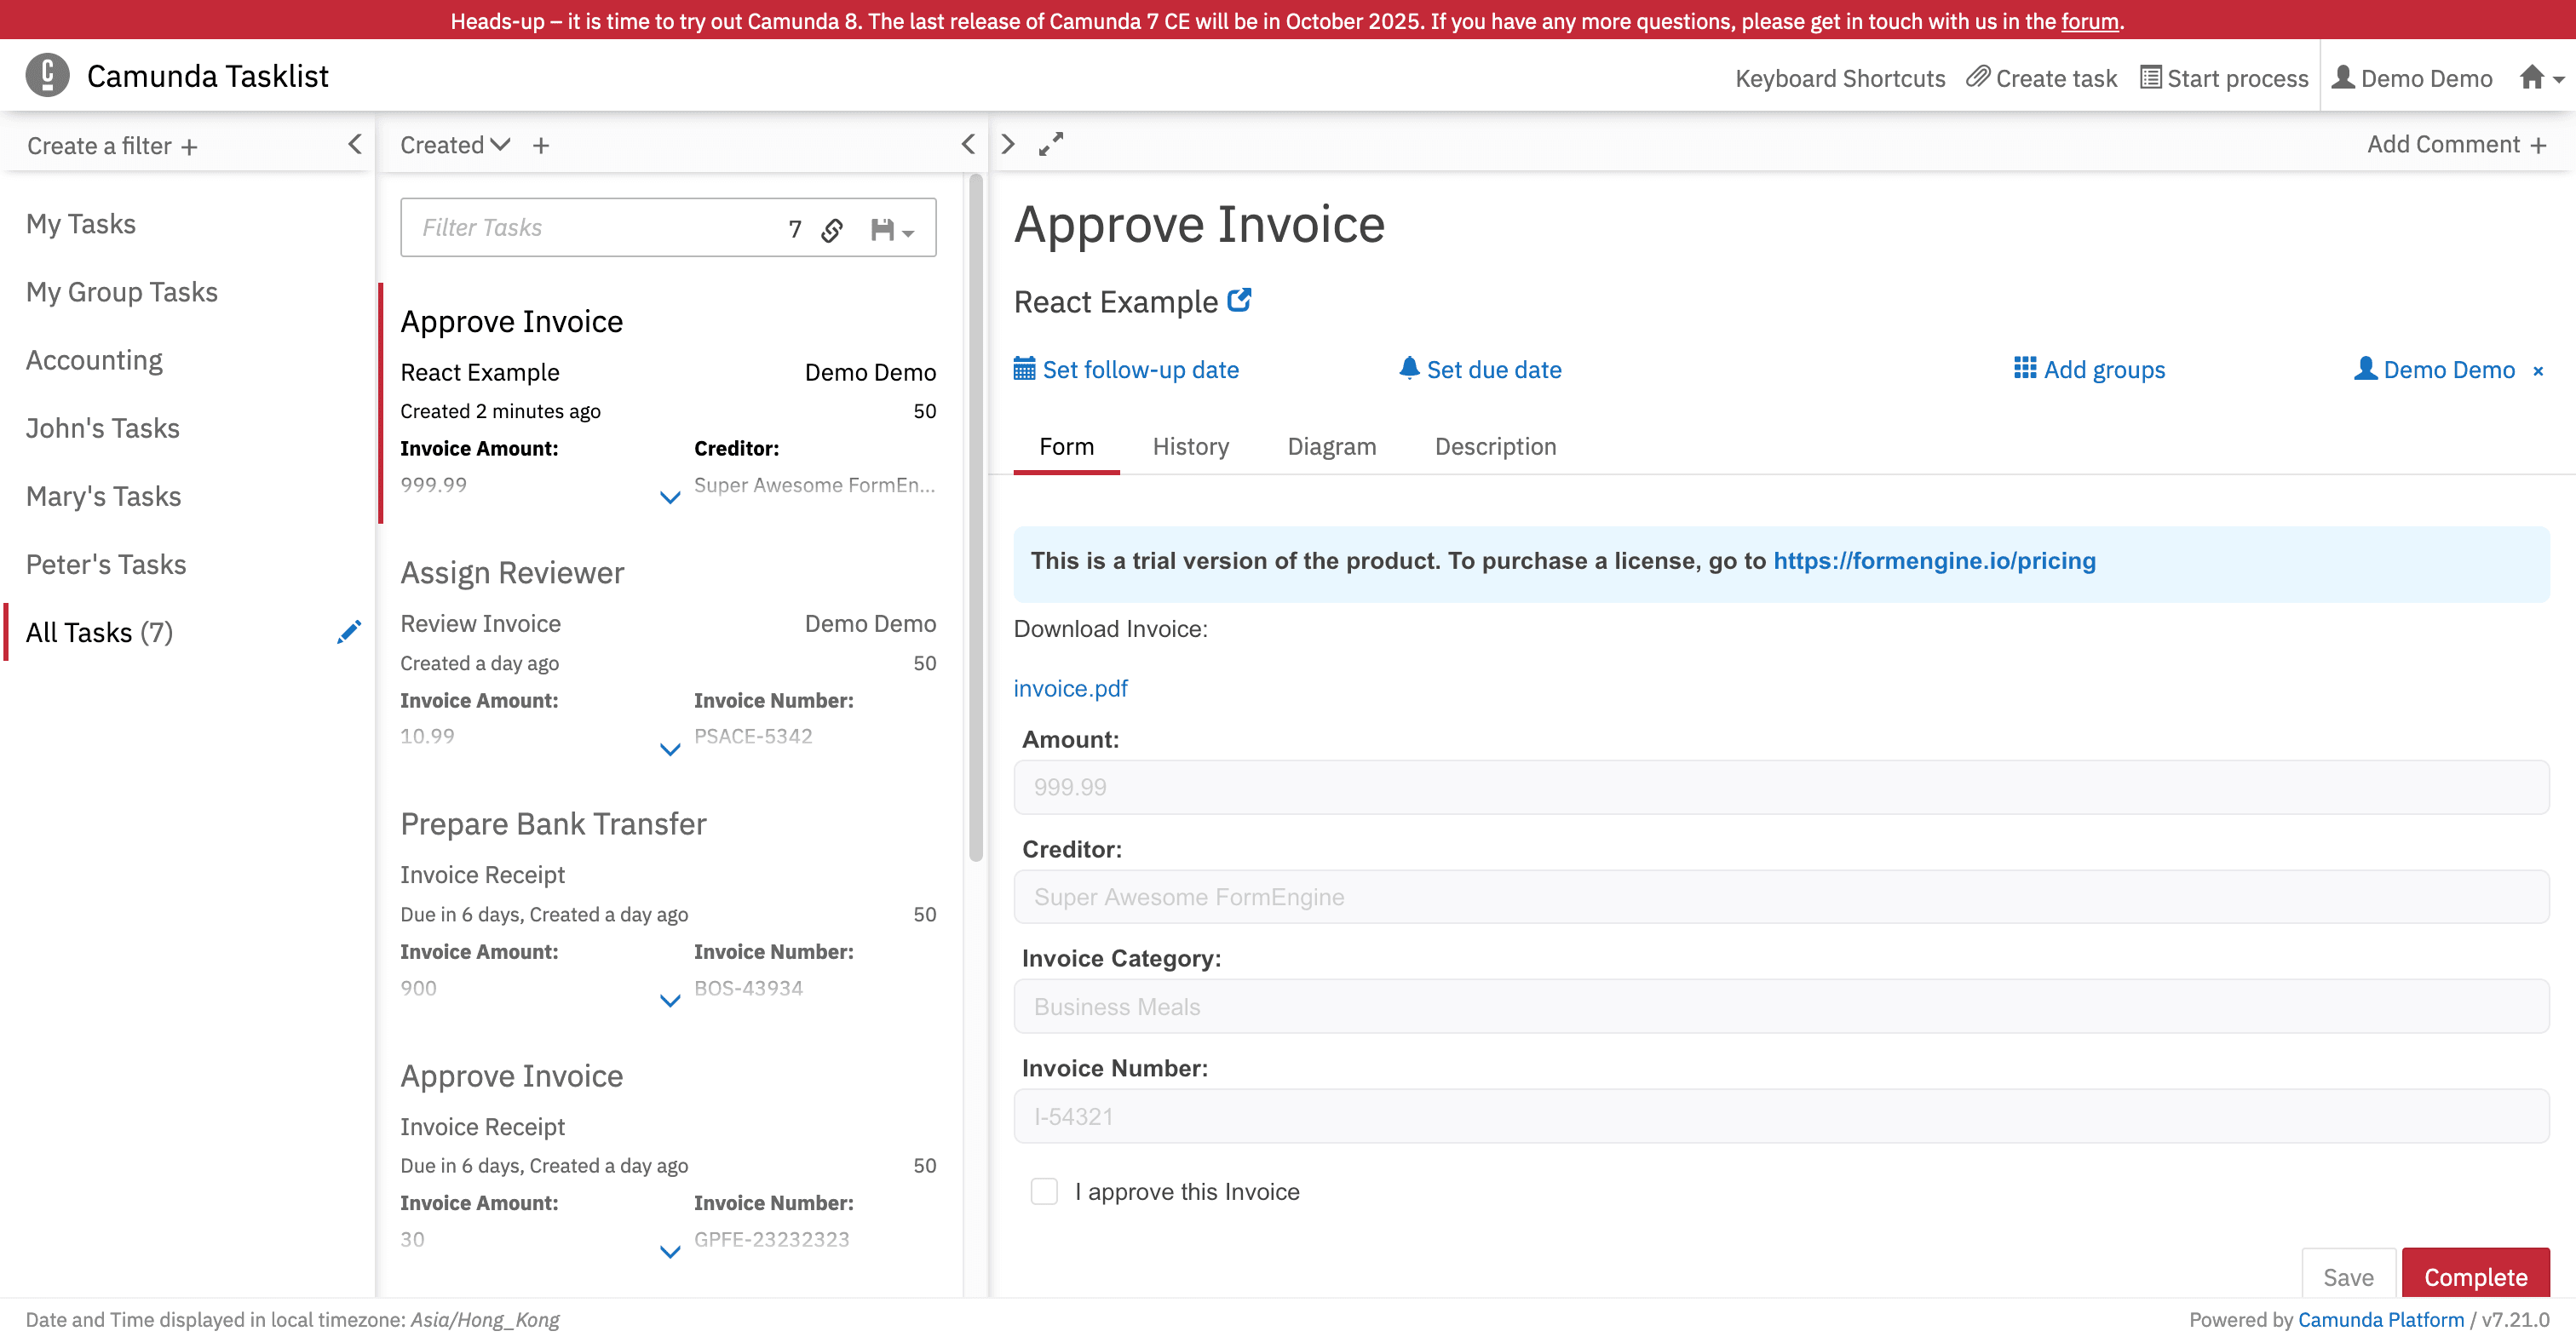
- Claim the task by clicking on the "Claim" link, which will change to "Demo Demo":

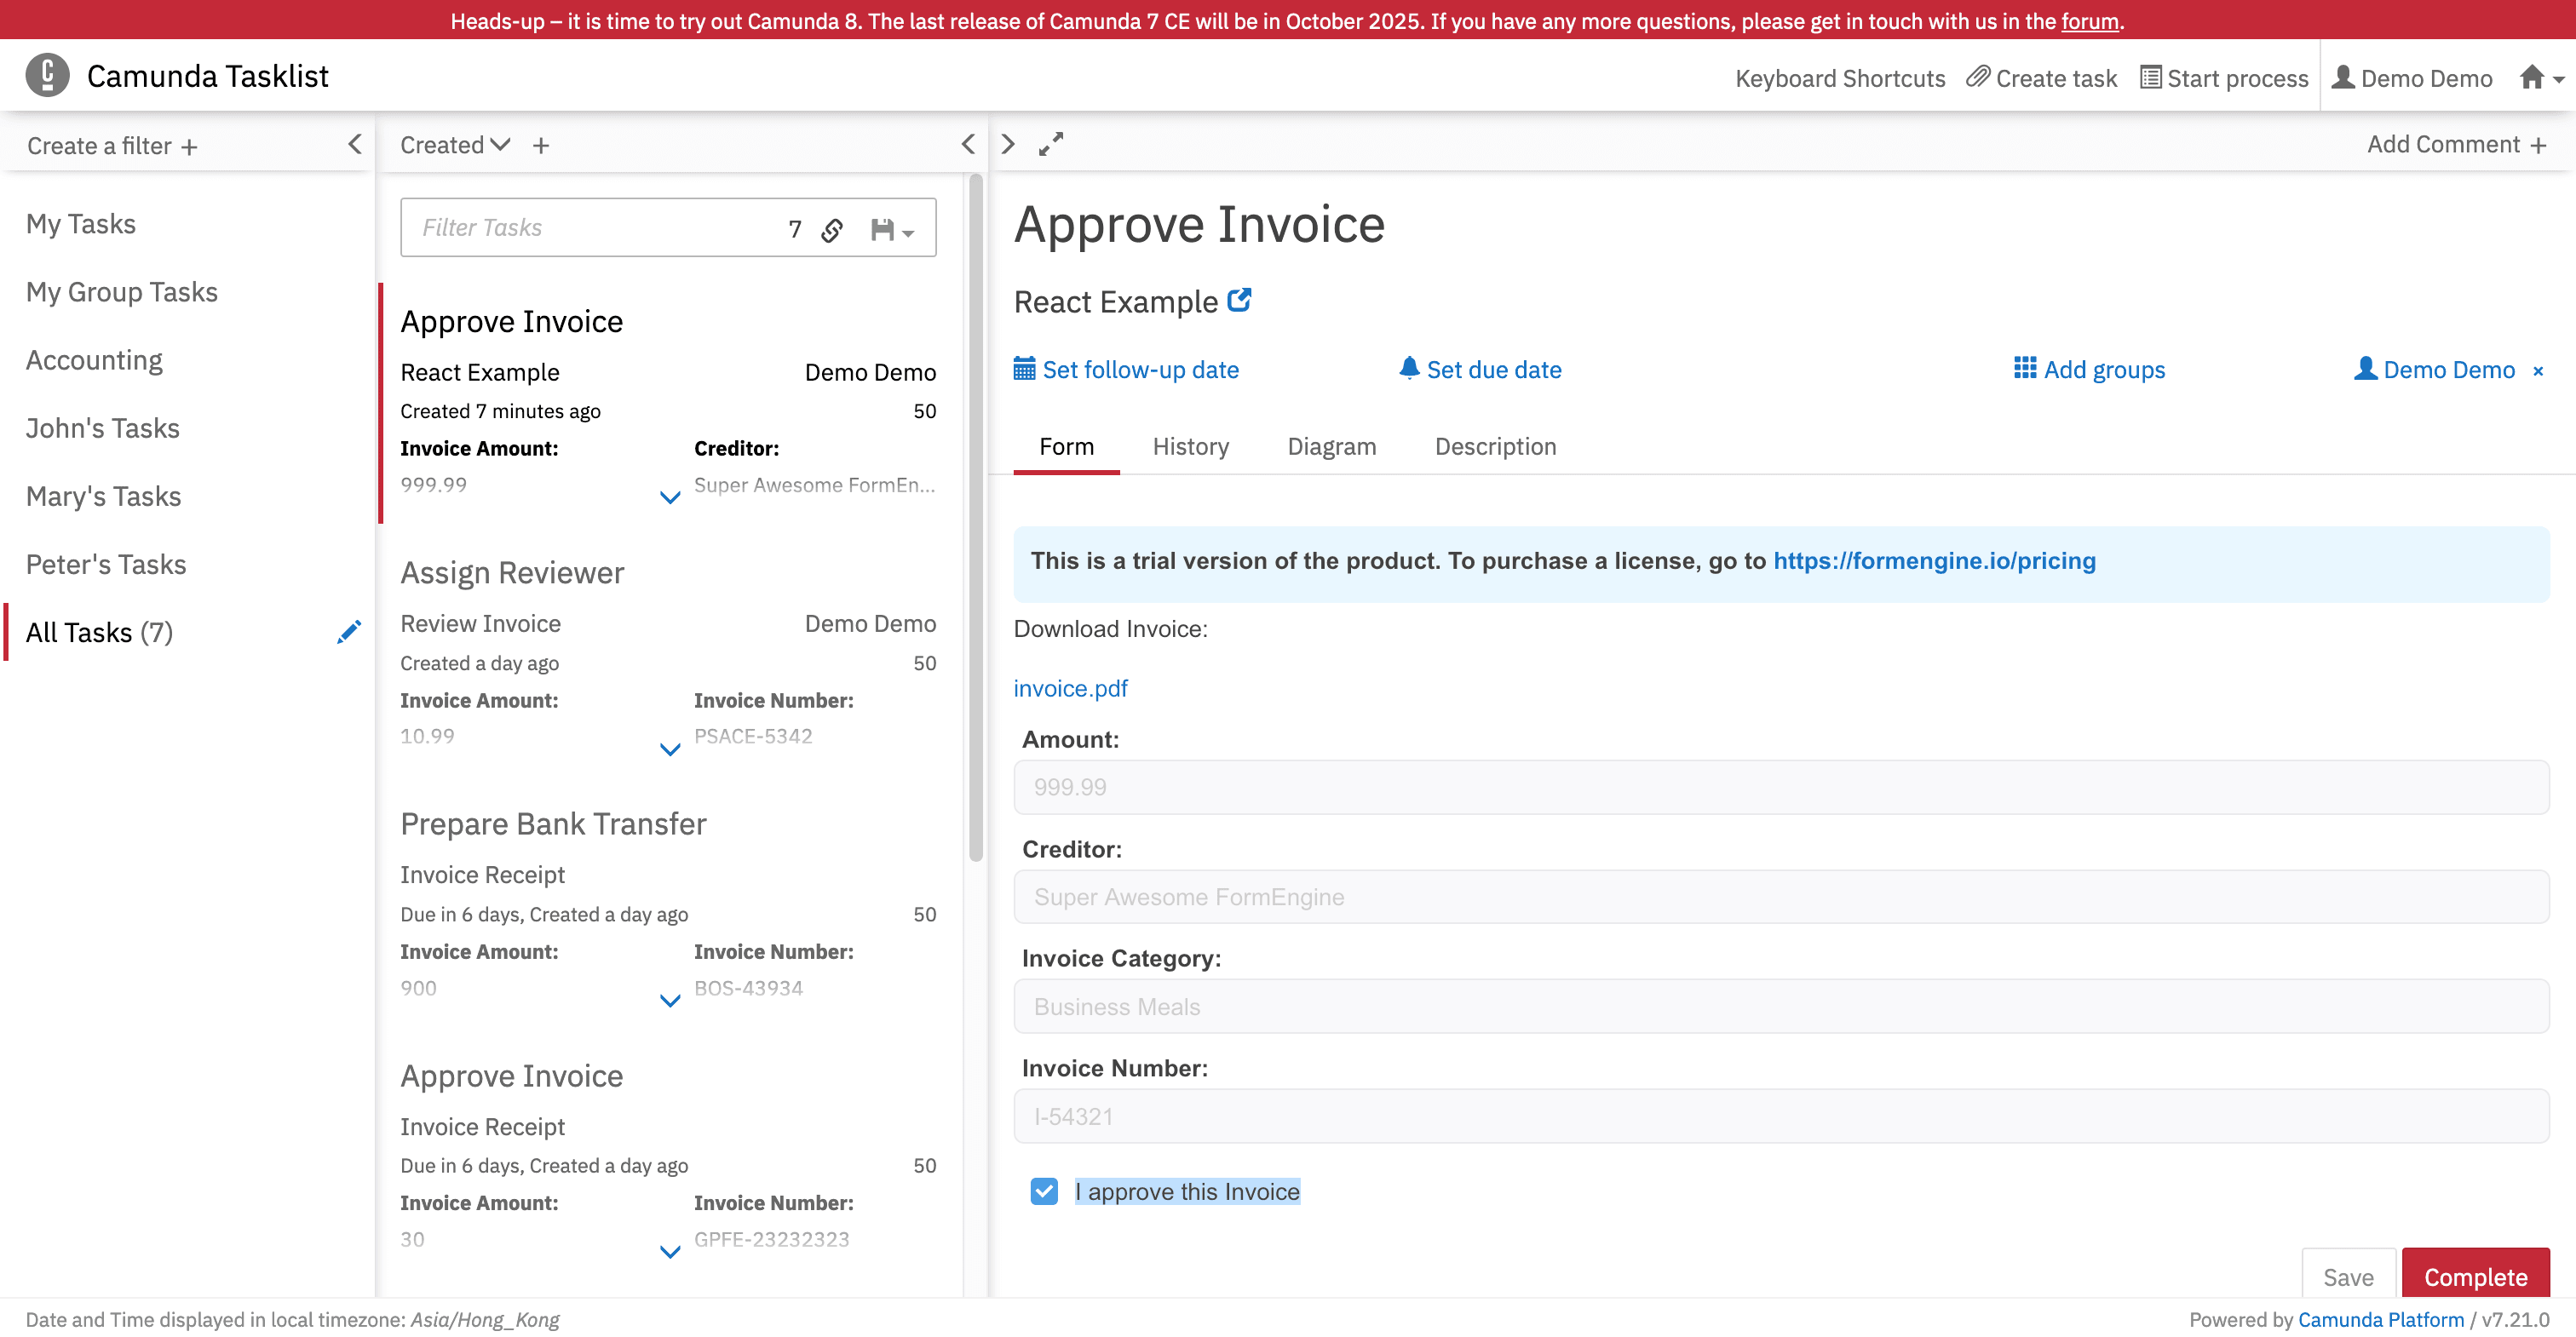
- Complete the task:
- The form you see is uploaded from the
task-form.htmlfile. - Fill out the form by clicking on the "I approve this Invoice" checkbox, then click the "Complete" button:
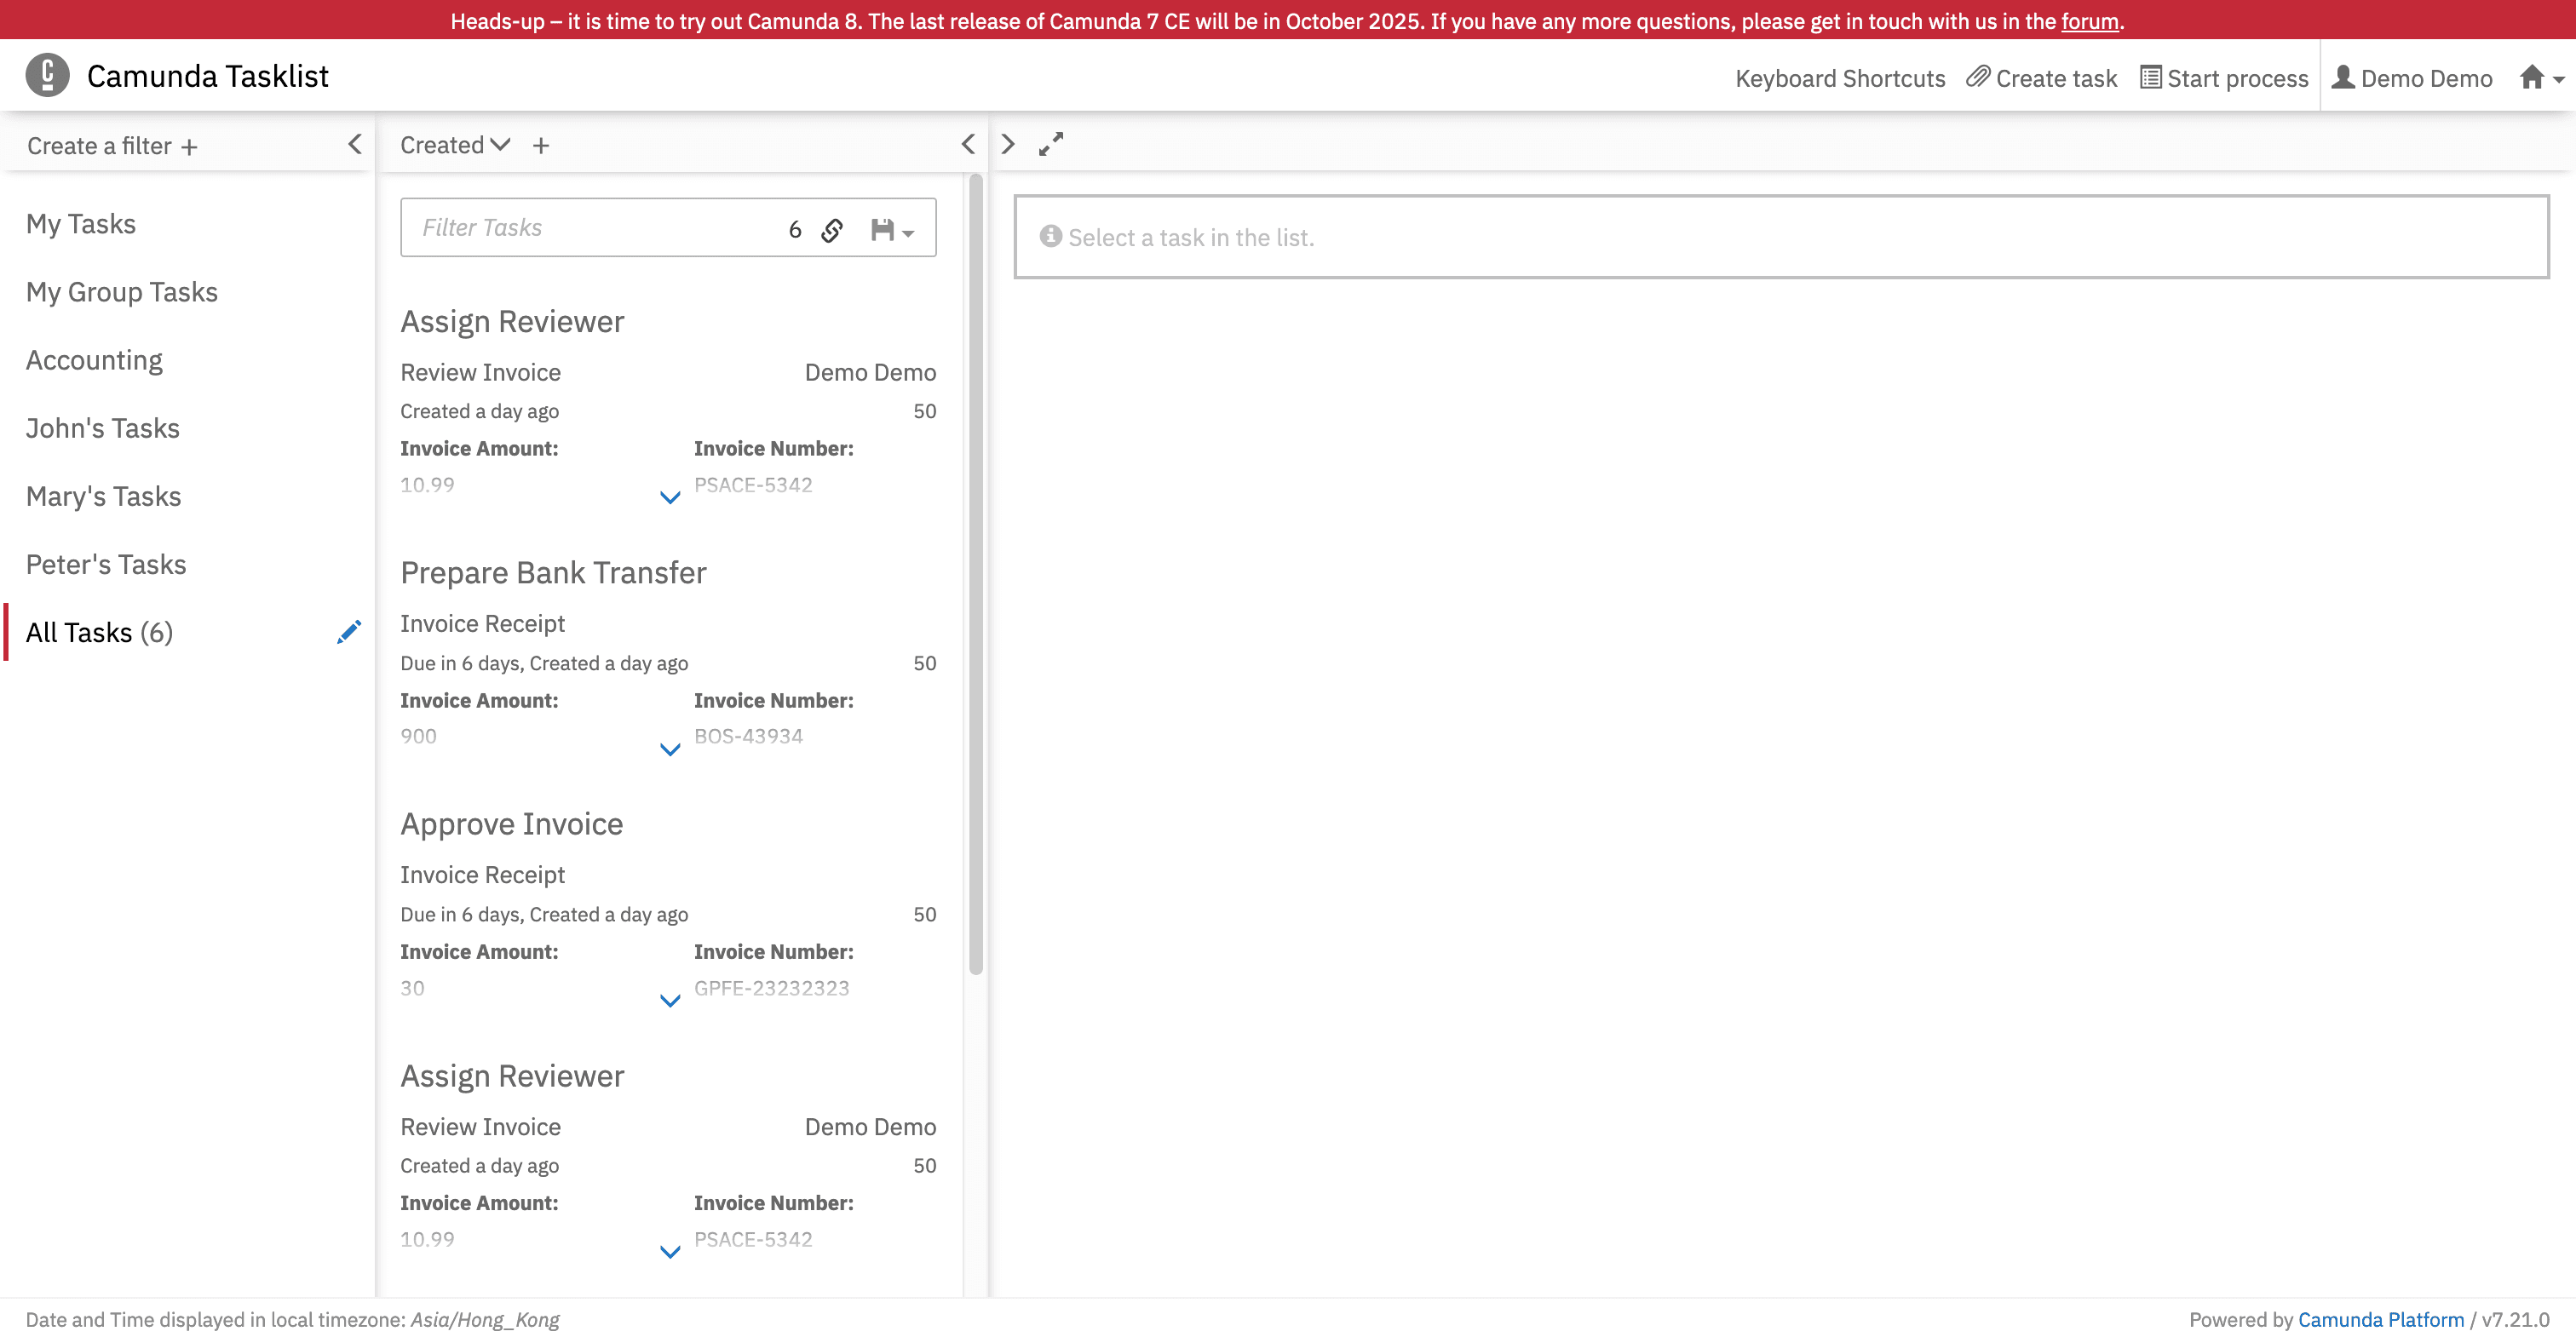
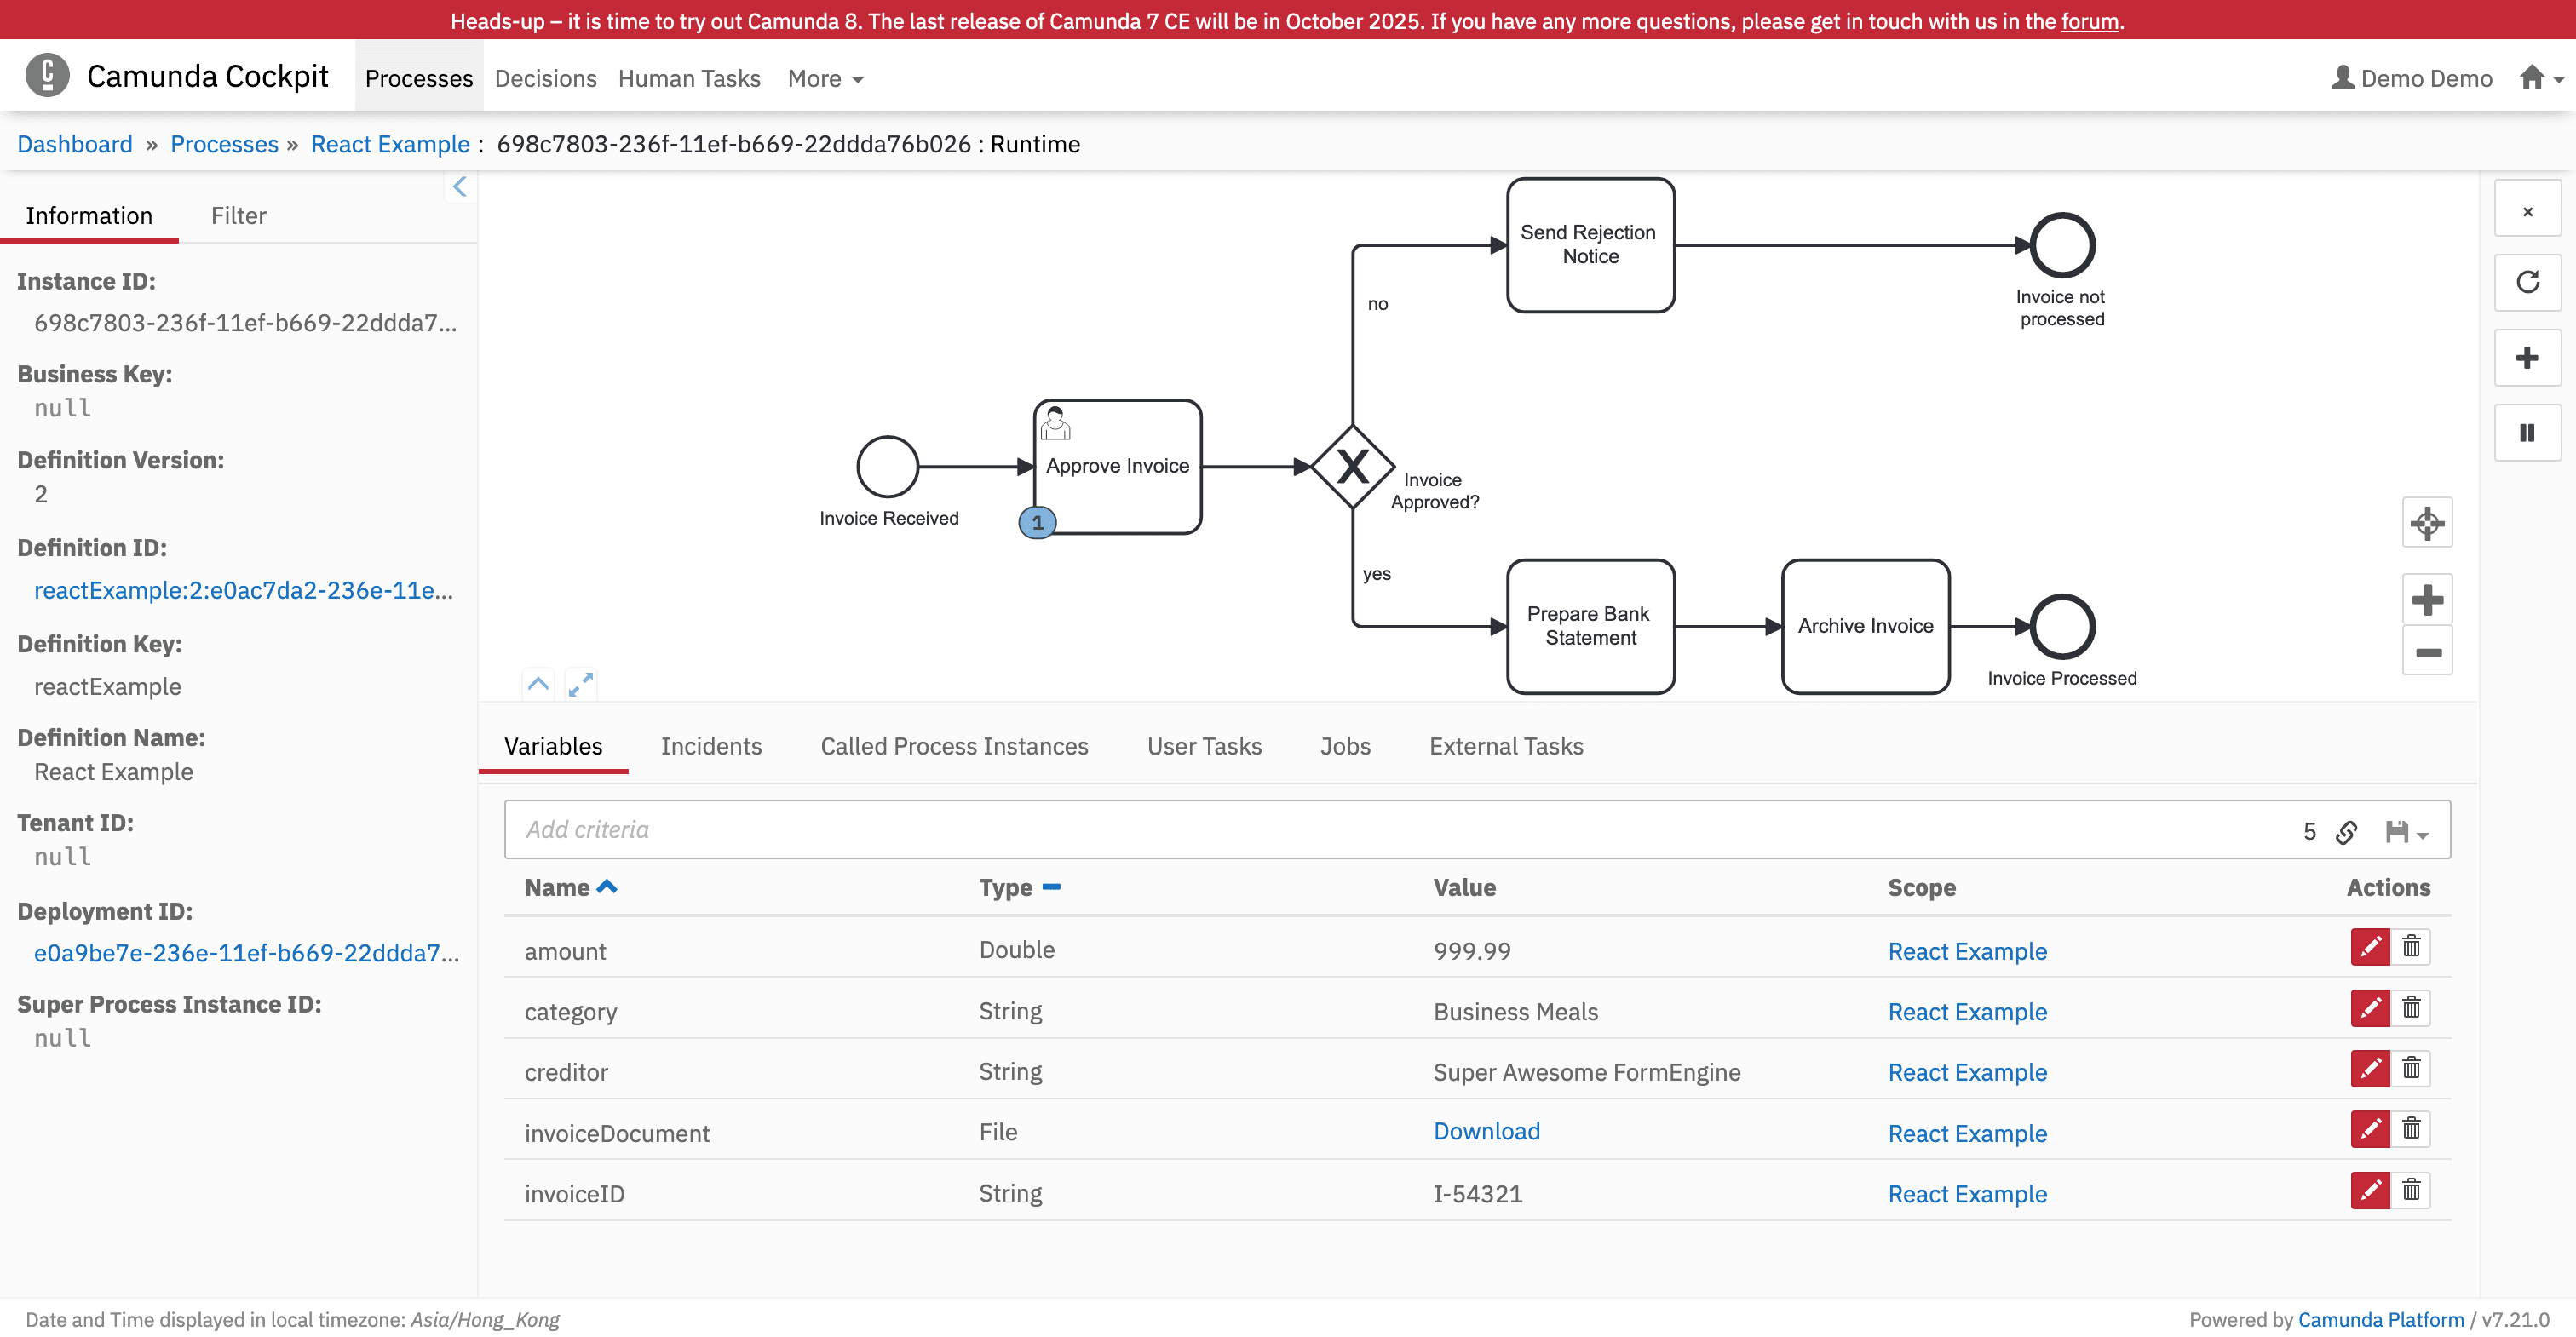
- Verify completion:
- The task will be completed:
Creating forms
To connect FormEngine to Camunda, we will use a package that includes a set of components based on React Suite. These components are utilized in our demo.
First, we need two forms to replace the React forms from the Camunda example. We will omit the process of creating these forms, as it is straightforward to accomplish. For instance, you can use our demo. Simply drag and drop the necessary components onto the form and configure their properties as required. Below are the JSON files containing the forms themselves.
Click to view start-form.
{
  "version": "1",
  "actions": {
    "onChange": {
      "body": "    const setInvoiceDocument = document => e.store.formData.state['invoiceDocument'] = document;\n\n    const blobFile = e.args[0]?.[0]?.blobFile;\n    if (blobFile) {\n        const reader = new FileReader();\n        reader.readAsDataURL(blobFile);\n        reader.onload = () => {\n            setInvoiceDocument(reader.result.replace(/^data:(.*;base64,)?/, ''));\n        };\n        reader.onerror = () => {\n            setInvoiceDocument(undefined);\n        }\n    } else {\n        setInvoiceDocument(undefined);\n    }",
      "params": {}
    }
  },
  "form": {
    "key": "Screen",
    "type": "Screen",
    "props": {},
    "children": [
      {
        "key": "RsContainer 1",
        "type": "RsContainer",
        "props": {},
        "children": [
          {
            "key": "RsLabel 1",
            "type": "RsLabel",
            "props": {
              "text": {
                "value": "Invoice Document:"
              }
            }
          },
          {
            "key": "invoiceDocument",
            "type": "RsUploader",
            "props": {
              "autoUpload": {
                "value": false
              }
            },
            "events": {
              "onChange": [
                {
                  "name": "onChange",
                  "type": "code"
                }
              ]
            }
          }
        ]
      },
      {
        "key": "creditor",
        "type": "RsInput",
        "props": {
          "label": {
            "value": "Creditor:"
          },
          "placeholder": {
            "value": "e.g. \"Super Awesome Pizza\""
          },
          "size": {
            "value": "md"
          }
        }
      },
      {
        "key": "amount",
        "type": "RsNumberFormat",
        "props": {
          "label": {
            "value": "Amount:"
          },
          "placeholder": {
            "value": "e.g. \"30.00\""
          },
          "allowNegative": {
            "value": false
          }
        }
      },
      {
        "key": "invoiceCategory",
        "type": "RsDropdown",
        "props": {
          "label": {
            "value": "Invoice Category:"
          },
          "data": {
            "value": [
              {
                "value": "Travel Expenses",
                "label": "Travel Expenses"
              },
              {
                "value": "Business Meals",
                "label": "Business Meals"
              },
              {
                "value": "Other",
                "label": "Other"
              }
            ]
          },
          "value": {
            "value": ""
          }
        }
      },
      {
        "key": "invoiceNumber",
        "type": "RsInput",
        "props": {
          "placeholder": {
            "value": "e.g. \"I-12345\""
          },
          "label": {
            "value": "Invoice Number:"
          }
        }
      }
    ]
  },
  "localization": {},
  "languages": [
    {
      "code": "en",
      "dialect": "US",
      "name": "English",
      "description": "American English",
      "bidi": "ltr"
    }
  ],
  "defaultLanguage": "en-US"
}
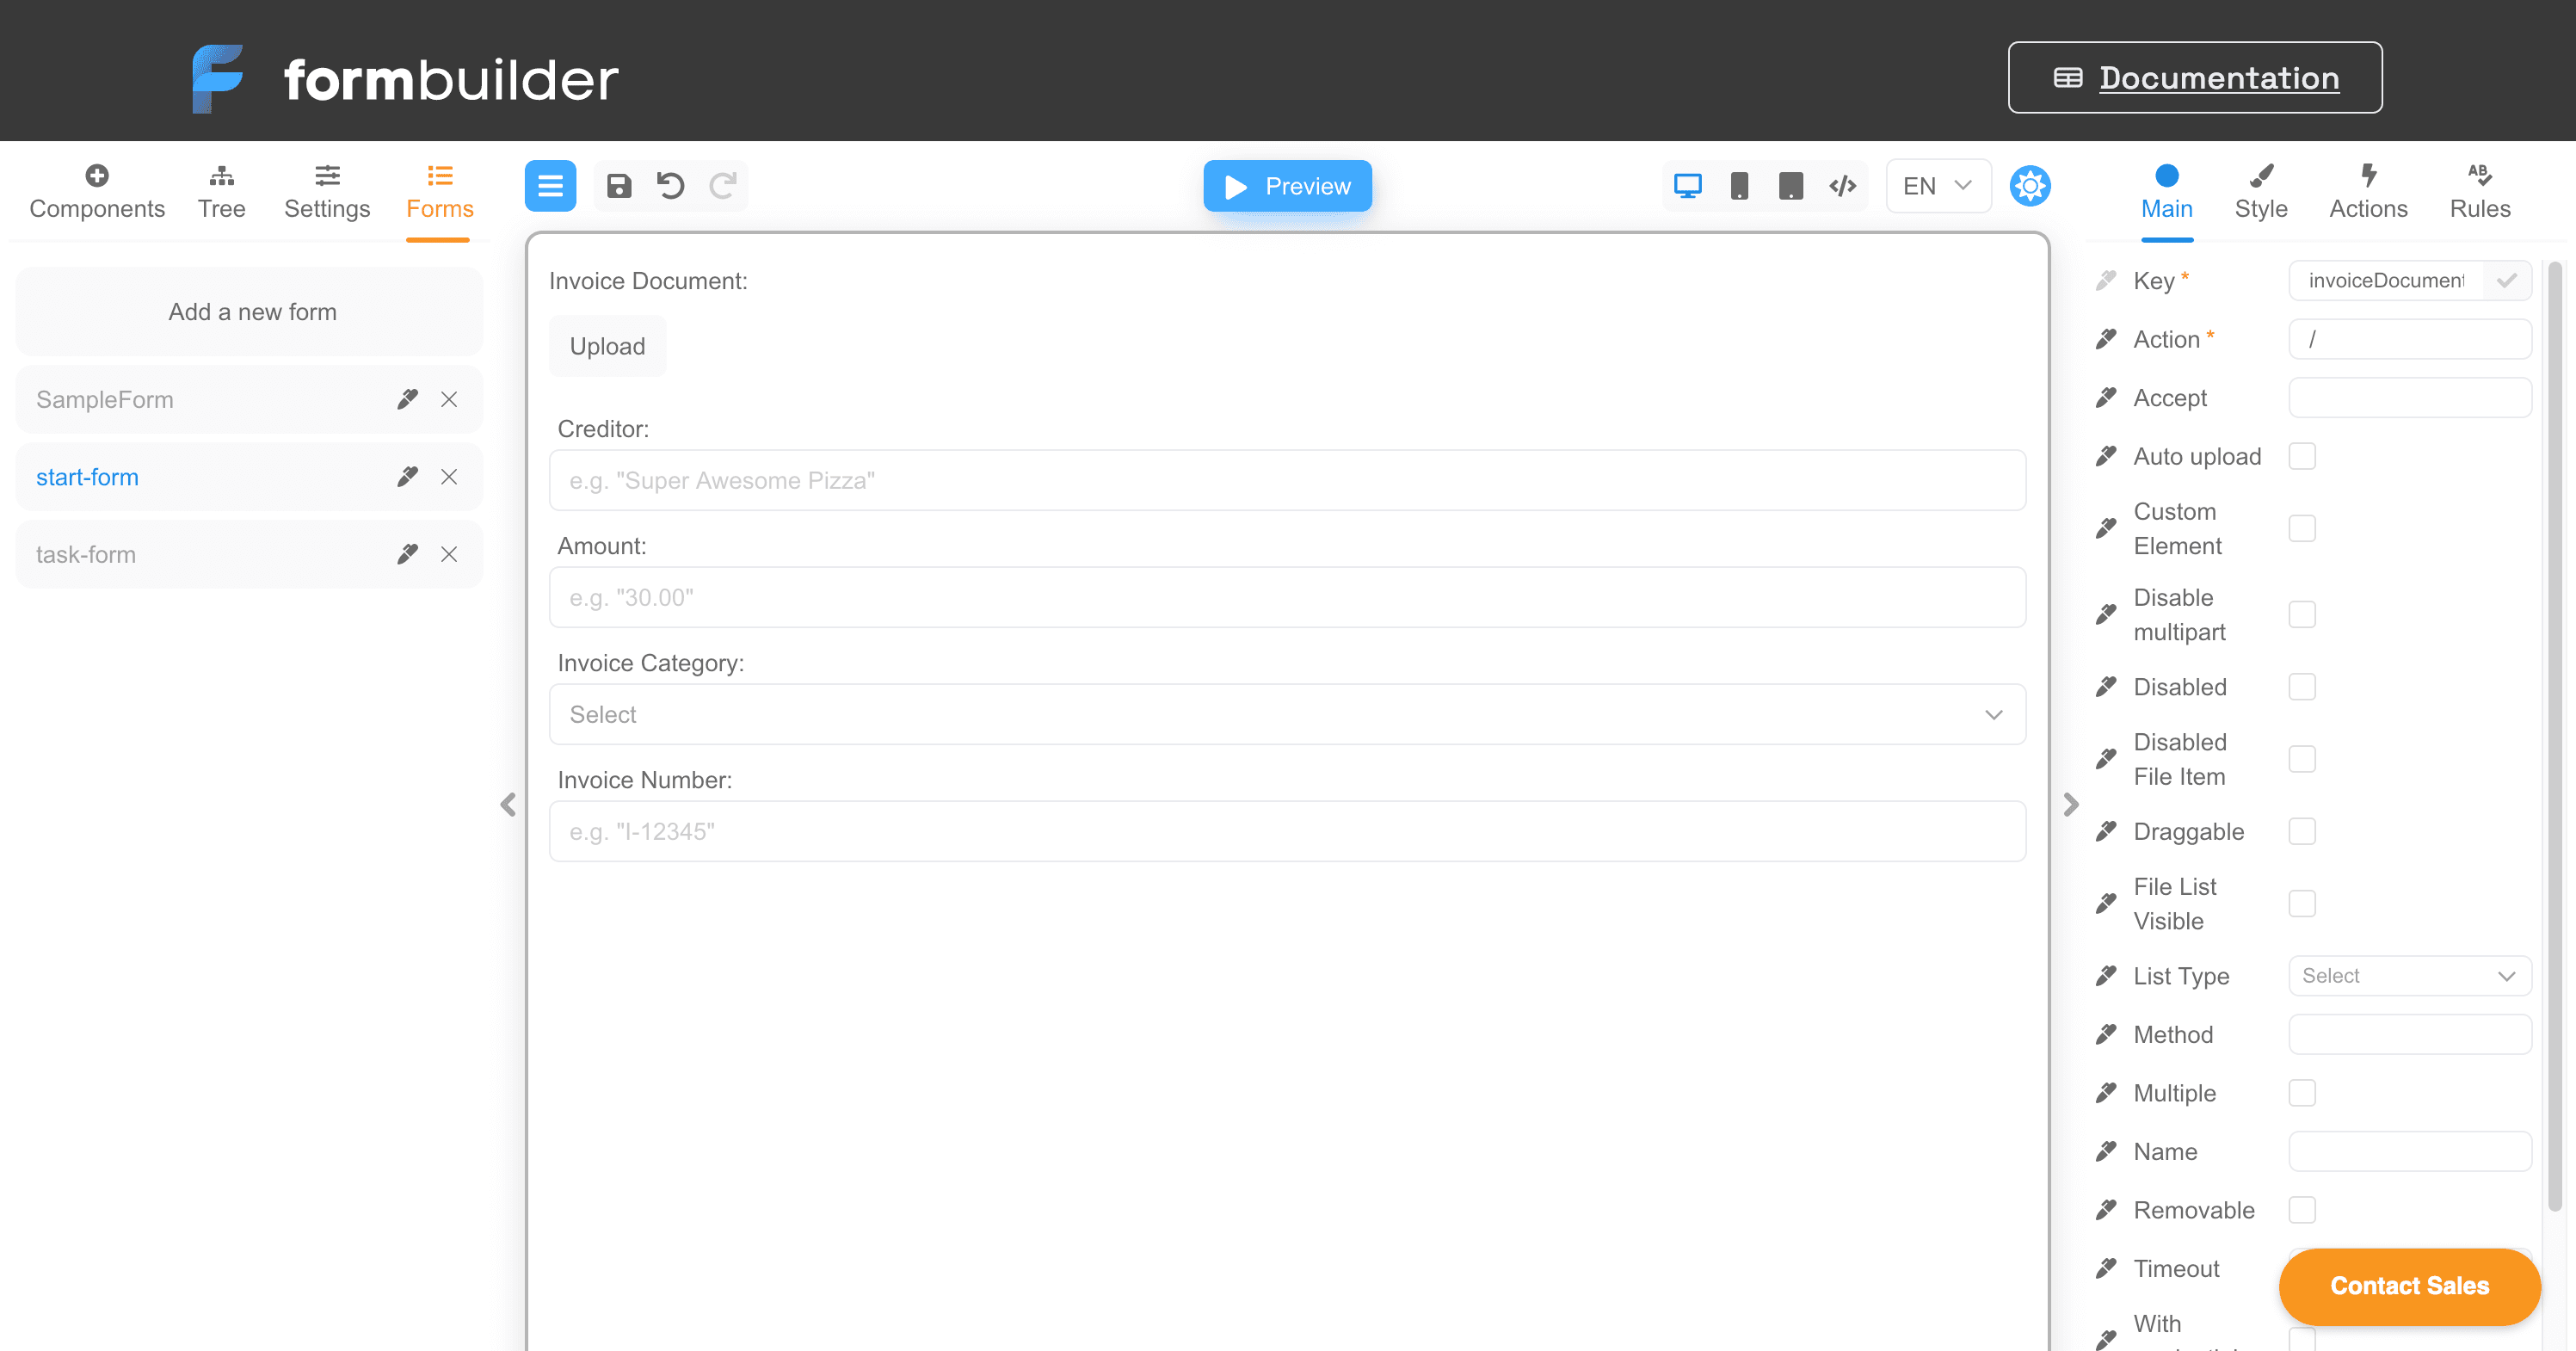
You can see the "start-form" in the screenshot below:
The second form is similar to the first.
Click to view task-form.
{
  "version": "1",
  "form": {
    "key": "Screen",
    "type": "Screen",
    "props": {},
    "children": [
      {
        "key": "RsContainer 1",
        "type": "RsContainer",
        "props": {},
        "children": [
          {
            "key": "RsLabel 1",
            "type": "RsLabel",
            "props": {
              "text": {
                "value": "Download Invoice:"
              }
            }
          },
          {
            "key": "invoiceDocument",
            "type": "RsLink",
            "props": {
              "text": {
                "value": "invoice.pdf"
              },
              "href": {
                "value": "about:blank"
              }
            }
          }
        ]
      },
      {
        "key": "amount",
        "type": "RsNumberFormat",
        "props": {
          "label": {
            "value": "Amount:"
          },
          "placeholder": {
            "value": ""
          },
          "allowNegative": {
            "value": false
          },
          "readOnly": {
            "value": false
          },
          "disabled": {
            "value": true
          }
        }
      },
      {
        "key": "creditor",
        "type": "RsInput",
        "props": {
          "label": {
            "value": "Creditor:"
          },
          "placeholder": {
            "value": ""
          },
          "size": {
            "value": "md"
          },
          "disabled": {
            "value": true
          }
        }
      },
      {
        "key": "category",
        "type": "RsInput",
        "props": {
          "label": {
            "value": "Invoice Category:"
          },
          "disabled": {
            "value": true
          }
        }
      },
      {
        "key": "invoiceID",
        "type": "RsInput",
        "props": {
          "placeholder": {
            "value": ""
          },
          "label": {
            "value": "Invoice Number:"
          },
          "disabled": {
            "value": true
          }
        }
      },
      {
        "key": "approve",
        "type": "RsCheckbox",
        "props": {
          "children": {
            "value": "I approve this Invoice"
          },
          "checked": {
            "value": false
          }
        }
      }
    ]
  },
  "localization": {},
  "languages": [
    {
      "code": "en",
      "dialect": "US",
      "name": "English",
      "description": "American English",
      "bidi": "ltr"
    }
  ],
  "defaultLanguage": "en-US"
}
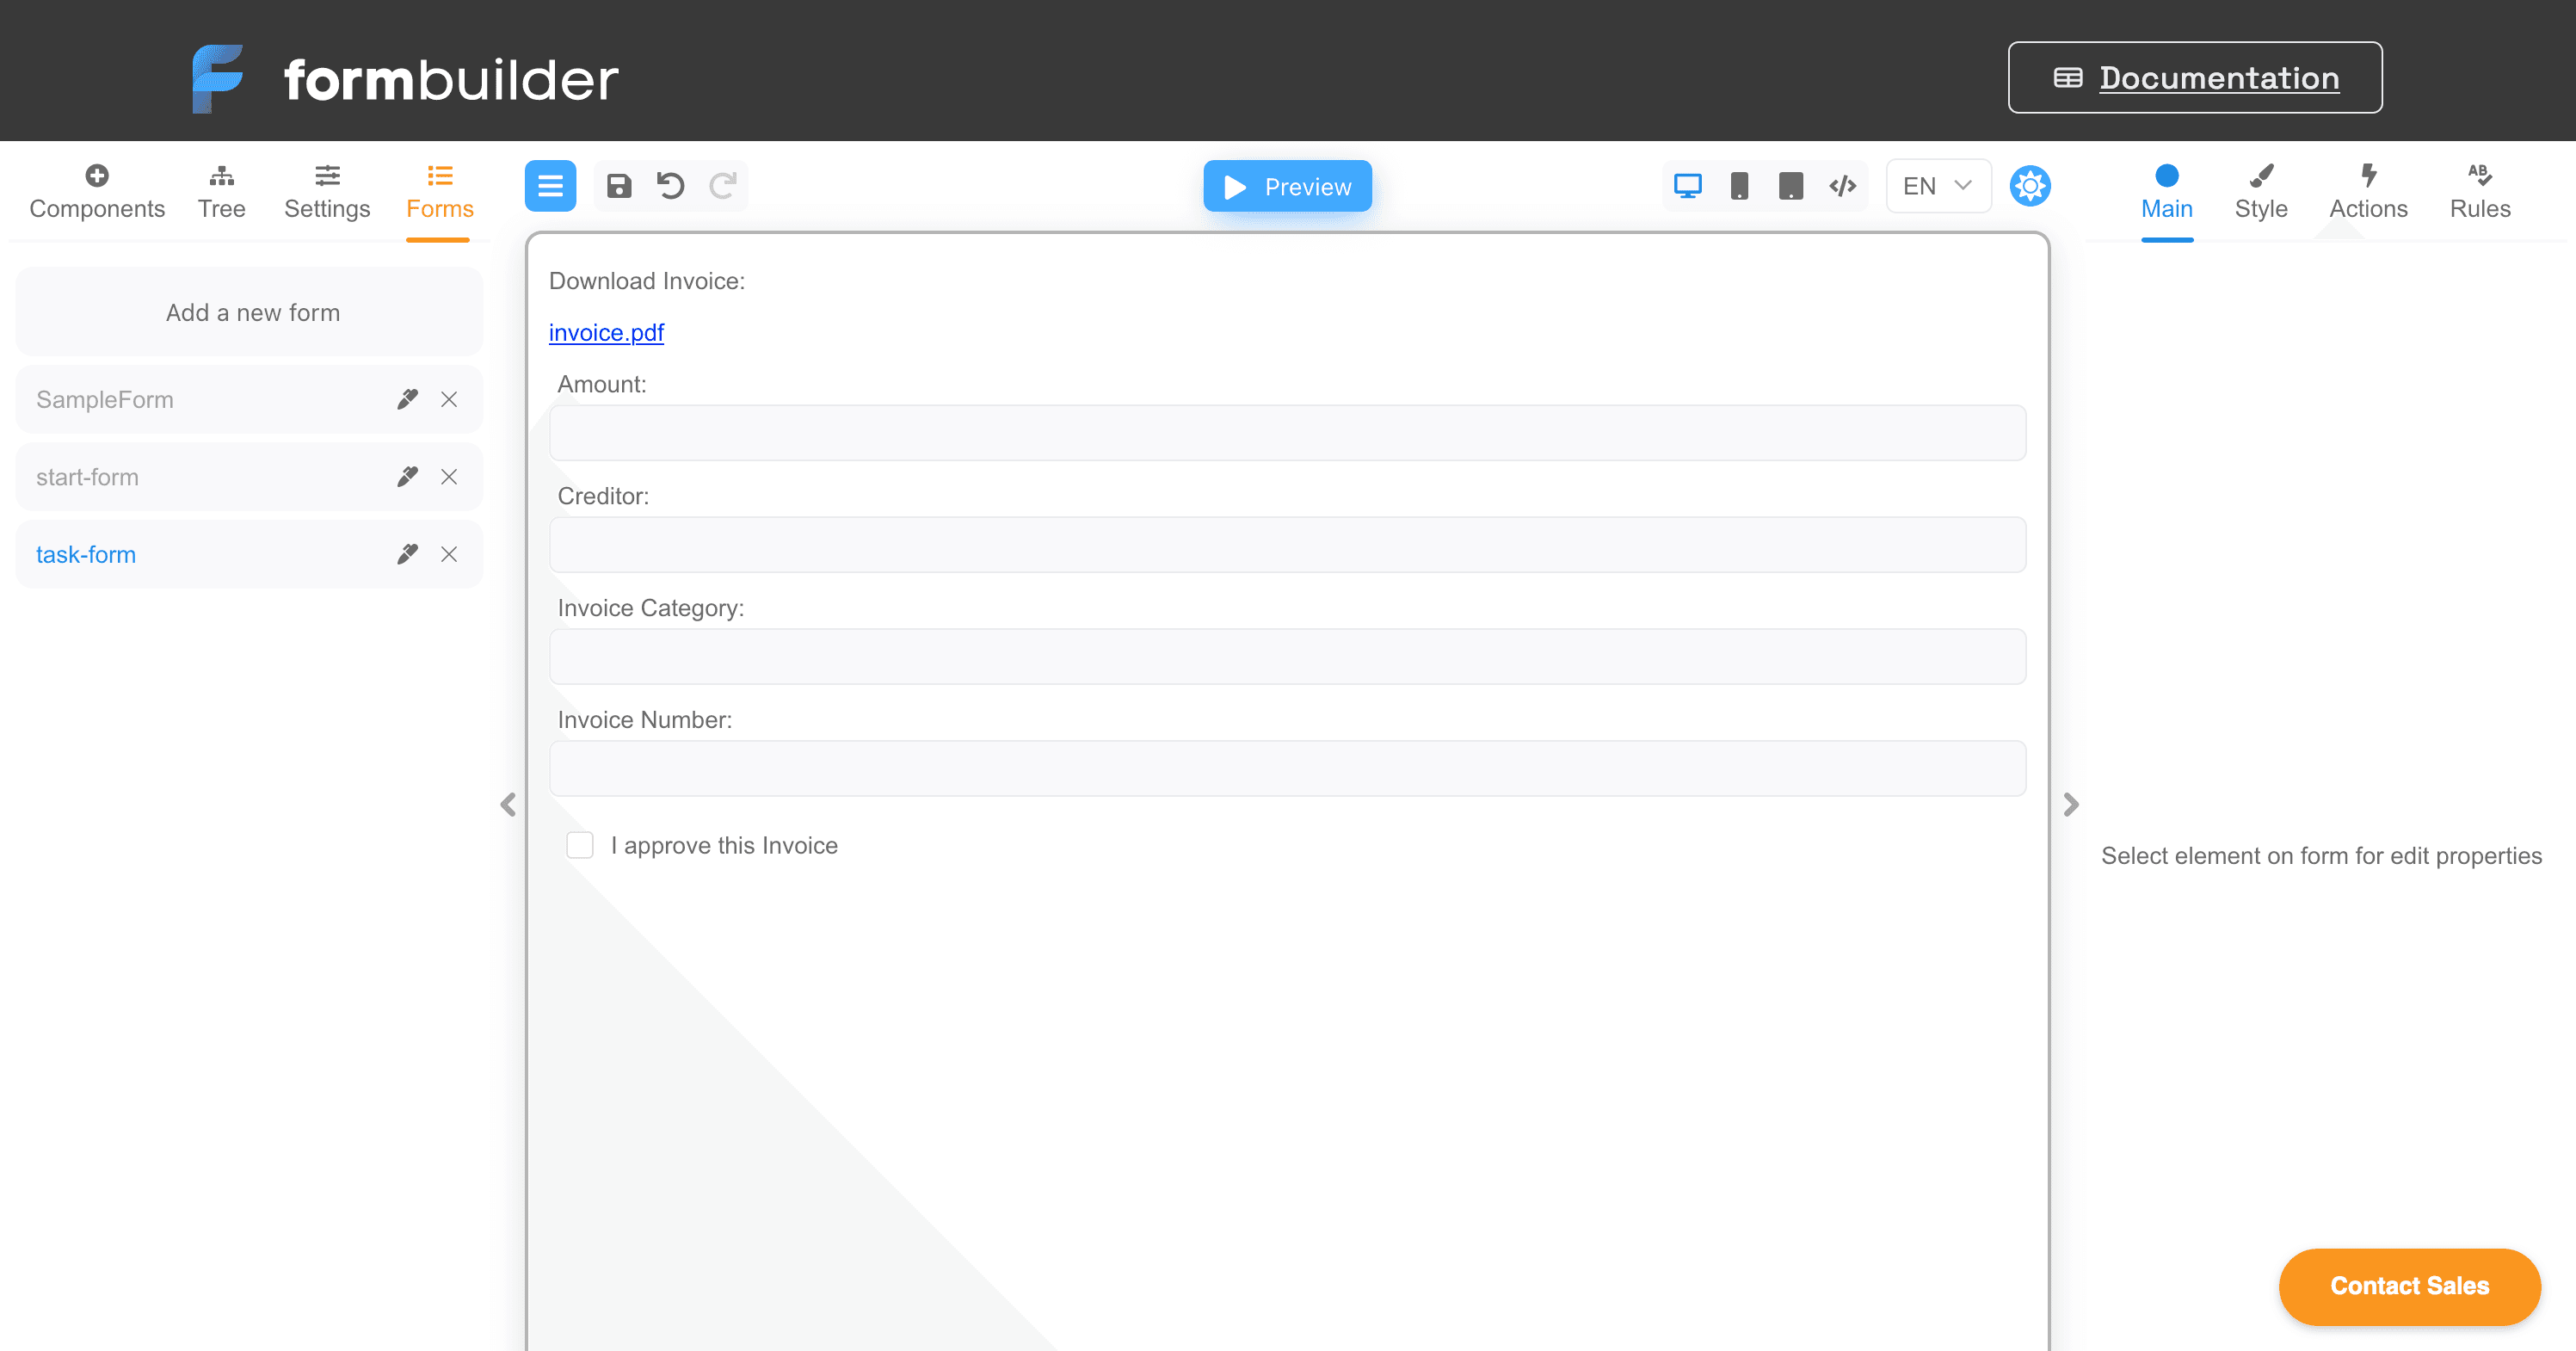
This is what the second form looks like:
Connecting FormEngine to Camunda
When connecting FormEngine to Camunda, we decided to use a bundle designed for use on any web page. This method does not require a separate React connection.
During the connection process, we discovered that Camunda uses a strict Content Security Policy, which prohibits some inline CSS used in the bundle. Therefore, we will connect the component styles separately.
-
Add
loadFormEngine.js:Place
loadFormEngine.jsinapp/tasklist/scripts/formEngineof the Camunda Tasklist webapp (e.g., for Tomcat, it will be/webapps/camunda/app/tasklist/scripts/formEngine).loadFormEngine.jsconst formEngine = document.createElement('script');
formEngine.crossOrigin = true;
formEngine.src = 'https://unpkg.com/@react-form-builder/viewer-bundle@1.2.0/dist/index.umd.js';
document.body.append(formEngine); -
Add the loader to
config.js:Modify
app/tasklist/scripts/config.jsof the Camunda Tasklist webapp to include the loader script. For Tomcat, the path will be/webapps/camunda/app/tasklist/scripts/config.js.config.jscustomScripts: [
'scripts/react/loadReact.js',
'scripts/formEngine/loadFormEngine.js'
] -
Download and add the CSS files:
Download the rsuite-no-reset.min.css file and the formengine-rsuite.css file. Place them in the
app/tasklist/stylesfolder. To avoid configuring the CSP policy, download the styles locally. -
Modify
user-styles.css:Add the following highlighted lines to
app/tasklist/styles/user-styles.css:user-styles.css/*
.navbar-brand {
text-indent: -999em;
background-image: url(./path/to/the/logo.png);
width: 80px;
}
[cam-widget-header] {
border-bottom-color: blue;
}
*/
@import url('./rsuite-no-reset.min.css');
@import url('./formengine-rsuite.css');
.rs-picker-select-menu.rs-picker-popup {
z-index: 2000;
}
Modifying Forms
In the code of both forms, we will use a simple renderFormEngineForm function that will render the form into an HTML element.
The function accepts the following parameters:
formis the JSON of the form.containeris the HTML element where the form will be rendered.additionalPropsare the additional properties of the FormViewer component.
function renderFormEngineForm(form, container, additionalProps) {
  const viewerRef = {current: null};
  const viewerBundle = window.FormEngineViewerBundle;
  const components = viewerBundle.rSuiteComponents;
  const view = components.view.withViewerWrapper(components.RsLocalizationWrapper);
  const props = {
    getForm: () => form,
    view,
    viewerRef,
    ...additionalProps
  };
  viewerBundle.renderFormViewerTo(container, props);
  return viewerRef;
}
Each form's code will have its own renderCamundaForm function that will link the FormEngine form and the Camunda form, which is stored in
the camForm object. In general, the form code is similar to the forms from the React example. See the form code below for reference.
Click to view start-form.
<script>
  function renderFormEngineForm(form, container, additionalProps) {
    const viewerRef = {current: null}
    const viewerBundle = window.FormEngineViewerBundle;
    const components = viewerBundle.rSuiteComponents;
    const view = components.view
      .withViewerWrapper(components.RsLocalizationWrapper);
    const props = {
      getForm: () => form,
      view,
      viewerRef,
      ...additionalProps
    }
    viewerBundle.renderFormViewerTo(container, props);
    return viewerRef;
  }

  function onSubmit(camForm, formRef) {
    const formData = formRef.current.formData.data;
    // the file data was saved via a user action to a user state
    const userState = formRef.current.formData.state;

    camForm.variableManager.createVariable({
        'name': 'invoiceDocument',
        'type': 'File',
        'value': userState.invoiceDocument,
        'valueInfo': {filename: 'invoice.pdf'},
        isDirty: true
      }
    );
    camForm.variableManager.createVariable({
        'name': 'creditor',
        'type': 'String',
        'value': formData.creditor,
        isDirty: true
      }
    );
    camForm.variableManager.createVariable({
        'name': 'amount',
        'type': 'Double',
        'value': formData.amount,
        isDirty: true
      }
    );
    camForm.variableManager.createVariable({
        'name': 'category',
        'type': 'String',
        'value': formData.invoiceCategory,
        isDirty: true
      }
    );
    camForm.variableManager.createVariable({
        'name': 'invoiceID',
        'type': 'String',
        'value': formData.invoiceNumber,
        isDirty: true
      }
    );
  }

  function renderCamundaForm(elementId, camForm) {
    const form = `
{
  "version": "1",
  "actions": {
    "onChange": {
      "body": "    const setInvoiceDocument = document => e.store.formData.state['invoiceDocument'] = document;\\n\\n    const blobFile = e.args[0]?.[0]?.blobFile;\\n    if (blobFile) {\\n        const reader = new FileReader();\\n        reader.readAsDataURL(blobFile);\\n        reader.onload = () => {\\n            setInvoiceDocument(reader.result.replace(/^data:(.*;base64,)?/, ''));\\n        };\\n        reader.onerror = () => {\\n            setInvoiceDocument(undefined);\\n        }\\n    } else {\\n        setInvoiceDocument(undefined);\\n    }",
      "params": {}
    }
  },
  "form": {
    "key": "Screen",
    "type": "Screen",
    "props": {},
    "children": [
      {
        "key": "RsContainer 1",
        "type": "RsContainer",
        "props": {},
        "children": [
          {
            "key": "RsLabel 1",
            "type": "RsLabel",
            "props": {
              "text": {
                "value": "Invoice Document:"
              }
            }
          },
          {
            "key": "invoiceDocument",
            "type": "RsUploader",
            "props": {
              "autoUpload": {
                "value": false
              }
            },
            "events": {
              "onChange": [
                {
                  "name": "onChange",
                  "type": "code"
                }
              ]
            }
          }
        ]
      },
      {
        "key": "creditor",
        "type": "RsInput",
        "props": {
          "label": {
            "value": "Creditor:"
          },
          "placeholder": {
            "value": "e.g. \\"Super Awesome Pizza\\""
          },
          "size": {
            "value": "md"
          }
        }
      },
      {
        "key": "amount",
        "type": "RsNumberFormat",
        "props": {
          "label": {
            "value": "Amount:"
          },
          "placeholder": {
            "value": "e.g. \\"30.00\\""
          },
          "allowNegative": {
            "value": false
          }
        }
      },
      {
        "key": "invoiceCategory",
        "type": "RsDropdown",
        "props": {
          "label": {
            "value": "Invoice Category:"
          },
          "data": {
            "value": [
              {
                "value": "Travel Expenses",
                "label": "Travel Expenses"
              },
              {
                "value": "Business Meals",
                "label": "Business Meals"
              },
              {
                "value": "Other",
                "label": "Other"
              }
            ]
          },
          "value": {
            "value": ""
          }
        }
      },
      {
        "key": "invoiceNumber",
        "type": "RsInput",
        "props": {
          "placeholder": {
            "value": "e.g. \\"I-12345\\""
          },
          "label": {
            "value": "Invoice Number:"
          }
        }
      }
    ]
  },
  "localization": {},
  "languages": [
    {
      "code": "en",
      "dialect": "US",
      "name": "English",
      "description": "American English",
      "bidi": "ltr"
    }
  ],
  "defaultLanguage": "en-US"
}`

    const viewerContainer = document.getElementById(elementId);
    const formRef = renderFormEngineForm(form, viewerContainer);

    camForm.on('submit', () => {
      onSubmit(camForm, formRef)
    });
  }
</script>

<form class='form-horizontal'>
  <div id="formViewerContainer"></div>

  <script cam-script type='text/form-script'>
    renderCamundaForm('formViewerContainer', camForm);
  </script>
</form>
Click to view task-form.
<script>
  function renderFormEngineForm(form, container, additionalProps) {
    const viewerRef = {current: null}
    const viewerBundle = window.FormEngineViewerBundle;
    const components = viewerBundle.rSuiteComponents;
    const view = components.view
      .withViewerWrapper(components.RsLocalizationWrapper);
    const props = {
      getForm: () => form,
      view,
      viewerRef,
      ...additionalProps
    }
    viewerBundle.renderFormViewerTo(container, props);
    return viewerRef;
  }

  function renderCamundaForm(elementId, camForm, scope) {
    const camVars = camForm.variableManager.variables;
    const invoiceUrl = camVars.invoiceDocument.contentUrl;

    const form = `{
  "version": "1",
  "form": {
    "key": "Screen",
    "type": "Screen",
    "props": {},
    "children": [
      {
        "key": "RsContainer 1",
        "type": "RsContainer",
        "props": {},
        "children": [
          {
            "key": "RsLabel 1",
            "type": "RsLabel",
            "props": {
              "text": {
                "value": "Download Invoice:"
              }
            }
          },
          {
            "key": "invoiceDocument",
            "type": "RsLink",
            "props": {
              "text": {
                "value": "invoice.pdf"
              },
              "href": {
                "value": "${invoiceUrl}"
              }
            }
          }
        ]
      },
      {
        "key": "amount",
        "type": "RsNumberFormat",
        "props": {
          "label": {
            "value": "Amount:"
          },
          "placeholder": {
            "value": ""
          },
          "allowNegative": {
            "value": false
          },
          "readOnly": {
            "value": false
          },
          "disabled": {
            "value": true
          }
        }
      },
      {
        "key": "creditor",
        "type": "RsInput",
        "props": {
          "label": {
            "value": "Creditor:"
          },
          "placeholder": {
            "value": ""
          },
          "size": {
            "value": "md"
          },
          "disabled": {
            "value": true
          }
        }
      },
      {
        "key": "category",
        "type": "RsInput",
        "props": {
          "label": {
            "value": "Invoice Category:"
          },
          "disabled": {
            "value": true
          }
        }
      },
      {
        "key": "invoiceID",
        "type": "RsInput",
        "props": {
          "placeholder": {
            "value": ""
          },
          "label": {
            "value": "Invoice Number:"
          },
          "disabled": {
            "value": true
          }
        }
      },
      {
        "key": "approve",
        "type": "RsCheckbox",
        "props": {
          "children": {
            "value": "I approve this Invoice"
          },
          "checked": {
            "value": false
          }
        }
      }
    ]
  },
  "localization": {},
  "languages": [
    {
      "code": "en",
      "dialect": "US",
      "name": "English",
      "description": "American English",
      "bidi": "ltr"
    }
  ],
  "defaultLanguage": "en-US"
}`

    const additionalProps = {
      initialData: {
        amount: camVars.amount.value,
        creditor: camVars.creditor.value,
        invoiceID: camVars.invoiceID.value,
        approved: camVars.approved.value,
        category: camVars.category.value
      },
      onFormDataChange: ({data, errors}) => {
        camForm.variableManager.variableValue('approved', data.approve);
        if (data.approve !== camVars.approved.value) {
          // Activate 'save' button
          scope.$$camForm.$dirty = true;
        }
      }
    }

    const viewerContainer = document.getElementById(elementId);
    renderFormEngineForm(form, viewerContainer, additionalProps);
  }
</script>

<form class='form-horizontal'>
  <div id='formViewerContainer'/>

  <script cam-script type='text/form-script'>

    // Fetch Variables and create new ones
    camForm.on('form-loaded', function () {
      camForm.variableManager.createVariable({
        'name': 'approved',
        'type': 'Boolean',
        'value': false,
        isDirty: true
      });

      camForm.variableManager.fetchVariable('amount');
      camForm.variableManager.fetchVariable('creditor');
      camForm.variableManager.fetchVariable('invoiceID');
      camForm.variableManager.fetchVariable('invoiceDocument');
      camForm.variableManager.fetchVariable('category');
    });

    camForm.on('variables-applied', function () {
      renderCamundaForm('formViewerContainer', camForm, $scope);
    });
  </script>
</form>
The JSON for the form and the basic code for rendering the form are included in HTML files for this example. In practice, it's likely better to use a separate JavaScript module.
Running FormEngine Forms in Camunda
- Deploy the FormEngine Forms:
- Open Camunda Modeler and click the rocket icon button.
- Delete the selected forms
start-form.htmlandtask-form.html. - Add the forms created for FormEngine.
- Click the Deploy button.

- Open the Camunda Tasklist Web Interface:
- Navigate to http://localhost:8080/camunda/app/tasklist/ and refresh the page.
- Start the Process:
- Click on the “Start Process” button on the top panel.
- Select "React example" in the "Start process" window. You should see the form made with FormEngine.
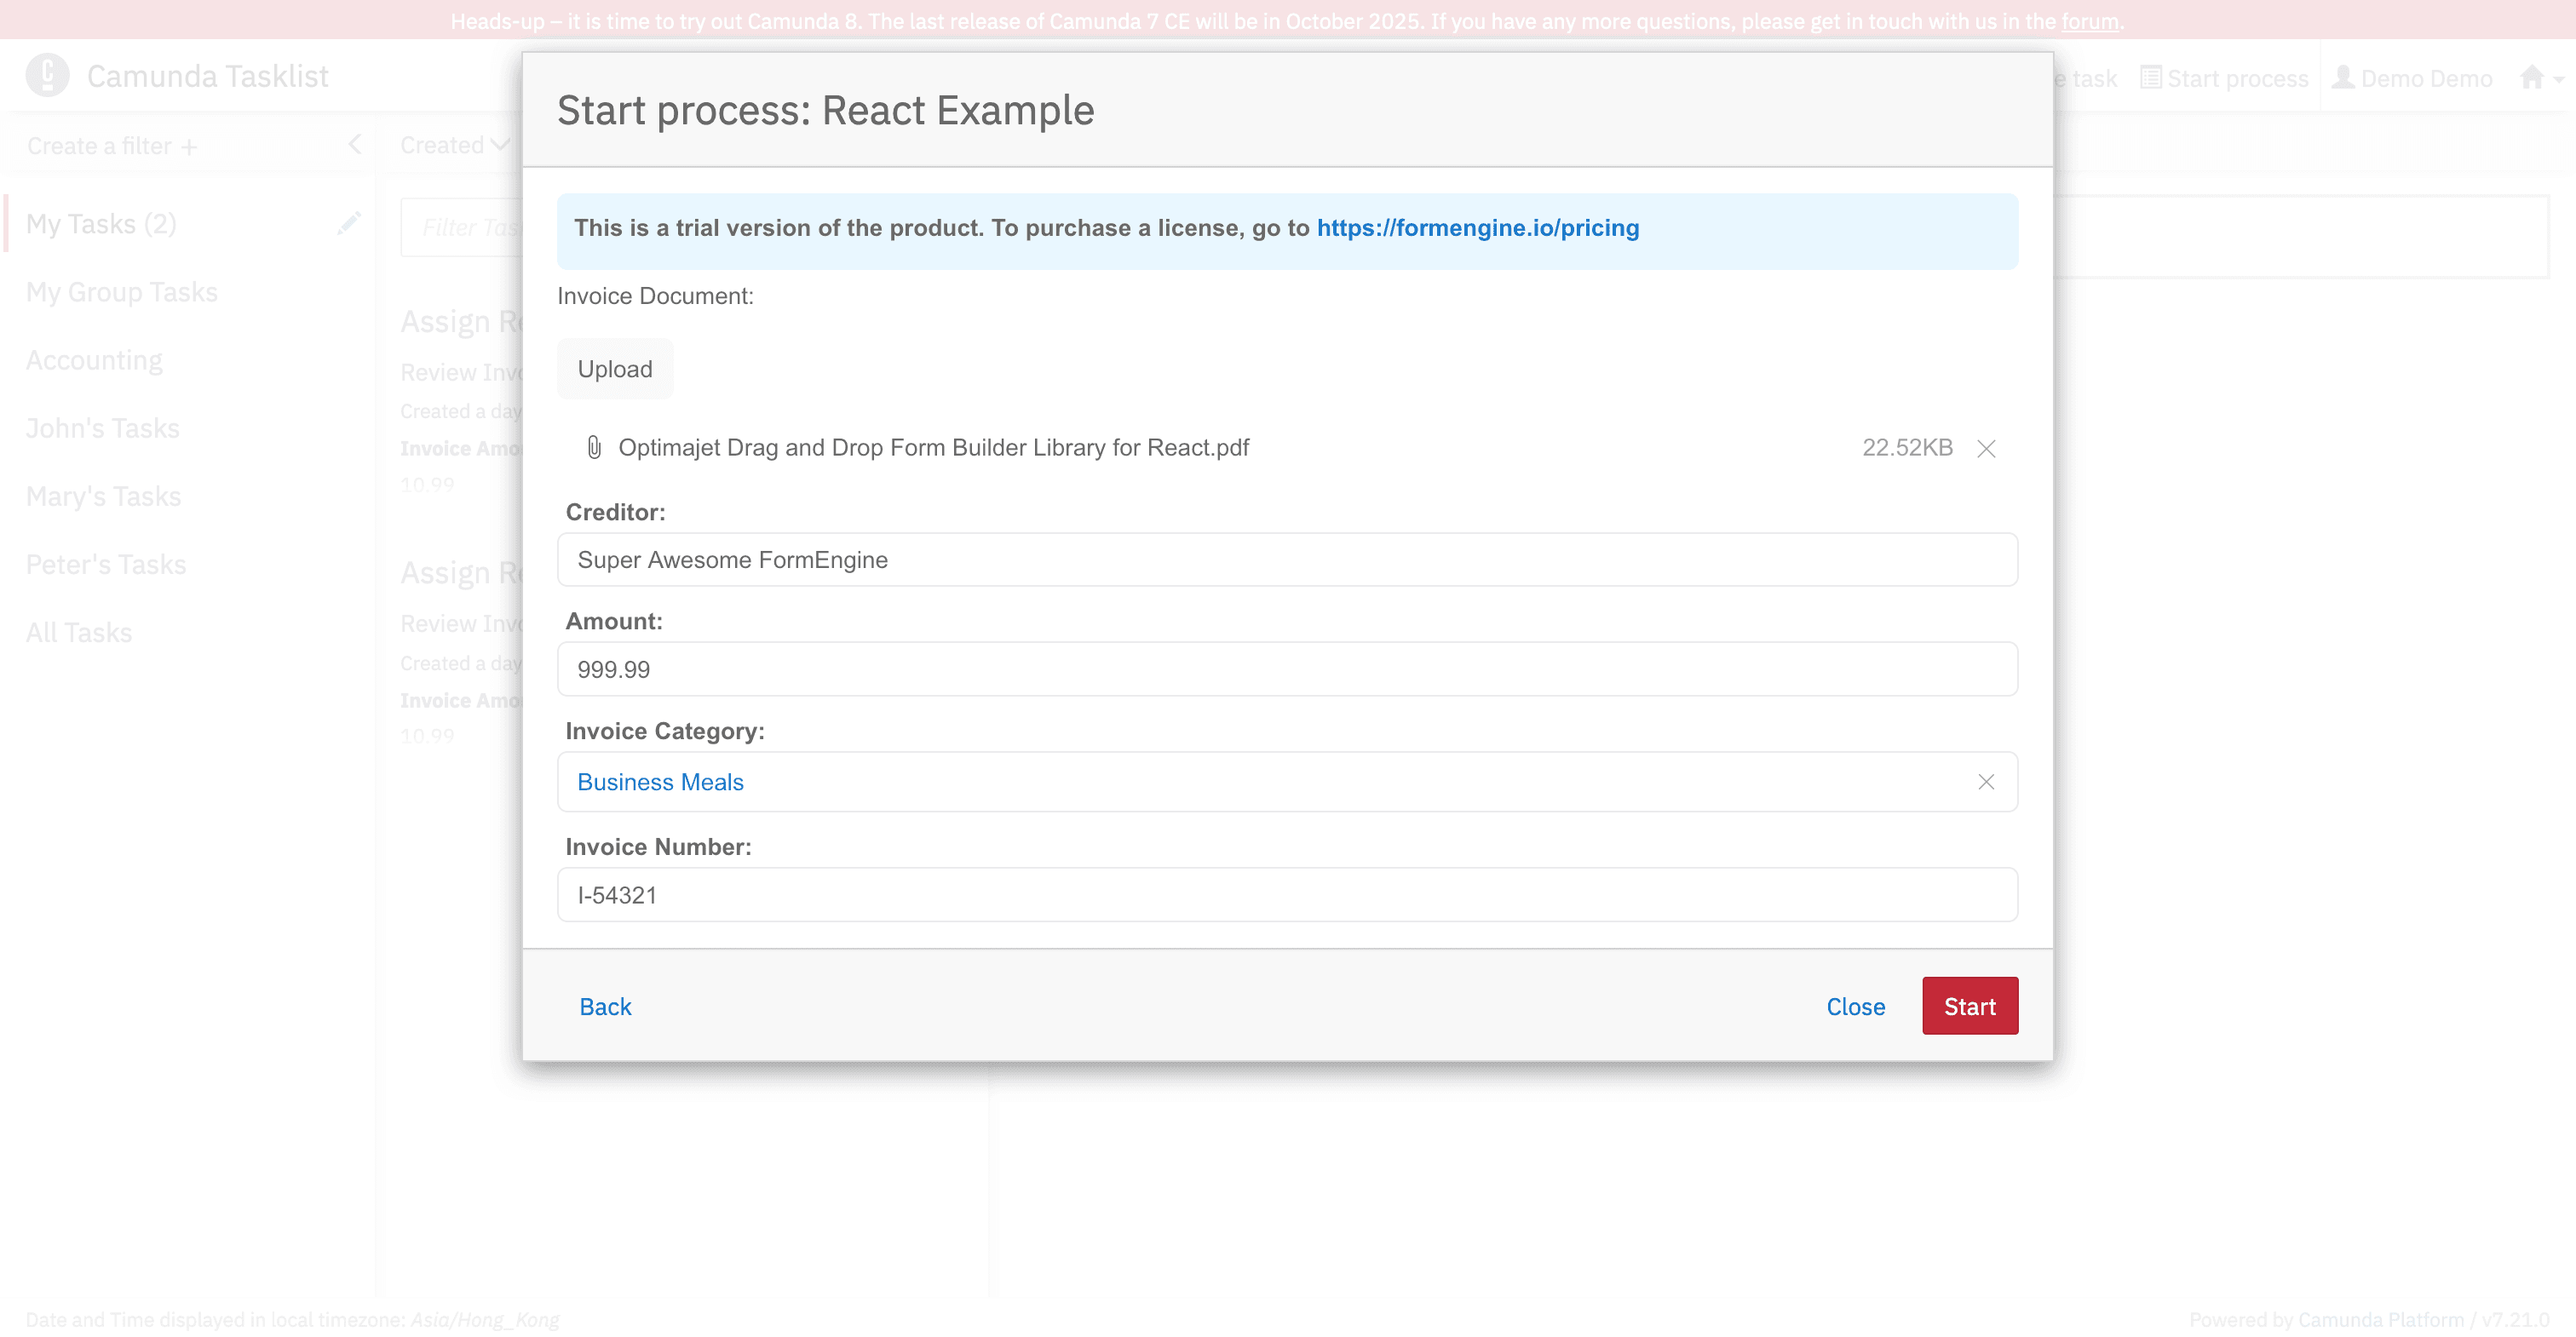
- Fill Out the Form and Start the Process:
- Fill out the form and click the Start button.
- The process has started. Now click on "All Tasks" on the left panel.
- Select and Claim the Task:
- Select the created task from the top.
- Claim the task by clicking on the "Claim" link. The link text will change to "Demo Demo".
- Verify Task Variables and Fill Out the Form:
- You should see that the variables have been populated. Click on the link next to the highlighted text "React Example".
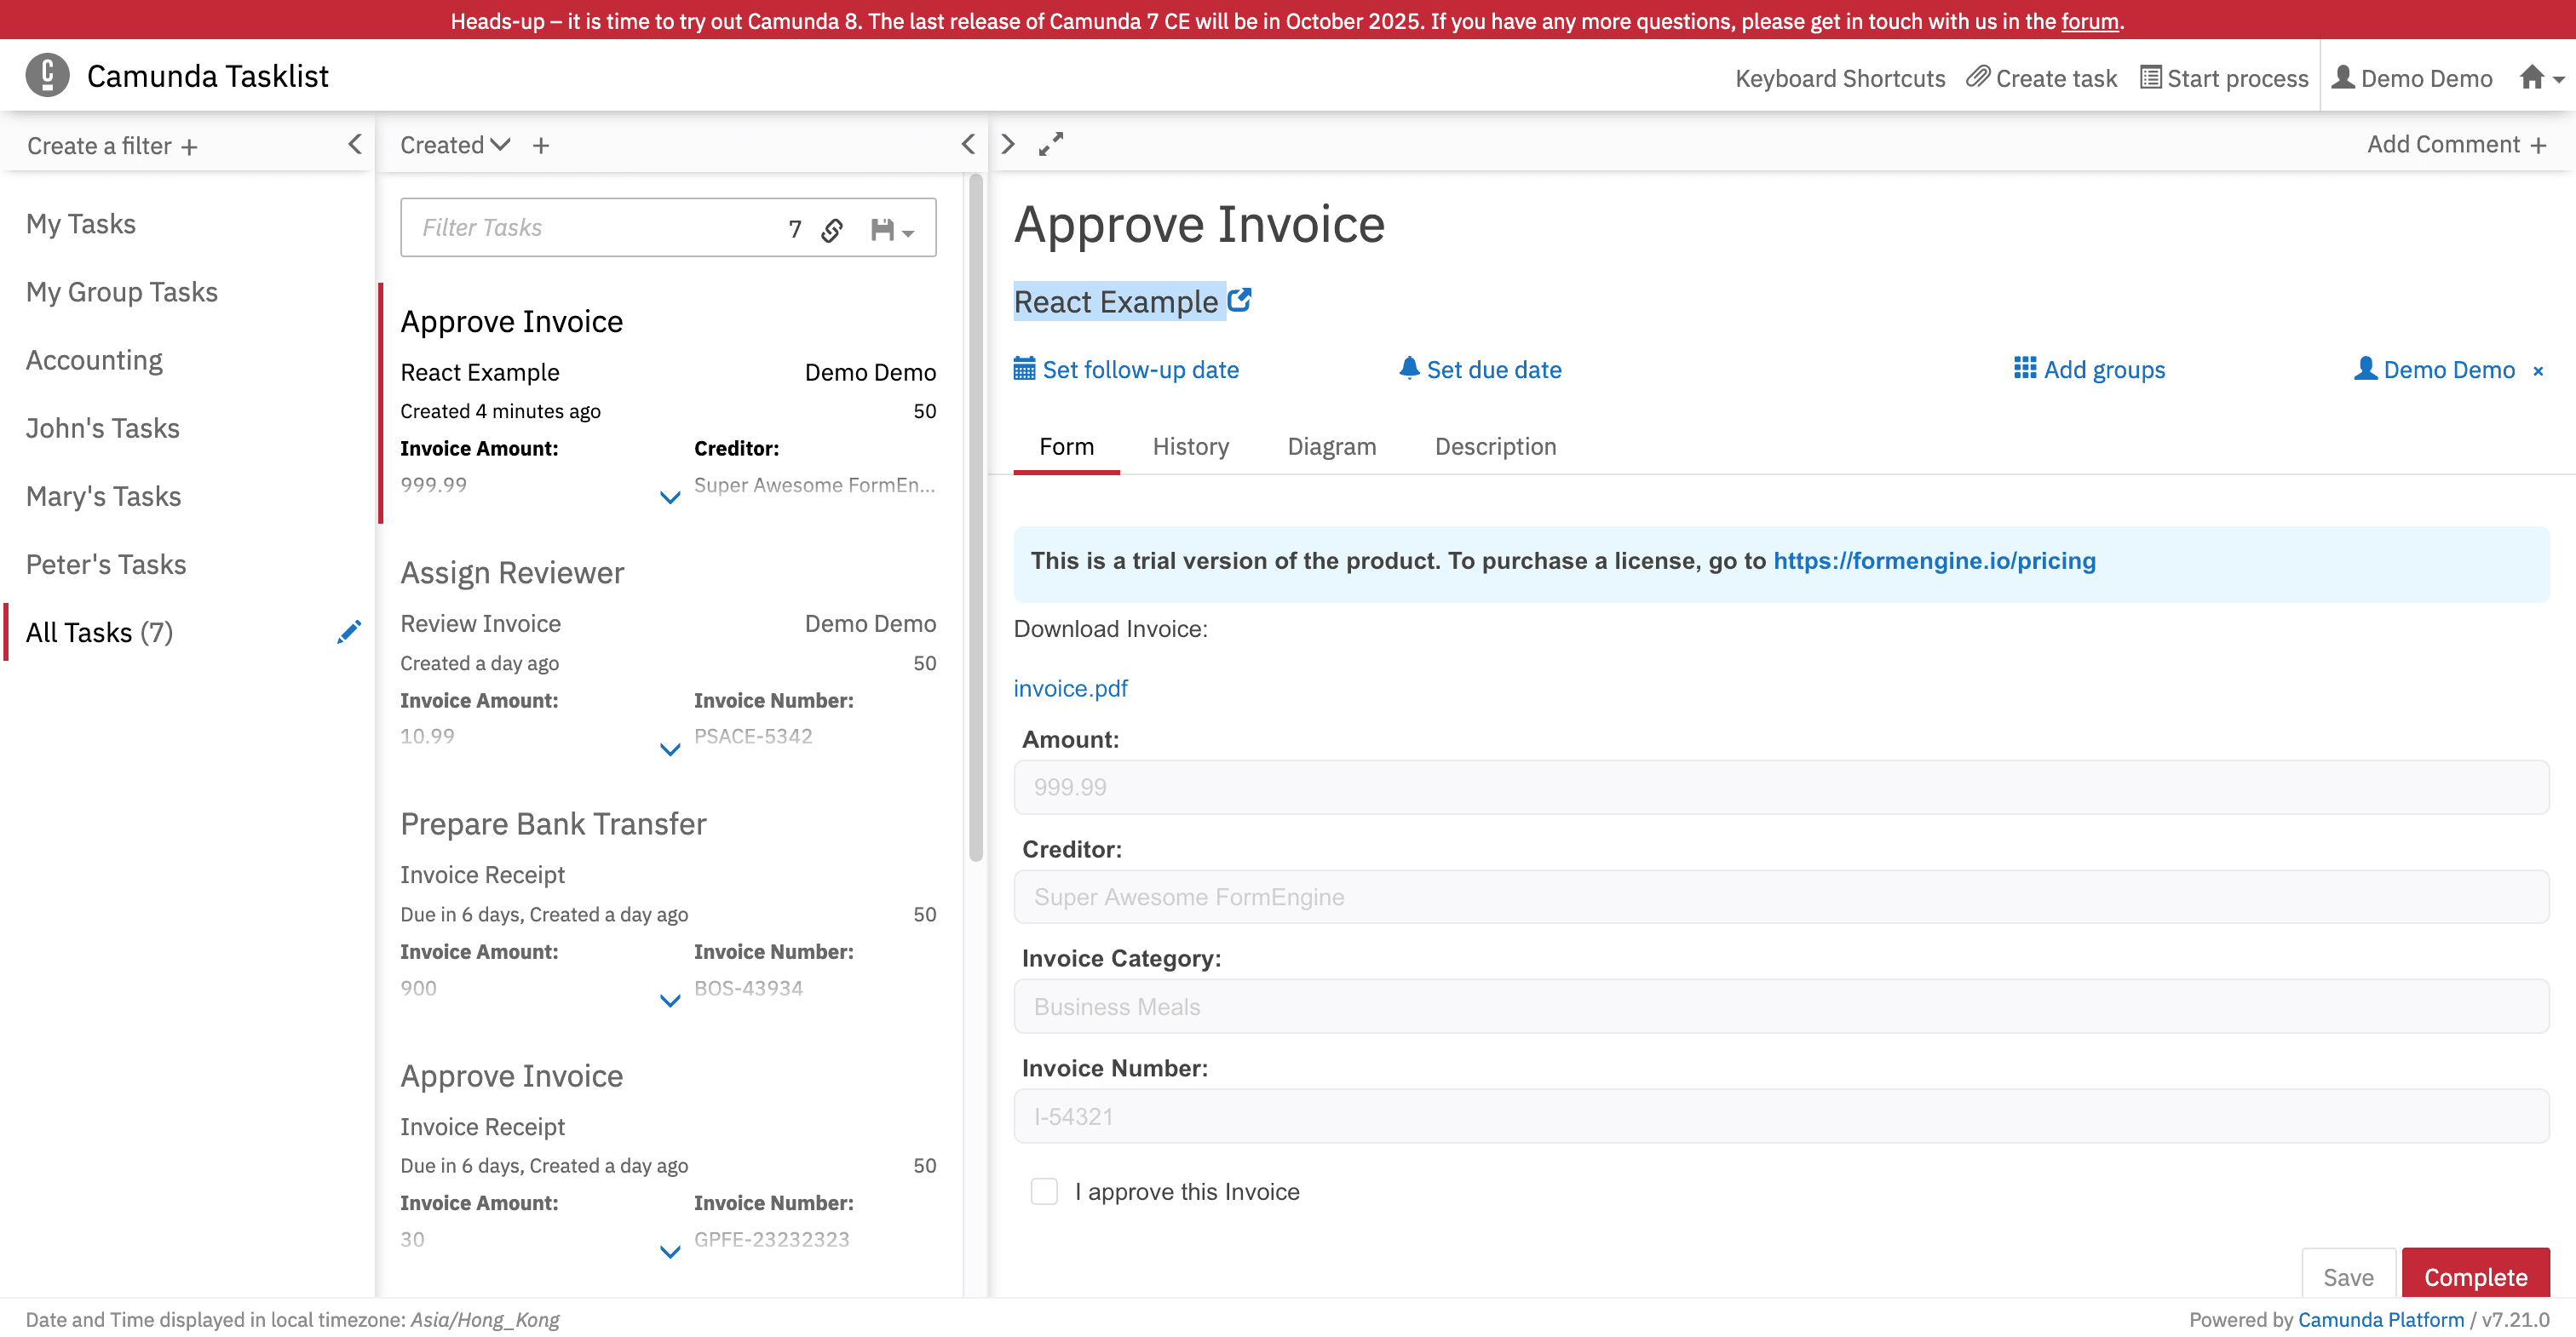
- The form should be correctly filled out.
- Fill out the form and click Complete.
That's it! Your FormEngine forms are now running in Camunda.
Conclusion
In this article, we have successfully connected FormEngine as a form rendering engine for Camunda. This allows you to use your custom components to render forms by passing a set of your components through properties.
If you encounter any issues or have questions, feel free to reach out to us on GitHub.